Home
| What's New |
Features |
Gallery |
Reviews |
Reference |
Forum |
Search
Home
| What's New |
Features |
Gallery |
Reviews |
Reference |
Forum |
Search
|
|
|
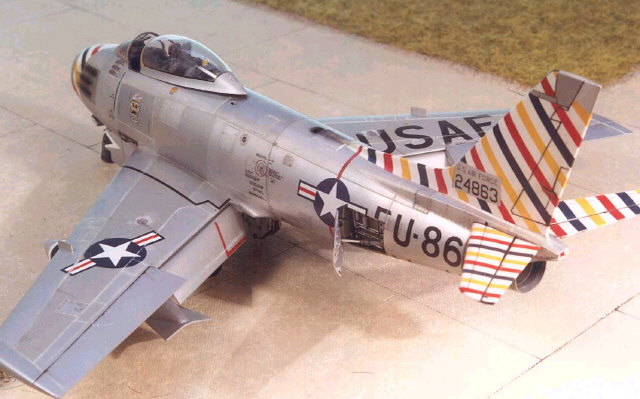
North American F-86F Sabre by Phil Ludolph
My inspiration for this 1/48 scale Sabre was the little old 1/72 scale Heller Sabre kit that I had completed in the early 80's using the Superscale markings for the 391st FBS. These markings have always been a favourite of mine. Superscale' 1/48 scale decals were originally designed for the old Monogram kit. However, when the new 1/48 scale Hasegawa Sabre hit the hobby store shelves it re-ignited the fire. I had to build it.
Unfortunately, my old 1/72 scale kit is no longer with us. The markings had gone yellow with age anyhow, due to the enamel clear coat. I wanted to replace it.
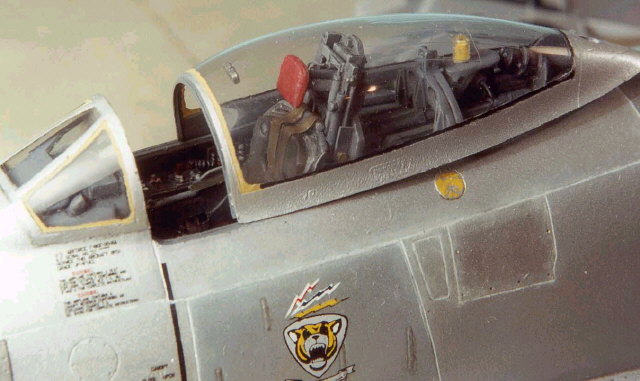
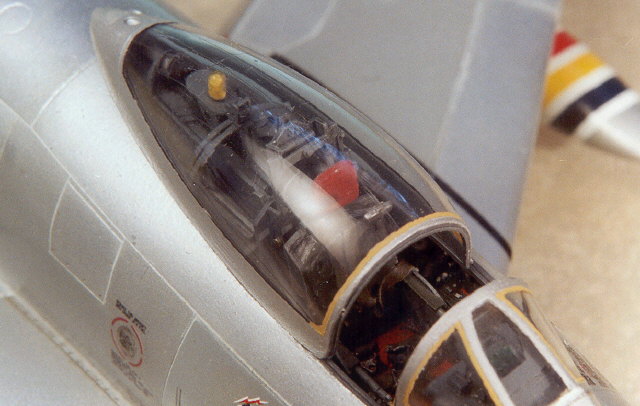
Cockpit The cockpit for this Sabre was originally developed from the KMC cockpit set which was extensively modified as the original according to my research was not a true F-86F cockpit.
By using a modified Verlinden instrument panel and gun sight the cockpit better resembled the F-model than using the original kit items. The seat and cockpit was then painted to match the color plates from the book "Fighting Colors" F-86 Sabre in Color By Larry Davis, a Squadron / Signal publication.
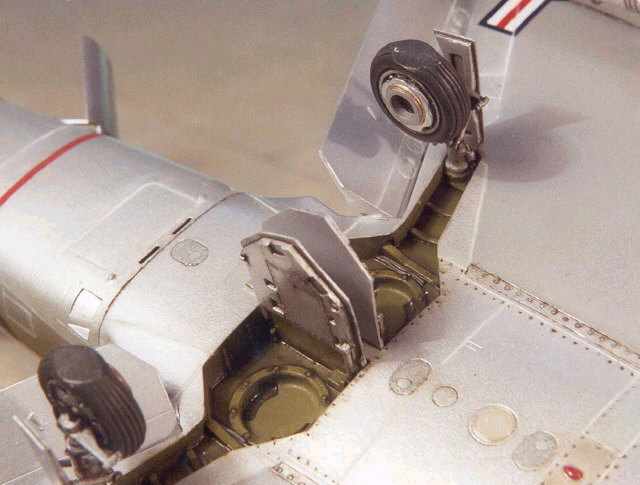
Fuselage An area of concern on the Hasegawa kit was the .50 cal openings in the side of the fuselage. Hasegawa's moldings enable one to see right through to the other side of the fuselage and the other holes on that side of the kit. This would not do! This problem required extensive reworking with brass barrels in an attempt to hide the holes in the fuselage. The ammunition bay was cut open and the resin replacement items from Teknics was then installed.
The large air intake supplied in the kit had extensive molding release holes and seams down its length; but KMC came to the rescue with a resin nose intake which was fitted to the kit. A tail pipe was fashioned from plastic tube and was installed when the fuselage was fitted together.
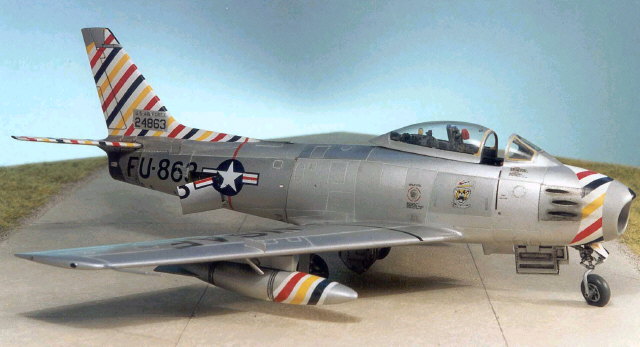
Wings The 1/48 Hasegawa Sabre kit did not go together as well as I had hoped. The under-wing joint between the fuselage and lower wing section was difficult to fit correctly and required extensive sanding and re-scribing. The small wing fences were replaced with 10- thou plastic card and fitted into small cuts in the wing leading edges. The flaps were cut & dropped using the KMC replacements and the rear elevators were also repositioned.
Undercarriage The undercarriage was molded incorrectly by Hasegawa, particularly the nose wheel leg area. A new nose wheel leg was constructed using brass rod and fitted to the rest of the nose wheel mechanism.
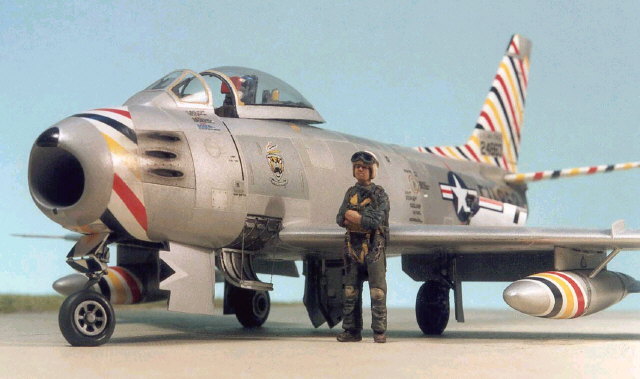
The main wheel legs remained out of the box but were fitted with hydraulic brake lines out of copper wire to give it a more scale appearance. The kit's wheels were replaced by the resin items from True Details using the early version of the Sabre wheel set. This completed the landing gear.
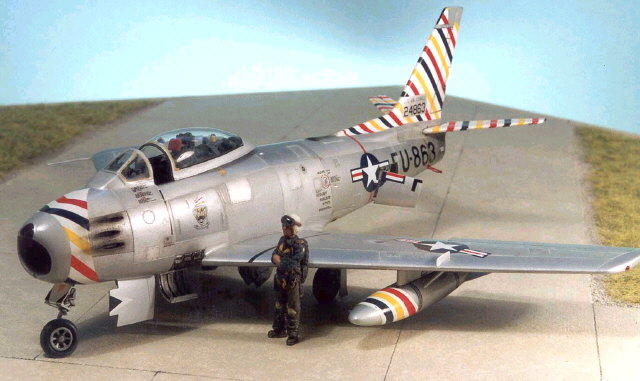
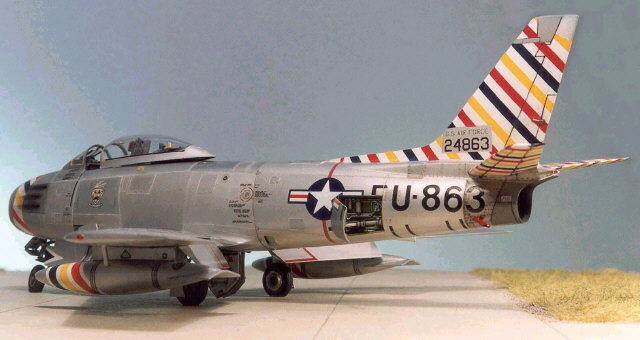
: The original markings for this F-86F (52-4863) of the 391st FBS, 366th FBW Nellis AFB 1956 gunnery meet was discovered in the book "Fighting Colors" F-86 Sabre in Color By Larry Davis a Squadron / Signal publication. Originally, the markings were found on Superscale sheet 48-115 which was the scaled up version of their 1/72 scale sheet. A word of warning - be prepared to do some fitting on the decals especially around the drop tanks, nose and tail fin areas. The natural metal finish commenced with a trial of Pollyscale metal paints. This was a big mistake. When dry, the paint lifted under the masking tape which was used to provide the different shades of metal panels on the model aircraft. Testors Metalizer was used as a replacement to help hide the lifting Polly scale paint. The overall finish that I wanted was not a pristine Sabre but one that looked in service; so as not to look like a little toy!
The Bob Dorr's book on the F-86 Sabre, published by Motorbooks, provided excellent color references for the natural metal finish. The worn appearance was achieved by using white oil paint thinned by turpentine and traced in the panel lines with a 000 paint brush. The overall finish was very different to previous natural metal finishes that I had attempted. A final spray of Future clear coat and the job was complete! The pilot figure in the model photos was resin from Reheat products. The head on the Reheat figure was not good and a with a replacement head from an old Monogram figure was used. The pilot figure was then painted to match the dress of a late 50's pilot uniform as found in the F-86D section of the Squadron book.
This Sabre started out as a small project as it was hoped that the new Hasegawa kit would fall together. Regrettably, it did not! Be prepared to do a lot of test fitting before you actually glue the kit parts. Along with the resin replacement sets from KMC, True Details, Verlinden and Teknics I can recommend the Hasegawa kit as the basis for any 1/48 F-86F Sabre project. It is hoped that the markings for this aircraft from Superscale are still around and can be purchased at your local hobby store or mail order outlet.
Click the thumbnails below to
view images full-sized.
Models, Description and Images Copyright ©
2000 by Phil Ludolph
|