Home
| What's New |
Features |
Gallery |
Reviews |
Reference |
Forum |
Search
Home
| What's New |
Features |
Gallery |
Reviews |
Reference |
Forum |
Search
|
|
|
Northrop F-89D Scorpion by Sébastien Privat
Just after World War II, the United States found themselves facing a new enemy: the Soviet Union. This country, with its carbon copy of the B-29, had an aircraft able of striking North America and was busy developing long range bombers which could strike the US. American Chiefs of Staff found that very idea quite unpalatable and asked for a long range all weather interceptor carrying enough firepower as to bring any marauding Soviet bomber down. Curtiss proposed the XP-87 Blackhawk, a four engined, two seater aircraft. Douglas answered with a land based version of the F3D Skyknight which was to equip the US Marine Corps. Northrop, designer of one of the best nightfighters during WW II with the P-61 Black Widow, proposed the XP-89 Scorpion.
Air Force evaluators ranked the Scorpion last, but declared it had the best potential for evolution, and gave Northtop the contract, thus ending Curtiss activities. The Air Force had a winner, but how did this winner look? Well, if you think an interceptor is a sleek and elegant aircraft, you are very accurately describing almost everything but a Scorpion. This aircraft is big, having a 60 ft span even without tip tanks. It had to carry a huge amount of fuel to stay aloft above the Arctic wastes in these days before in-flight refuelling. It had an endless nose, necessary to house the fire control system. The first versions (F-89 A, B and C) had six 20mm cannons in the nose. Behind them, the two-man crew was seated in a tandem configuration, pilot and radar operator. The wings were huge, and in a mid-fuselage position. Two Allison J-35 turbojets were slung under the fuselage. They were soon fitted with afterburner as their dry thrust was deemed insufficient. The low intakes turned the engines into splendid FOD detectors. The tail assembly was classical, but sat very high above the ground because of the short nose gear leg. This tail high attitude gave the aircraft its name.
As the atomic bomb became the main instrument in East/West confrontation, the Air Force thinkers changed their perspective. It became totally unbearable to let a single bomber pass through the defence lines, and the cannons were seen as lacking punch. This gave birth to the F-89 D, with a rocket only armament. On each wing-tip was an enormous fuel tank, with housing for fifty two 70mm air to air rockets at the front. The 104 rockets could be fired in one, two or three salvoes, and each of them could ruin the day of a bomber. E, F and G variants never left the drawing board. The last produced variant was the F-89H. Its wingtip pods housed three Falcon missiles and 24 rockets each. Three hundred and fifty F-89D were rebuilt as F-89Js. The wing tip tanks were plain fuel tanks, but four Falcon air-to-air missiles were hung under the wings, as well as two Genie air-to-air, nuclear tipped unguided rockets. One could call that poetry in motion.
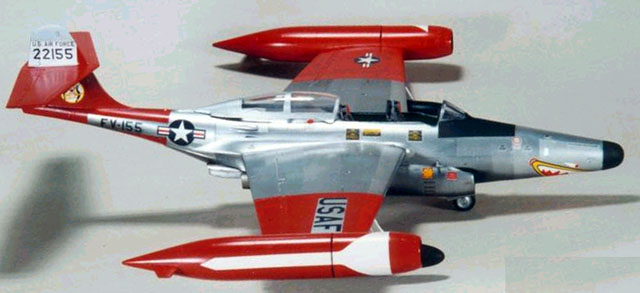
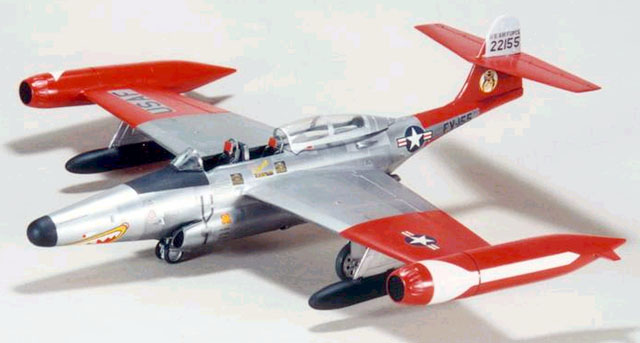
Revell released this model ten years ago. The box is big, and its cover shows a F-89D sporting a gaudy shark mouth and arctic red markings. The parts are moulded in a tough, metallic gray styrene. The panel lines are accurate and thin, but raised. The Revell logo is raised, too, and is a sandpaper target. There are parts for a D and a J model, with parts specific to each of these variants, such as wing tip tanks or rocket pods, underwing tankls or armament and different instrument panels. The main mistake in the kit is the rocket pods. The rocket warheads protrude where they shouldn't.
The decals offer a F-89 D from the 61st TFW based in New Foundland in 1958 and a F-89 J from Iowa Air National Guard. If ever choose to build a J model, don't forget that, according to the Detail & Scale book, ANG units weren't issued with Falcons.
I began with an burst of enthusiasm that should have earned me a straight jacket.
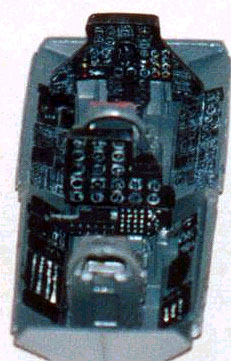
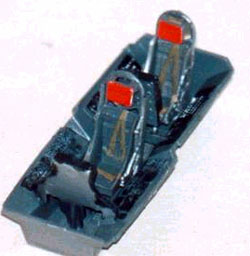
I painted the instrument panels black and drybrushed them with white. I put some color dabs here and there, according to the color pictures I found in the D&S book, which show a J interior, I know. All the dials got a drop of Humbrol Clearfix. The tub was then painted dark gray, and I realized it was exactly the wrong gray too late to fix anything. The details were painted black and drybrushed white. I added the lap belts to the seats using lead foil. The seats were painted gray, the head rests gloss red and the belts olive drab with silver buckles. I drilled out all the holes on the foot rest of the back seat. I put two .44 lead balls in the nose, and tried to put the fuselage halves together. Trouble is, they didn't want to stay that way. I think one of them suffered when it was removed from the mold, as it was more oddly shaped than any self-respecting F-89 fuselage half should be. I glued the fuselage halves at the nose, held the rest in place with strong adhesive tape, and worked my way to the tail brushing liquid cement on the interior joint.
I sprayed Gunze gloss black on the turbine blades, let it cure, then sprayed Alclad II Highly Polished Aluminium. I inserted that part in the fuselage. The belly plate was rather reluctant to stay where it should, because of the warping on the fuselage. Some persuasion, lots of putty and a thorough sanding solved the problem. I drilled holes under the wings for the underwing tanks, and assembled the wings, glueing the main undercarriage doors close in the meantime. Wing to fuselage fit was poor for the same reason so it was putty time again. The radome didn't fit well either. The puttying and sanding was restrained to keep the nose shape right. The intakes needed less putty, as did the air scoops above the fuselage. The tailplane and fintip went into place without problem. I masked the windscreen using Tamiya tape, then glued it in place, puttied the joint lines and sanded the place to get as smooth a finish as possible. A coat of acylic light gray was sprayed to detect all the rough spots, which were sanded away. After a good amount of buffing, the Scorpion was ready for the paint shop.
I had decided to give Alclad II paints a try, so I first sprayed the interior color on the windscreen, followed with a coat of Gunze gloss black, which I let cure for a week.
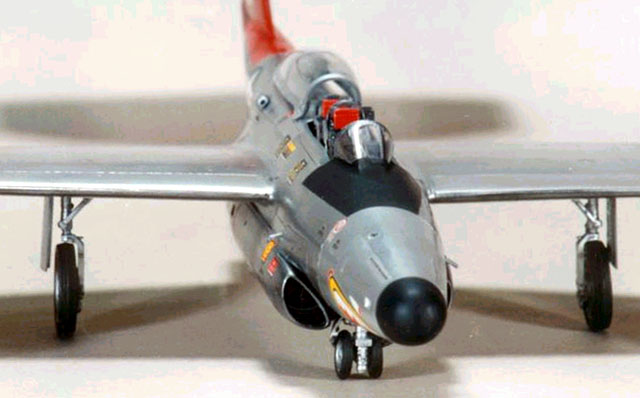
I sprayed two coats of Aluminium at a ten-minute interval. The next day, I masked some panels then sprayed a coat of Duraluminium. The leading edges received a coat of Highly Polished Aluminium. Finally, two panels on the spine were painted Testor's Metallizer Aluminium, while the nose sides received the whole SnJ treatment, paint then powder. I removed the masks, then gasped : even such a low tack tape as drafting tape had pulled some Aluminium chips away! Some sanding with worn out sabdpaper followed by another coat in the touched spots hid hte damage. Chastened, I let the paint cure for a whole week before masking for the Arctic markings, which weren't Arctic Red but Insigna Red. I used Humbrol Gloss Red #19 for them. I painted the radome and anti glare panel flat black and the fin tip white.
I painted the landing gear doors interior Testor's Metalizer Aluminium, and the outside received SnJ. The gear legs, gear actuators and wheels were painted aluminium, and the tires Aeromaster Tire Black. The underwing tanks received a flat black coat and their pylons were painted Aluminium. The wing tip pods were painted Gloss Red.
When everything was dry, I glued all the bits that protrude and break on handling. I used the kit decals, and chose the gaudy shark mouth markings. The decals went on without a glitch, but, as they were flat, needed a gloss coat. Out of sheer laziness, I decided not to weather my Scorpion.
This is an aircraft that, even if not exactly good looking, attracts the eye. I don't think the model is difficult, just that my sample had problems that made me live interesting times. I tried a lot of things for the first time on it : Alclad II paints, NMF, and scribing. I freely admit my scribing is rather far from Tamigawa's, but the general result did please me. Anyway, I'll wait some time before building the F-89 C!
Click the thumbnail to view the
image full size.
Model, Text and Images Copyright © 2000 by Sébastien
Privat
|

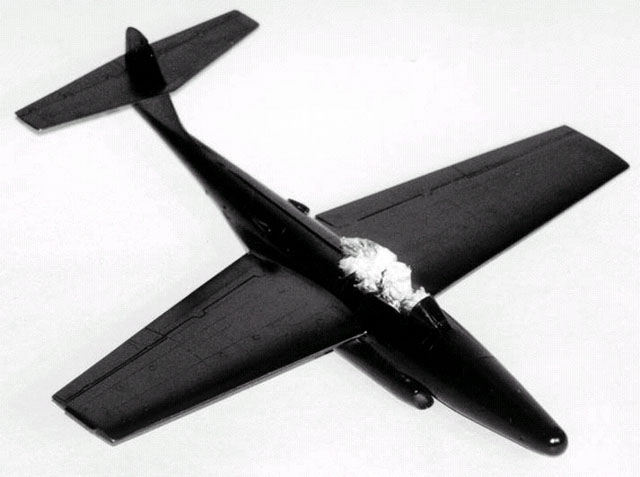
 I decided
to re-scribe ALL the panel lines, and as it was the first time I attempted such
a feat, it was an entertaining exercise in self-control. Help from friends, a
sewing needle held in a suitable handle and 6mm DYMO tape allowed me to survive
this ordeal relatively undamaged. Once all the scribing, sanding, and general
mess cleaning up was done, I began with the cockpit. Detail there is rather
good, with raised instrument details and consoles.
I decided
to re-scribe ALL the panel lines, and as it was the first time I attempted such
a feat, it was an entertaining exercise in self-control. Help from friends, a
sewing needle held in a suitable handle and 6mm DYMO tape allowed me to survive
this ordeal relatively undamaged. Once all the scribing, sanding, and general
mess cleaning up was done, I began with the cockpit. Detail there is rather
good, with raised instrument details and consoles.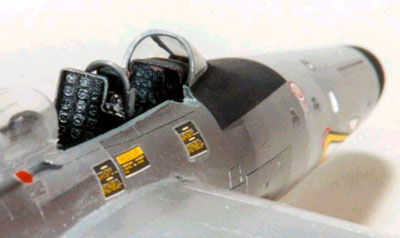 The
cockpit tub was inserted without fuss, but needed a rear bulkhead to hide the
fuselage interior.
The
cockpit tub was inserted without fuss, but needed a rear bulkhead to hide the
fuselage interior.