Home
| What's New |
Features |
Gallery |
Reviews |
Reference |
Forum |
Search
Home
| What's New |
Features |
Gallery |
Reviews |
Reference |
Forum |
Search
|
|
|
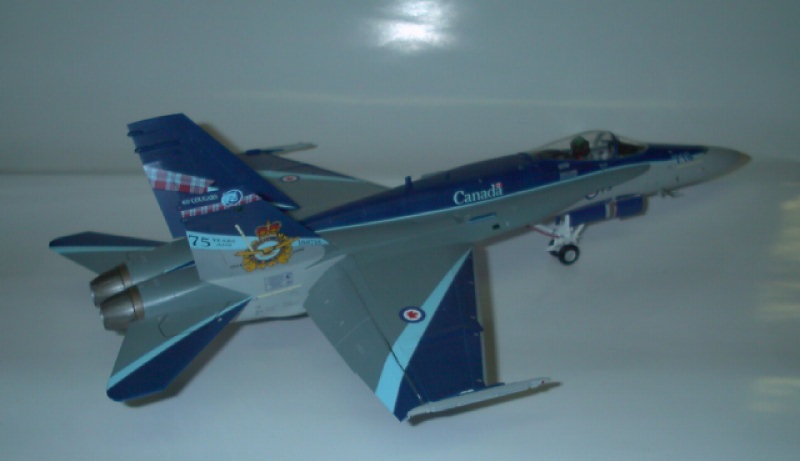
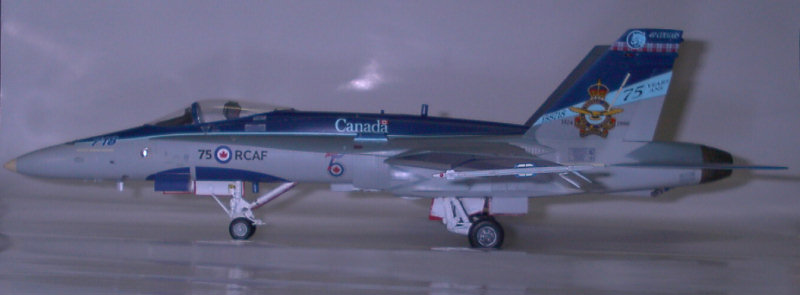
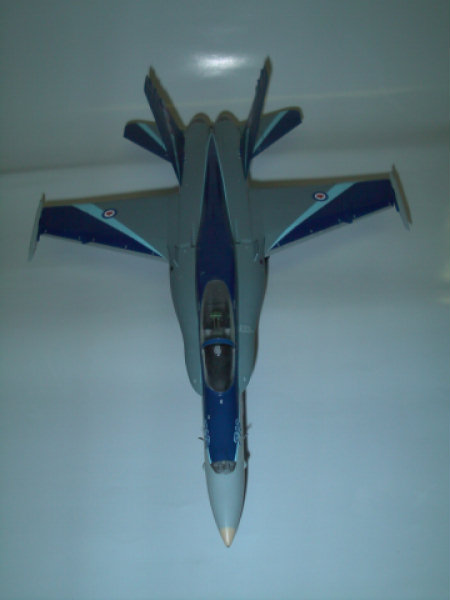
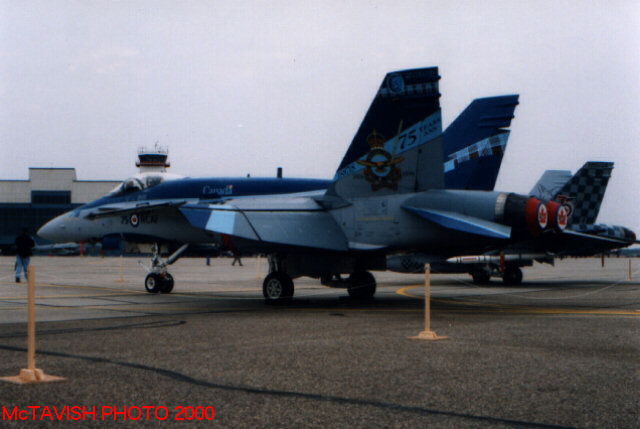
CF-188
Hornet by Scott McTavish
With the public debut of The Millennium Hornet recently, here is a review of the previous color bird. Using the Hasegawa 1/48 CF-18 kit, Leading Edge Decals, Seamless Sucker intakes, and a True Details seat made for an interesting and enjoyable challenge.
Thoughtful planning, cutting well back of the joint lines, sanding carefully and test fitting all the time will result with the intakes looking authentic. Seamless Suckers parts are by no means a simple replacement to the kits open intakes. Not only will parts of the plastic have to be cut away, but also the resin will need to be sanded in spots to seat properly. Glue the kit intake cone and the trunk together first. This will help not only in being able to access the joint for putty and sanding, but also for painting the interior white. The exterior color also extends back into the cone, and better access is allowed for free handing this line now. Glue the parts into their places on the lower fuse half. Next paint the fan blades and install them, but make sure they are lined up vertical, and not flush with the back of the trunk as the backs may not line up equally. Stuff the intakes with wet towel to save your work during the painting process.
The cockpit was built up before the Black Box conversion was announced, so I had to add some sidewall details myself. A few strips of styrene were used to make the instruments and details here. A True Details seat was backdated using the fabric cover from the kit and gluing it above the headrest. The only other modification made to the kit was using an MV Lens for the light on the left side of the fuselage. I later found that this aircraft did not have the light installed, but rather a fiberglass colored plug.
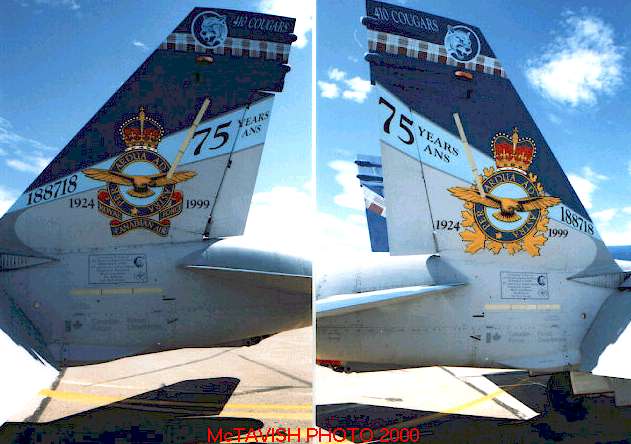
Leading Edge Decals has released a set for this very colorful special marking and has pushed the printing barrier once again. These are fantastic! Having used many of LED's products, I have mastered their application. Use lots of water to float them into place (especially the stripes) and then pat them down with a paper towel, I then flood them with full strength Mr. Softener. As this dries, they sink down into whatever detail is on the kit (this includes the blue/gray paint overlap ridge!). I did have to pull out the Big Gun-Poly S Decal Softener to get the crests to sink down around the tail bolt detail. Although the blue of the real aircraft changes color from every viewpoint, the recommended mixes do look great once finished. I used the Testor's mix and found it to match the decals perfectly. I am sure that many will be finishing Hornets in this very colorful scheme. I compared a Floquil paint against the real aircraft and found it to be a perfect match. This includes the color-shifting tendency. The only difficulty that will be encountered if using this paint will be with the application of the CANADA word mark. LED outlined the light blue with the darker shade, so carefully paint the floquil over the decal, because the two dark shades will not match. The other dark blue marks on the sheet will not be very visible as the light blue borders camouflage them.
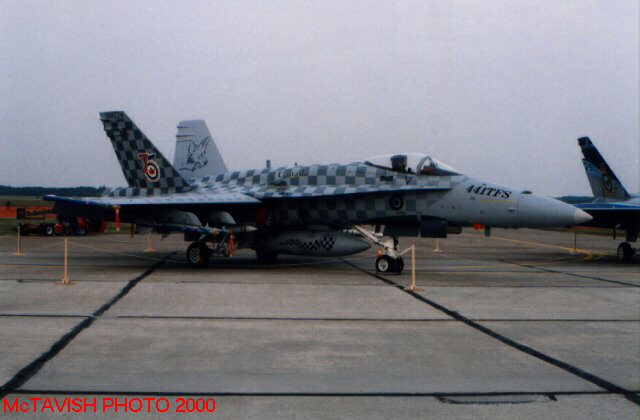
This was a fun project that resulted in an attractive Hornet. Those of you who have become hooked on our Canadian color birds may certainly have yet another modeling project! I have talked with Leading Edge Decals and he is considering doing the Millennium Hornet and the 441 Checkerbird as seen in one of the thumbnails below.
Click the thumbnails to view the
images full-size
Model, Text and Images Copyright ©
2000 by Scott McTavish
|