Home
| What's New |
Features |
Gallery |
Reviews |
Reference |
Forum |
Search
Home
| What's New |
Features |
Gallery |
Reviews |
Reference |
Forum |
Search
|
|
|
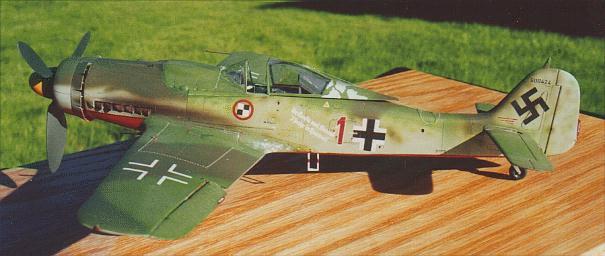
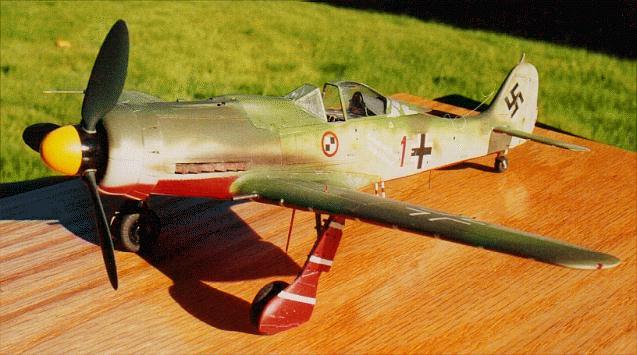
Focke-Wulf Fw 190D-9 by Mike Millette
I find the very colorful Fw 190Ds that flew airfield cover for the legendary JV44 to be compelling modeling subjects. When Eagle Editions released their Eagle Files #1, "Doras of the Galland Circus" along with Eagle Cals Decals # 14, I knew it was time to build one.
Using the Tamyia kit as a starting point, the kit was constructed similarly to my previous Tamiya 190D-9, Brown 4, the obvious exception being that this kit retains the stock tail. I also opted to use a Hawkeye/Cooper Details cockpit, which I had been unable to find for the previous kit and Eagle Parts #4, upgrade set for the Tamyia kit. It made all the difference in the world. Engine
Cockpit The Hawkeye/Cooper Details resin cockpit is a considerable improvement over the kit assembly. The level of detail is amazing and my poor photography/scanning skills simply do not do it justice. The cockpit was painted RLM 66 lightened with RLM 02 and then given a wash of Aeromasters Tire Black thinned with mineral spirits. High spots were drybrushed and high wear areas were lightly hit with silver. Wing and Wheel Well
Other Bits & Pieces The canopy was drilled to accept one end of the Fug 16 antenna support and stretched sprue antennas were added. Position lights and gear retraction flags were added as with Brown 4 as well a another set of Moskit exhausts.
The Eagle Parts upgrade set consists of a spinner and backplate, three prop blades and a hub, larger tires and wheels and a subtly altered upper deck gun cover. With the exception of the gun cover, the difference between the kits parts and the replacement parts is very obvious and makes an incredible difference. The Tamyia kit parts are all significantly under sized! The gun cover differences are more subtle, but it too adds to the improved "look" of the kit. The parts are very well engineered and the fit is excellent.
The paint scheme was applied as shown in Jerry Crandalls excellent monograph, "Doras of the Galland Circus". Tom Tullis' excellent artwork gives top bottom, left and right views of this aircraft in full color. It just doesn't get any better than this! The only area where I digressed from the color plates is the light patch on top of the head rest armor support. I have looked at the accompanying photos over and over again and I believe the "light" area to be an optical illusion.
The large areas of chipped paint on the left rear portion of the canopy were painted silver and then "painted" over with Micro Mask prior to the camoflage being applied. Once the paint scheme was completed, panel lines were lightly weathered using a wash of thinned Burnt Umber followed by the application of Burnt Sienna Prismacolor pencils. I have just started using the pencils and really like the control I am able to maintain. A final coat of Clear Flat was applied and then the paint on the wing roots was "chipped" using the silver pencil.
Click the thumbnail to view the
image full size.
Model, Images
and Article Copyright © 2000 by Mike
Millette
|

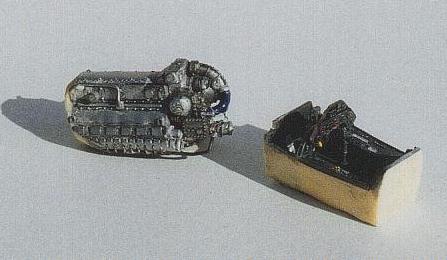 As
I did with Brown 4, I used the beautiful Aries Jumo engine.
Having made most of my mistakes in the earlier project, this one went in much more easily!
As
I did with Brown 4, I used the beautiful Aries Jumo engine.
Having made most of my mistakes in the earlier project, this one went in much more easily!
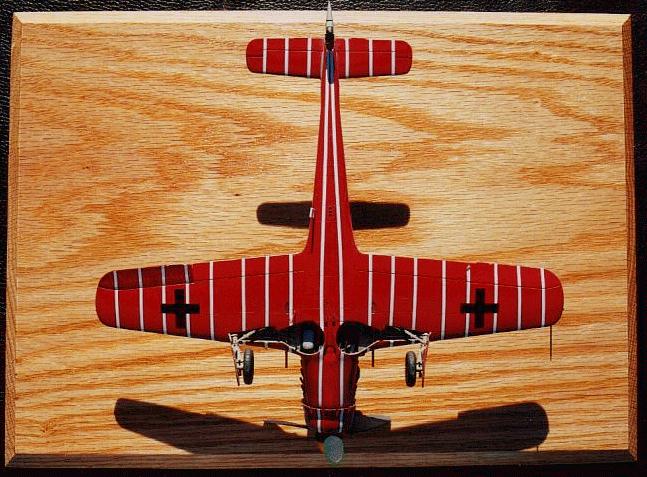
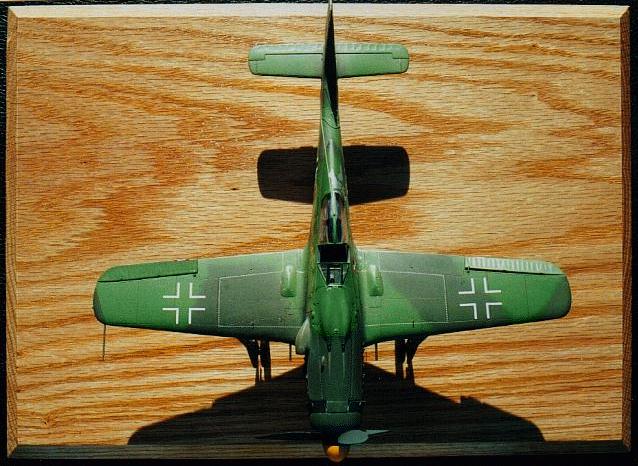
 The
wheel well was opened up as the waffled panels used in the Fw 190A series
aircraft were not used on the Fw 190D. Furthermore, the Tamyia wing
represents the wing from a D-13 with its smoothed over center section, not
the D-9 wing inherited from the late A series aircraft.
The
wheel well was opened up as the waffled panels used in the Fw 190A series
aircraft were not used on the Fw 190D. Furthermore, the Tamyia wing
represents the wing from a D-13 with its smoothed over center section, not
the D-9 wing inherited from the late A series aircraft.