Home
| What's New |
Features |
Gallery |
Reviews |
Reference |
Forum |
Search
Home
| What's New |
Features |
Gallery |
Reviews |
Reference |
Forum |
Search
|
|
|
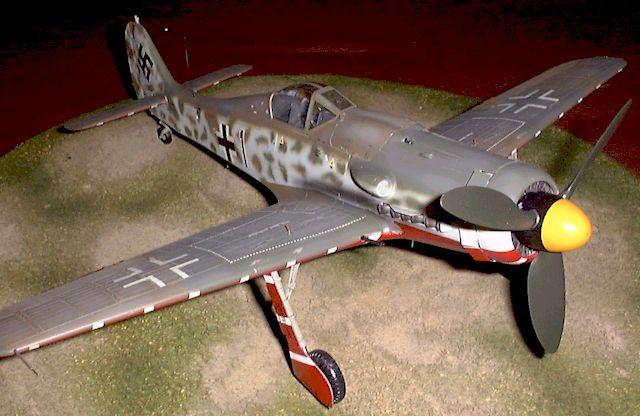
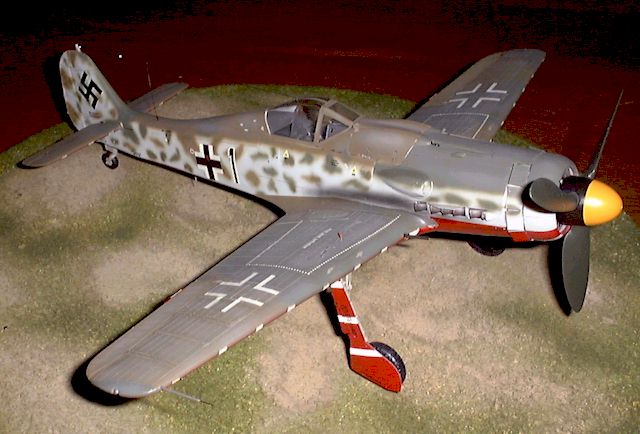
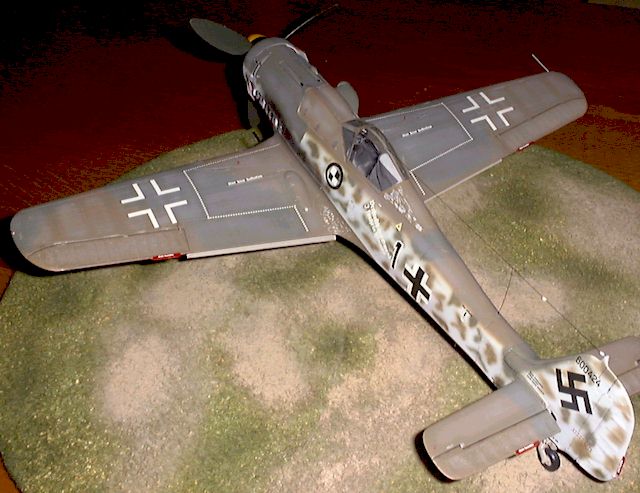
Focke-Wulf Fw 190D-9 by Franck Oudin
This is Hasegawa's 1/32 scale "Deluxe Series" Focke-Wulf Fw190D-9. It is built out of the box, except for additional detailing on the inside of the flaps. Construction started with cockpit. This was painted RLM 66 Black-Grey.
I managed to spread the fuselage slightly using plasticard to reduce the gap at the wing root but a little putty and sanding was still required. At this stage the instructions suggest that the exhaust pipes should be installed. I decided to delay this step by gluing the cowl machine gun cover with white glue.
I started painting after a thorough sanding. The base coat was Gunze H-8 aluminium overall. When dry, I gently buffed the model with a smooth cloth.
With paint diluted up to 80% I started the mottling. I used a thin coat of RLM 81. When this had dried for 24hrs, I masked the bottom of the model to paint the white bands I cut 3mm Tamiya Masking Tape and carrefully applied them to the underside. I sprayed white, followed ny a clear gloss coat. In the meantime the wheel wells were painted RLM02 and I finished all the other details details including landing gear, exausts, antennae, propeller and hub At this stage, I removed the guns cover and secured the exhausts. I inserted a small shaft between these two parts to ensure they stayed in place. Decals went on fine with some setting solution followed by another layer of clear gloss coat,. The airframe received a thin wash to highlight panel lines. Finally all the little details were added ,then a clear matt coat. The canopy and aerial wire were added. The wire was 0.15mm fishing line. I drilled two 0.3 mm holes for the landing gear and fixed them with super glue. The finished model was lightly post-shaded with Tamiya Deck Tan XF-55. This coat was also diluted up to 80% and gently spayed on every panels of the a/model until I was satisfied with the effect. This process was repreated to obtain exaust stains using Gunze H-343 soot.
So,with some patience and lots of masking tape it is possible to obtain a good result from this old kit. I used "Doras of the Galland Circus" as my main reference. This is, in my opinion, one of the best books on which to base a modelling project for any of these four colourful aircraft.
Click the thumbnails below to view
images full-sized.
Model, Text and Photographs Copyright ©
2000 by
Franck Oudin
|
 Next
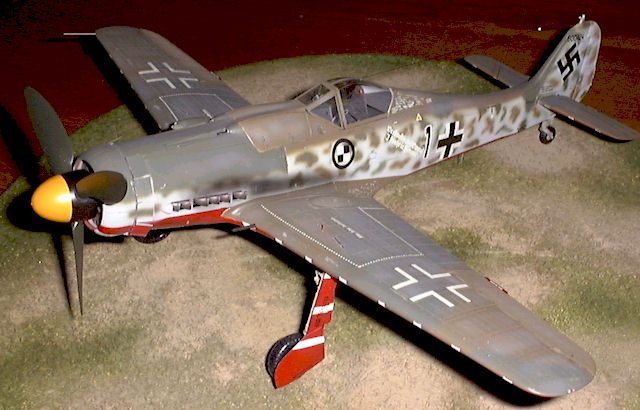
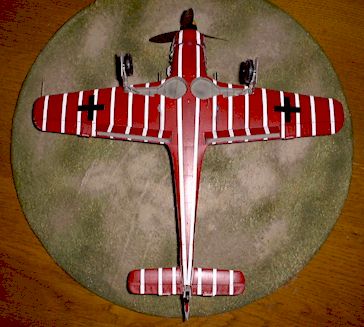
came the red, using Gunze H-3. After few coats of red I masked the separation
lines and sprayed RLM 82 H-304 on the wings; then masked the wing roots and
sprayed RLM 83 H-309. The wings were also masked and sprayed the RLM76 (Mix of
H-314 70% and H-67 30%). When dry, I repeated the RLM 82 & 83 for the top
fuselage, then it was time for the most exciting task for German aircraft
modellers - the mottling.
Next
came the red, using Gunze H-3. After few coats of red I masked the separation
lines and sprayed RLM 82 H-304 on the wings; then masked the wing roots and
sprayed RLM 83 H-309. The wings were also masked and sprayed the RLM76 (Mix of
H-314 70% and H-67 30%). When dry, I repeated the RLM 82 & 83 for the top
fuselage, then it was time for the most exciting task for German aircraft
modellers - the mottling.