Home
| What's New |
Features |
Gallery |
Reviews |
Reference |
Forum |
Search
Home
| What's New |
Features |
Gallery |
Reviews |
Reference |
Forum |
Search
|
|
|
Focke-Wulf Fw 190D-9 by Jean-Baptiste Verlhac
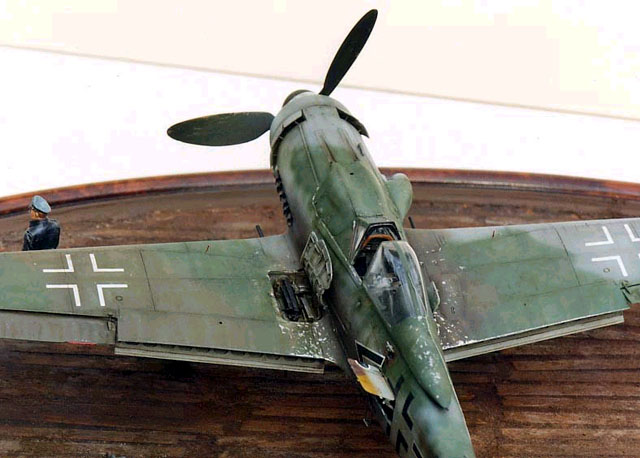
The Focke-Wulf Fw 190D is one of my favourite aircraft. I believe that many modelers share my opinion. Its overall appearance and the wide variety of possible camouflage schemes makes the Dora an attractive subject for any modeller. For this model I decided to experiment with a new technique as many late war Doras were heavily weathered due to outdoor storage, patchy manufacturing and painting procedures, and limited maintenance.
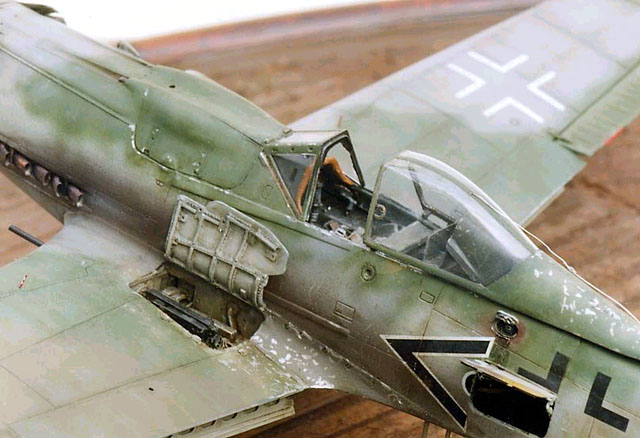
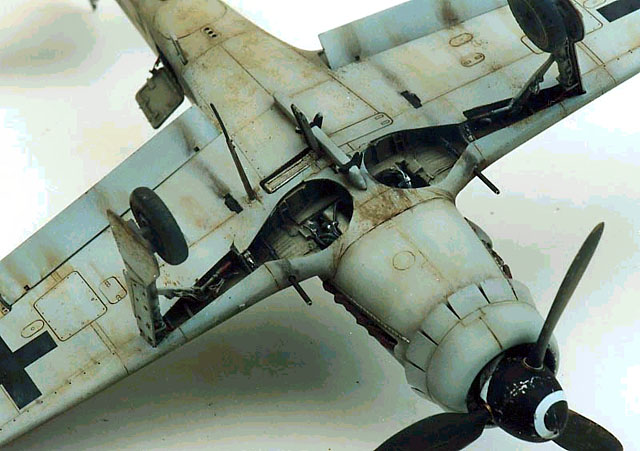
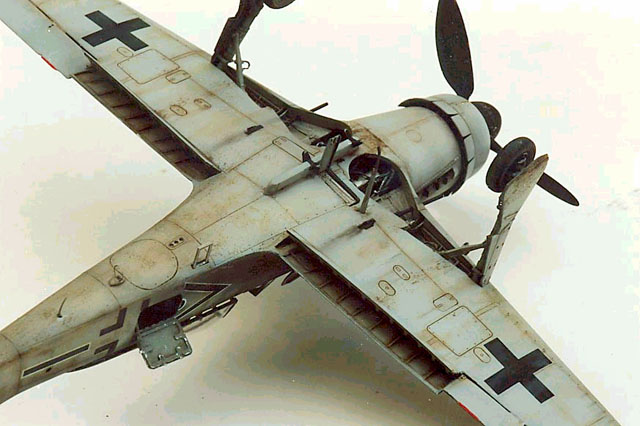
In order not to disrupt the elegant lines of this aeroplane, I did not open the engine bay. Detailing was limited to the cockpit, wheel well, radio and other compartments. I also tried to correct some of the bigger inaccuracies of the Tamiya model. For the completion of this project I used a lot of aftermarket accessories (some of them partially, the remaining parts being used for other modelling projects).
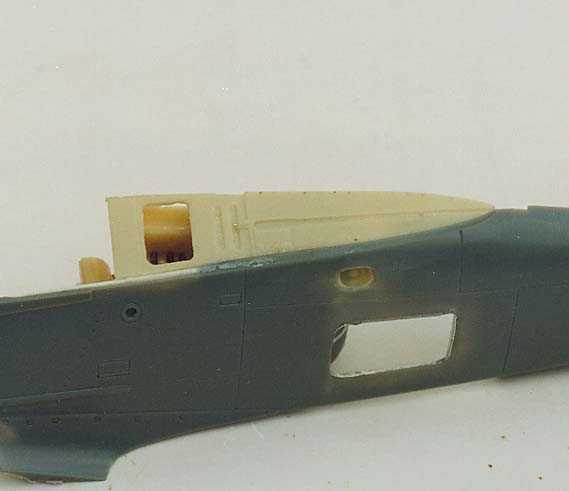
Fuselage and Wings Although the fuselage and wings are assembled separately, it is necessary to dry fit the fuselage and the wings at each step. Construction begins as usual with the cockpit. I used the Aires detail set without modification. I added the inner cockpit frame on both sides as well as the rails for the sliding canopy.
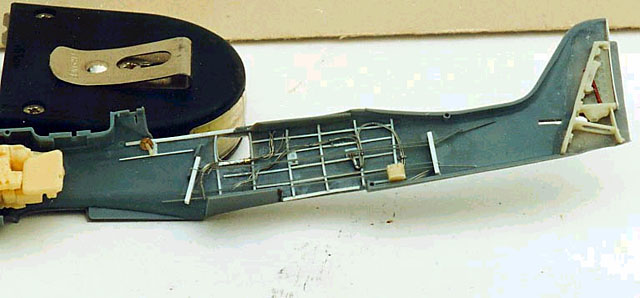
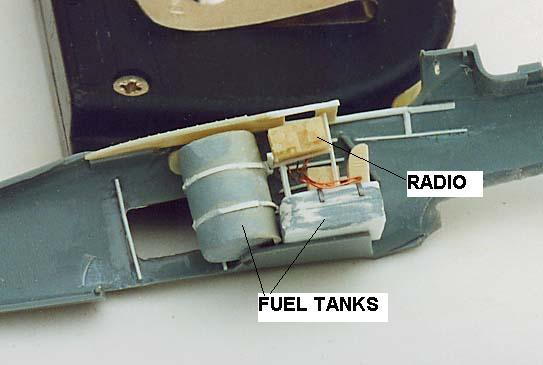
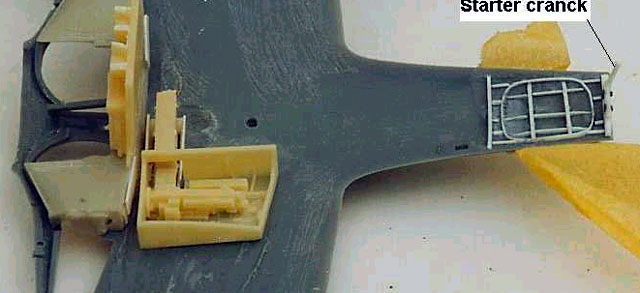
Major improvements were made to the rear of the fuselage interior, as many panels would be open. Starting from behind the pilot's seat, the Fug 16 Y radio (Aires) was added as well as a battery and the receiver, the latter being located upon a horizontally located fuel tank. These items were made from Evergreen styrene. The inner fuselage structure was reproduced in the area located in front of the maintenance hatch. The vertical fuel tank is made from a fuel drum detailed with strips of plastic. The starter crank is located on the lower part of the fuselage in this area.
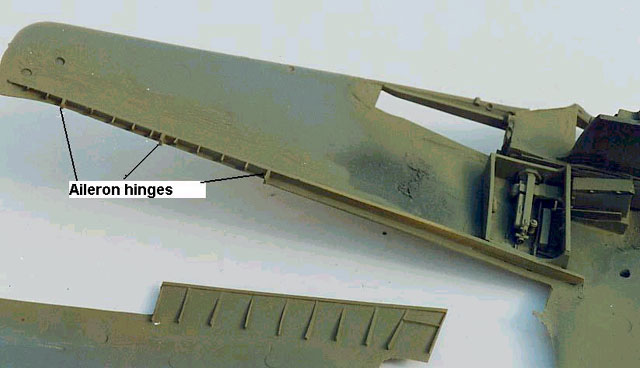
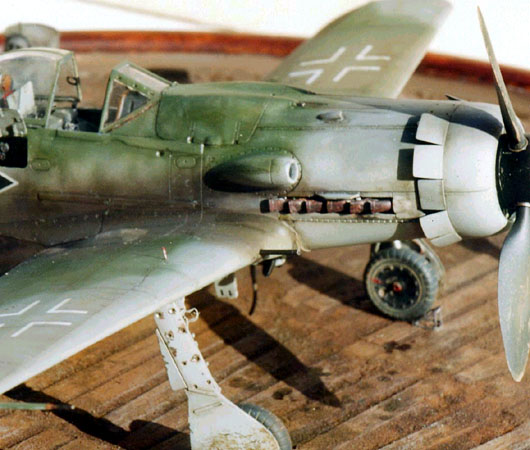
Various electric wires and boxes are added as well as control cables for the control surfaces. The tail wheel mechanism is a CMK resin detail item and is installed as shown. The tail was removed and the hinges were added in order to receive the Aires part. The installation of the gun bay revealed some major fit problems. The best solution is to dry fit at each stage. I decided to correct the wheel well of the Tamiya kit it is necessary to open this part. Tamiya used the BMW 801 powered model wheel well for its D-9 (there is the same problem in the Dragon/Italeri/DML kits ). Unfortunately, in order to save some place for the longer Jumo engin,e the wheel well was opened in the central area. I've used many pieces of different origin to correct and detail this area. The CMK undercarriage set is indeed worthwhile because it possesses sharper detail than the Tamiya item, but it is also designed for the Fw 190A/F model. This piece has to be cut in the middle as in the real aircraft. The aft engine was reproduced using copies of FM parts - the Jumo engine and the fire wall with the MG ammo boxes. These parts were secured after the installation of the wing root gun gay. I used the Aires gun bay and decided to save one of them for another D9 project. The installation required a lot of thinning inside the wing root in order to leave enough space for the bay. Now it was time to open the cannon ammunition box panel in the lower left wing and the gun access hatch on the upper half. I did not remove the flap at this stage as it gave me a reference for the thickness. While working on the lower wing half, I corrected the cowl gun chutes as Tamiya only represented one hole (which is correct for the D13 version) instead of two for the MG cartridge ejection. As the ailerons will be also replaced by Aires items, the upper and lower wing halves were sanded to a scale thickness along the aileron and flaps demarcation. A full-span spar was made from Evergreen styrene. Aileron hinges and some ribs were added.
Now I glued the gun bay, using the upper wing as a template and checking the alignment of the Mk 151 cannon with the wheel well insert. The CMK cannon box was glued to the lower wing checking alignment with the opening. All the abovementioned assemblies were attached at this point. Some fuse wires of different thickness were glued to the back of the engine. Now it's time to paint the cockpit and the inside of the fuselage. The cockpit was painted RML 66, and the fuselage interior was painted RML 02 (although it was probably natural metal). The fuel tanks were painted in black and slightly brushed with grey (they were indeed sealed with a sort of tarry product). The radio was painted in grey black and details were added with a brush.
The two fuselage halves were now assembled and then the upper wing halves were adjusted to the Karman. The lower wing was detailed in area that will be seen, near the fuselage hatch. A starter crank was added and painted before cementing the wings together. The nose radiator was detailed by adding two coolant pipes in the lower area. Actuator rods were added to the cowling flaps and the nose was then attached to the front fuselage. The upper cowling (Eagle part) was adjusted to the fuselage. A control bar was added to the elevators (Aires parts) and they were glued to the fuselage. Ailerons were also glued to the wings with actuator mechanism.
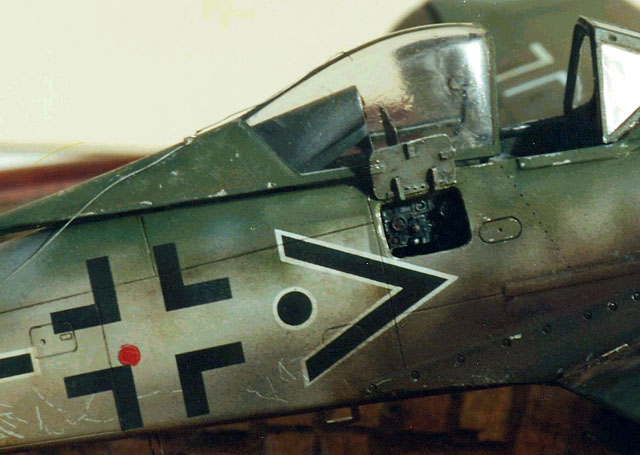
Detailing Small Parts The landing gear was detailed with etched compass, brake lines and other small wires. The canopy also received several add-ons. A stiffening piece was added on the upper part of the windscreen as well as a seal on the area that met the sliding hood. The latter was replaced by a vacu-formed piece and was also detailed with the addition of a reinforcement piece in the front part and a handle on the front left. The back area received a cylindrical piece and the ribbed inside lower structure was represented.
The Morane antenna was thinned to a more realistic thickness. Wing flaps were photoetched parts from FM detail set.
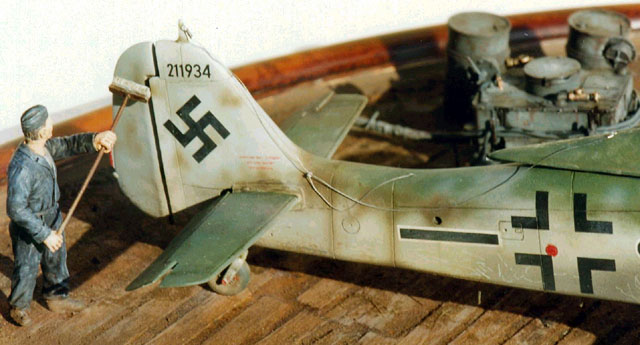
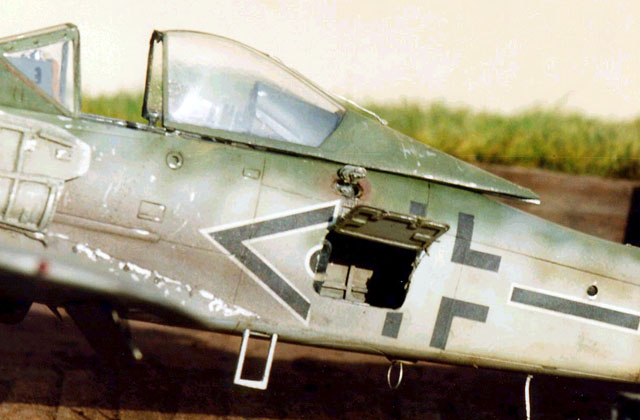
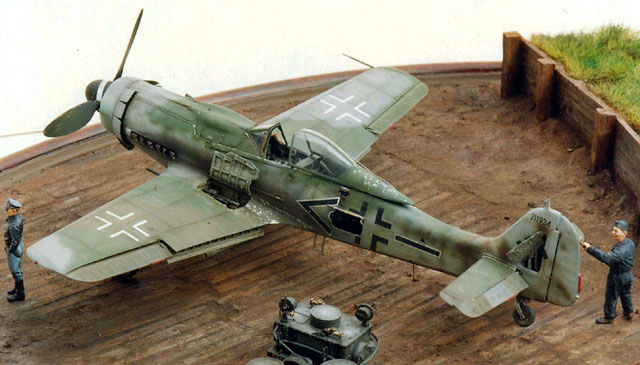
The markings for this Fw 190D-9 came from Kommandeur decal sheet number 4801. I choose the markings of the Geschwader technical officer from Stab II/ JG 6. The different base colours (Aeromaster) were airbrushed using an Aztek 470. Some of the panels on the wing are slightly highlighted. Once the camouflage scheme was finished, a gloss coat was applied to provide the best base for the decals. After 24 hours drying time, I've experiment a new weathering technique (at least new for me). In order to disrupt the uniformity of the colours and reproduced the ageing effect of the elements, I used artist oil paints very lightly thinned and a paintbrush to alter the tint of these colours. The tints used were the following: white yellow ochre, olive green and raw Umber for RLM 83, white, yellow-ochre and black for RLM 75. After 48 hour drying time, a mat varnish is applied and the surfaces are lightly polished with a cloth. Pastel chalks were added to highlight some areas around rivets and hinges.
As this aircraft seemed to be heavily weathered, a very light coat of Tamiya Desert Yellow and Buff was airbrushed on the rear fuselage. Exhaust staining was done with different shades varying from light grey to brown black. Mud was added to the undercarriage and the elevators. Some oil stains were also added to the lower engine cowling. Aluminium scuffs were mainly seen on the Karman and also on the canopy due to the rubbing of the antenna wire in the opened position. Paint scratches were also added to propeller blades in order to represent the wood appearance.
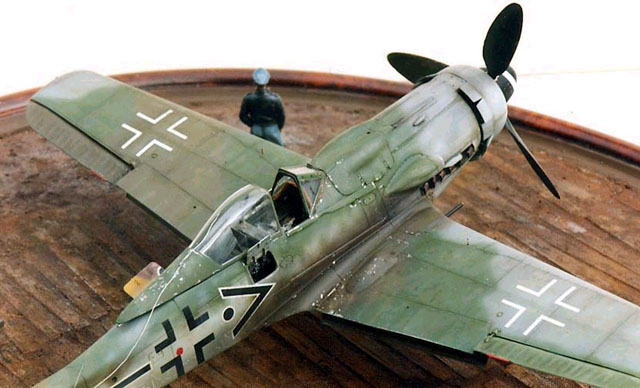
Small pieces were now cemented to the plane. Flaps were secured in the down position even though this configuration is rare on the ground. The display base was done with plaster and balsa, the grass is an Heki reference. The painting was done with Vallejo acrylics and oils. Mud and oil stains were also added to the wood base.
The oil cart is a Verlinden reference, the pilot is sculpted by Mike Good (Jaguar item) and is really outstanding. The mechanic is a Tarmac product.
Click
on the thumbnail images below to view the image full sized.
Model, Text and Images Copyright © 2000 by Jean-Baptiste
Verlhac
|