Home
| What's New |
Features |
Gallery |
Reviews |
Reference |
Forum |
Search
Home
| What's New |
Features |
Gallery |
Reviews |
Reference |
Forum |
Search
|
|
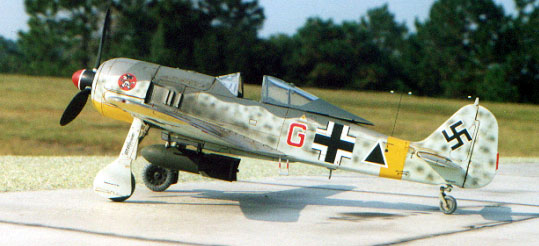
Focke-Wulf Fw 190G-1/2 by Larry Goodell
If any of you have ever built any of the DML Focke-Wulfs, you'll remember the fit around the wing roots and cowling to fuselage were somewhat tricky. This is the second one I've built and even knowing what to expect didn't help.
Painting was pretty straightforward using Model Master enamels. The decals are out of the kit and want to stay where they come off the paper, so make sure you keep them good and wet so they won't tear. Other than that they are fine and not translucent. As an experiment for an alternative wash I tried something that came to mind while cleaning the kitchen. YES - it's true, I have to do that before I can go to my workshop. I was tired of having to do all this futuring (which by the way scares me to death due to a bad experience) and such to keep the wash and the paint job from melding. I took some leftover coffee (decaf?) put it in a small pan and simmered it til it reduced to a maple syrup consistency. Sure enough, it flowed into the panel lines and around raised parts just like thinned paint. I painted on where needed and let dry. The next day I took a damp (I stress damp) cloth and started wiping her down in the direction of the airflow.
When the model was to my liking I let it dry and dusted it with four coats of Dull Cote. If you try to put it on wet it causes the java to run out and under the clear. Luckily I found this out on an old test model. I did this application right over gloss Testor's clear and the decals. If you don't like it, wash it off. If you don't use decaf you can drink the coffee and stay up all night working on your model. Model, Text and Images Copyright © 2000 by Larry
Goodell
|
 Here is
ProModelers re-release of the DML kit as a Fw190G-1/2 "Jabo". New
sprues include under wing tanks, two bombs and cowling parts with the gun
troughs faired over.
Here is
ProModelers re-release of the DML kit as a Fw190G-1/2 "Jabo". New
sprues include under wing tanks, two bombs and cowling parts with the gun
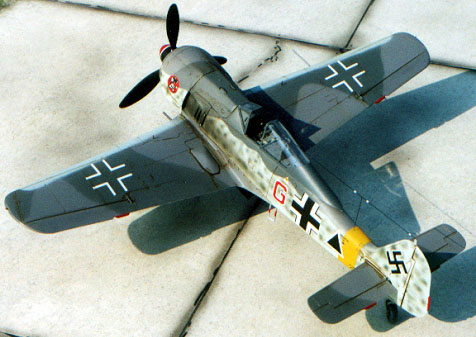
troughs faired over.  I had to
cement a 1/32 spacer between the upper part of the cowling and the gun cover to
keep the front from cocking up at a noticable angle. Spreading the fuselage as
far as possible without distorting the shape still leaves a large gap at the
wingroots. So, after spreading the sides, I cemented the upper wing halves to
the roots.
I had to
cement a 1/32 spacer between the upper part of the cowling and the gun cover to
keep the front from cocking up at a noticable angle. Spreading the fuselage as
far as possible without distorting the shape still leaves a large gap at the
wingroots. So, after spreading the sides, I cemented the upper wing halves to
the roots.