Home
| What's New |
Features |
Gallery |
Reviews |
Reference |
Forum |
Search
Home
| What's New |
Features |
Gallery |
Reviews |
Reference |
Forum |
Search
|
|
|
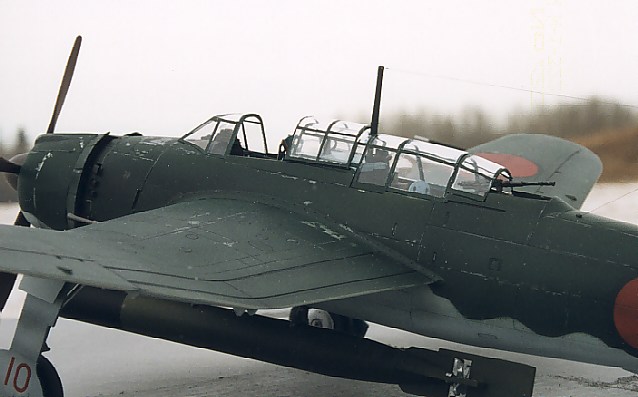
Aichi B7A2 Ryusei Kai "Grace" by Ian Robertson
Hasegawa's 1/48 B7A2 Shooting Star (known as "Grace" to the allies) is a welcome addition for modelers of Japanese WWII aircraft, and represents a rather esoteric subject from this mainstream manufacturer. The Grace was intended for use on carriers to supplement and ultimately replace the B6N Tenzan "Jill" torpedo bomber and D4Y Suisei "Judy" dive bomber.
However, by the time of the Grace's operational debut, air power had swayed in favor of the allies and Japan's last carriers were being sunk. Although none saw action from carriers, a small number were deployed from land bases starting in mid 1944. Despite its relatively minor contribution to Japan's war effort, the B7A proved an excellent performer, possessing both speed and manoeuverability on par with the A6M Zeke.
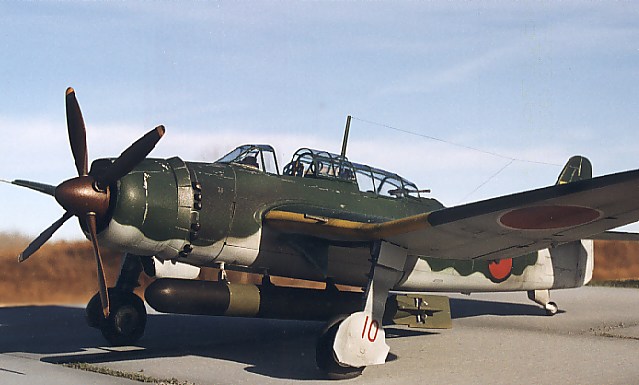
The only changes I made to the kit were the use of Squadron vacuform parts for some of the canopy (more on this below), resin tires from True Details, and etched brass seats and belts from Reheat. It is unfortunate that the rear gunner's seat supplied in the kit came in two halves.
Because of the seat's curved shape, I found that the resulting seam was near impossible to hide on the inside. Therefore, I opted to use a brass replacement seat from Reheat despite obvious differences in appearance with the original. A similar etched brass seat was used in the pilot's position. Those concerned about the accuracy of these seats should consult their references.
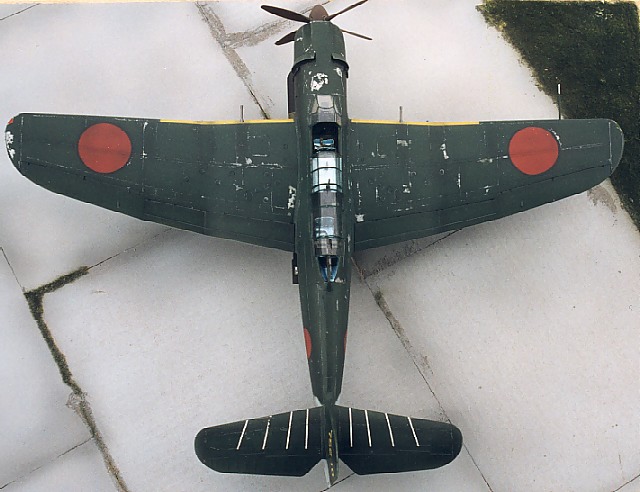
Using Polly Scale acrylics, the cockpit was painted in RLM 82 dark green followed by a wash of earth brown. The wheel wells, seats and centre section of the cockpit were painted aotake (metallic blue-green), as was the interior framing on the canopy. SnJ aluminum was sprayed on the model before applying the standard JNAF green over sky grey camouflage. Demarcation between the upper and lower surfaces was masked with room for slight overspray to soften the edges.
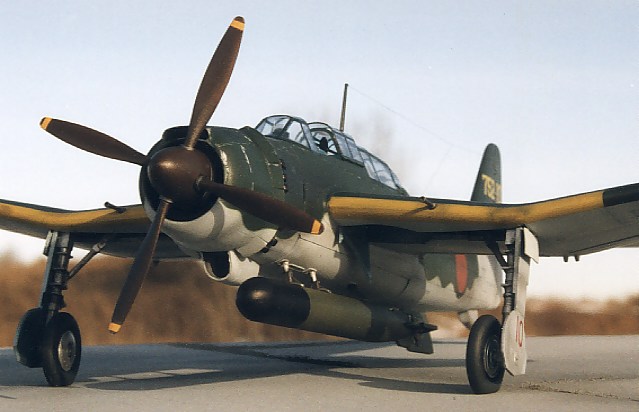
The propeller and spinner were painted JAAF red-brown. Because the kit-supplied hinomarus were too bright for the weathered effect I wanted, I painted the hinomarus on using a mixture of RLM 23 red and a touch of red-brown. Following the kit's instructions, a dark green ring was added around each hinomaru on the upper wings and fuselage, whereas a white ring was added to the hinomarus on the underside of the wings. The paint was then chipped in places on the wings, fuselage and tail, consistent with photos I have which show a less than pristine appearance for this aircraft. Lastly, thinned black paint was applied unevenly over the model to give it a slightly dirty appearance. For obvious reasons the torpedo was not subjected to any weathering.
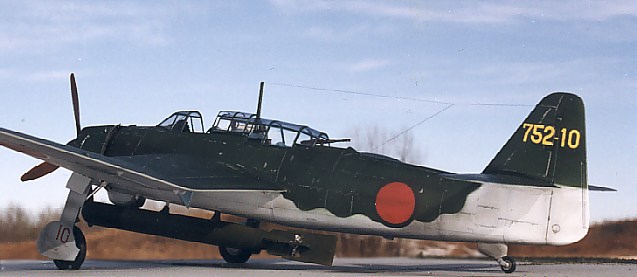
I used the kit decals for the markings on the tail and propeller. Much to my chagrin, the decals on the tail silvered terribly despite a glossy undercoat of Future (this occasionally happens when I use Hasegawa decals, regardless of the type of gloss coat). Pricking holes in the silvered areas and adding setting solution only exacerbated the problem. I ended up repainting JNAF green between the white lines on the stabilizers to hide the silvering.
Despite this annoyance, the kit was a pleasure to build.
Model, Text and Images Copyright ©
2000 by Ian Robertson
|
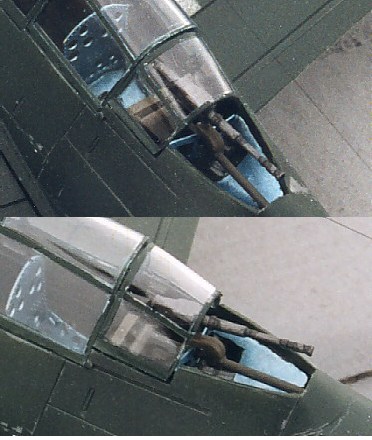 The
injection molded canopy supplied by Hasegawa comes in five parts that fit
perfectly in the closed position. However, vacuform parts are needed if
you want to display the canopy open. I used the kit-supplied parts for all
but the sliding section of the pilot's compartment and the final canopy
section above the rear machine gun. The few pictures I have of the Grace
show the rear gun stowed beneath the canopy. This configuration was
probably standard for aircraft on the ground, but I wanted to show the gun
exposed.
The
injection molded canopy supplied by Hasegawa comes in five parts that fit
perfectly in the closed position. However, vacuform parts are needed if
you want to display the canopy open. I used the kit-supplied parts for all
but the sliding section of the pilot's compartment and the final canopy
section above the rear machine gun. The few pictures I have of the Grace
show the rear gun stowed beneath the canopy. This configuration was
probably standard for aircraft on the ground, but I wanted to show the gun
exposed.