Home
| What's New |
Features |
Gallery |
Reviews |
Reference |
Forum |
Search
Home
| What's New |
Features |
Gallery |
Reviews |
Reference |
Forum |
Search
|
|
|
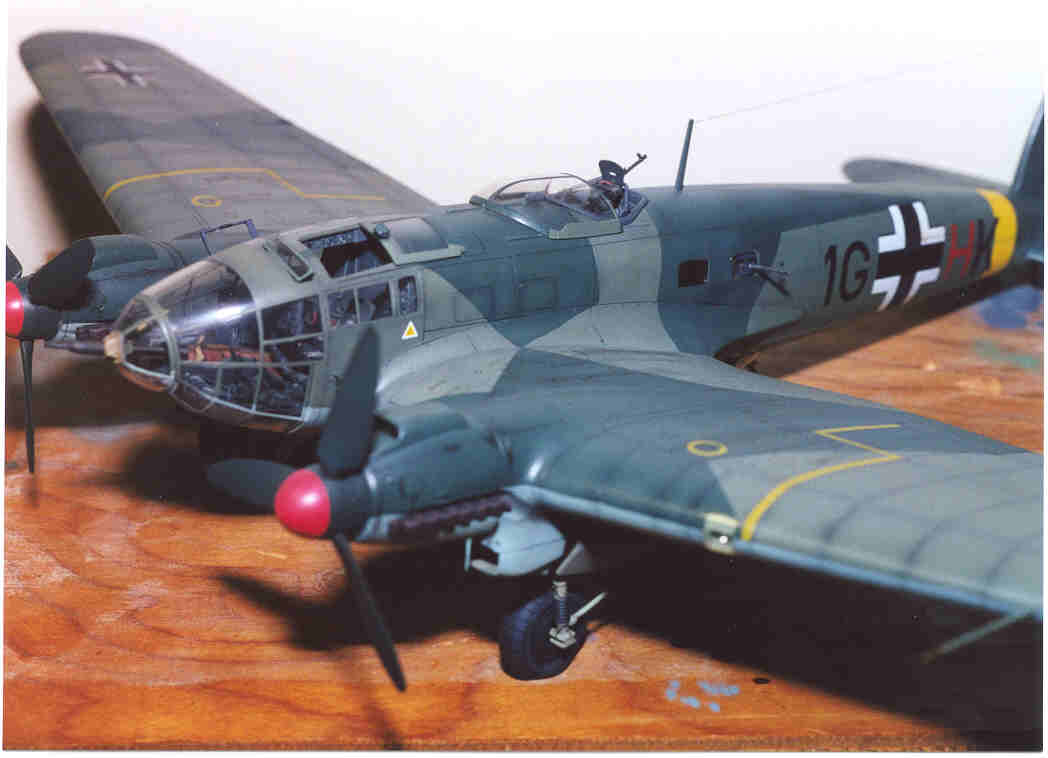
Heinkel He 111H-6 by Roy Long
The He 111 was a true workhorse of the Luftwaffe, fulfilling the roles of glider tug, troop and cargo transport and, of course, bomber. Monogram's He 111 allows the modeler to build the H-1 through H-4 from the kit. As luck would have it, the one I wanted to build was depicted as an He111H-6, at least as far as I can tell. This presented a problem at first as I had few references at the time, so I put the kit aside and worked on some others for a while. In the interim, I accumulated a few reference books. During this time Koster also released a conversion/update set for the He111. So, armed with the Koster set, the AJ Press book on the He111 and a decal sheet from Aeromaster I started building.
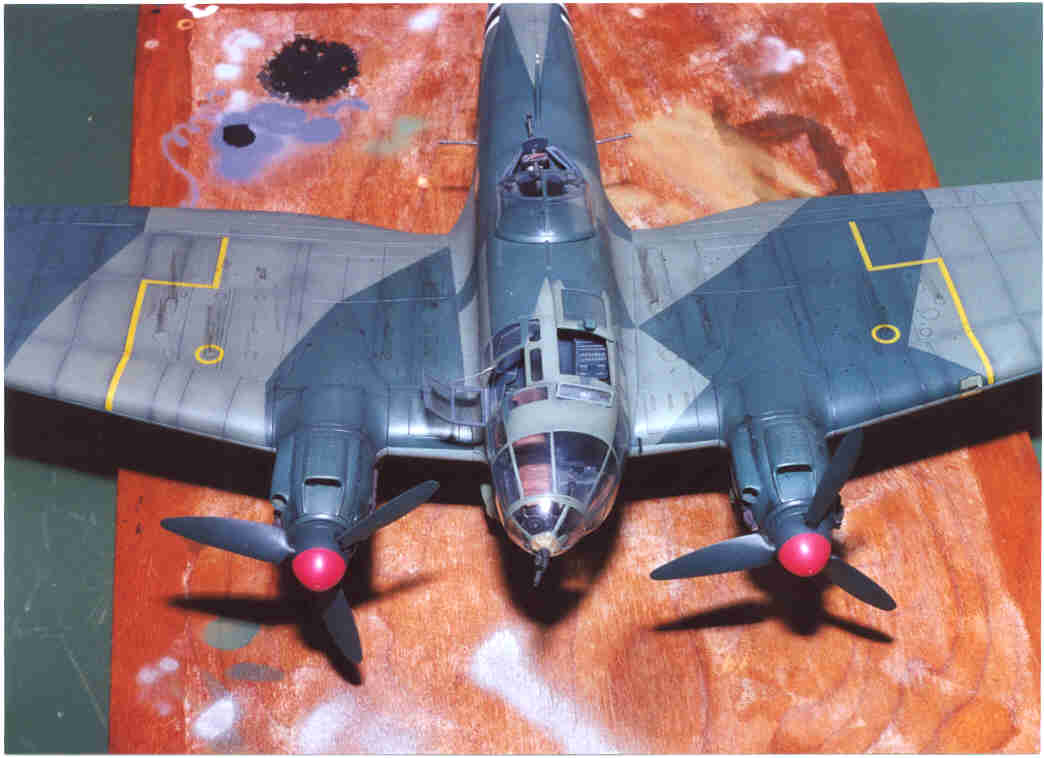
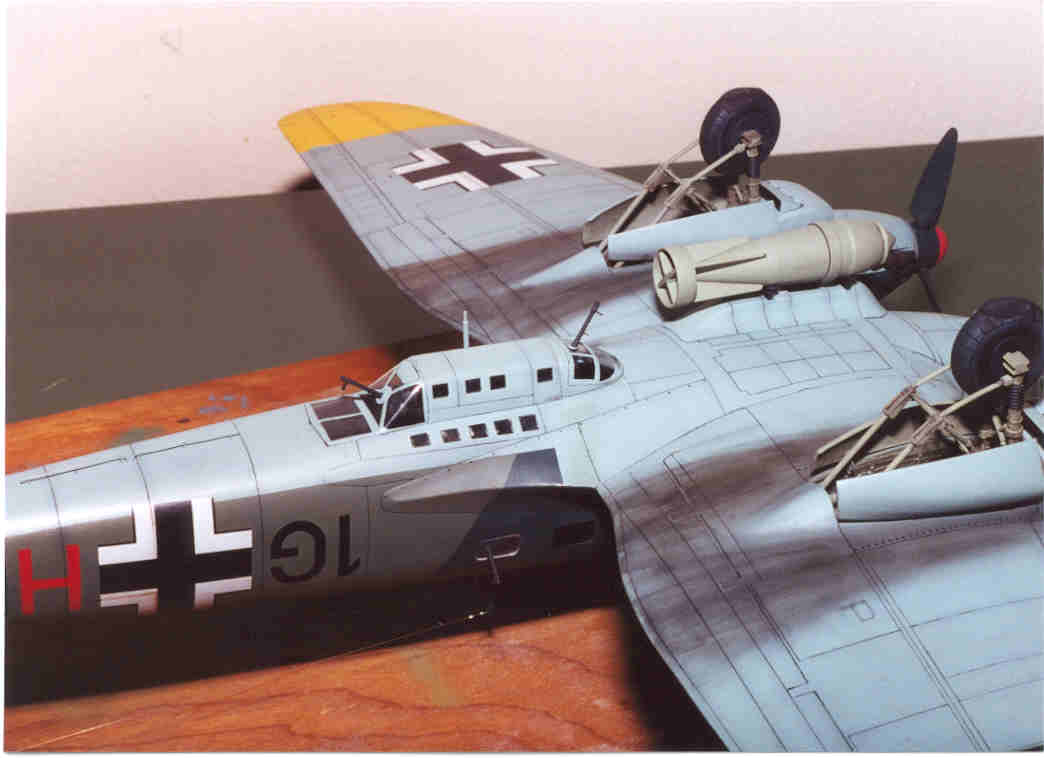
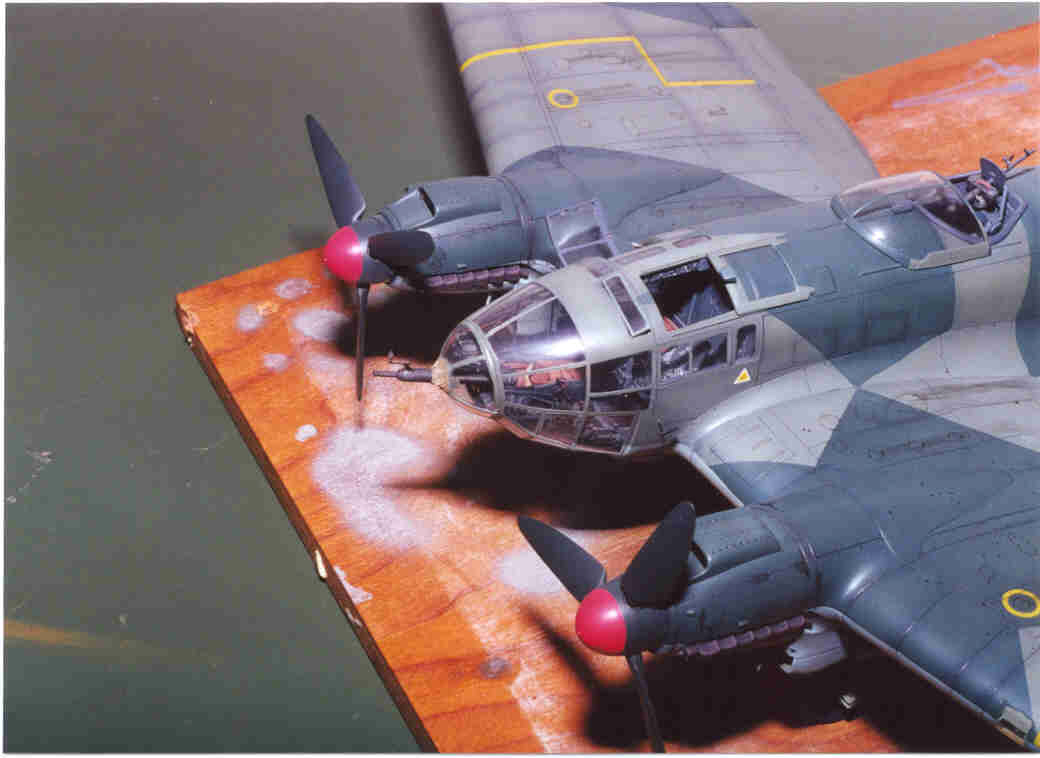
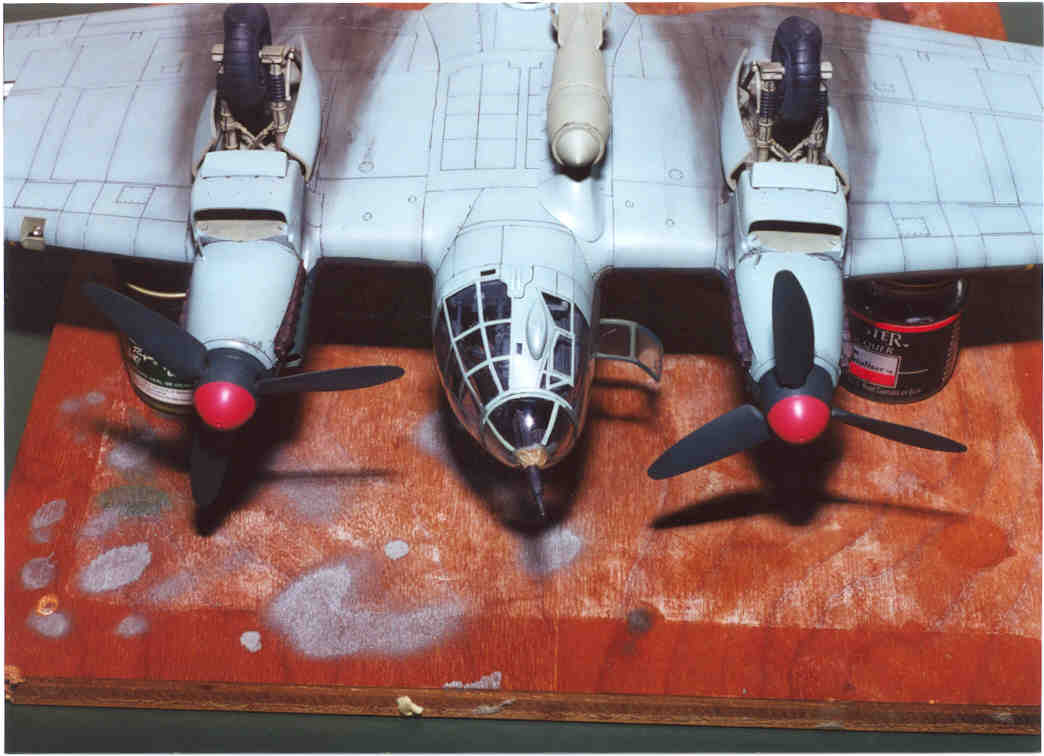
Koster Detail Set This set is quite comprehensive. It contains 2 vacuform sheets, one in clear and one in white styrene, as well as several white metal machine-guns and cannon. The white styrene includes engine nacelles and spinner back plates for the He111P, external cargo carriers, a PVC "Special" rack and some other odds and ends. The clear vac sheet contains various replacement pieces for different configurations found on the He-111, such as a the dorsal gunner's position with either the solid or folding back portion, the nose position, both nose hatches and fore and aft covers for the ventral gondola. Not long after this model was completed, a propeller set and an exhaust stack set were released by Koster as well.
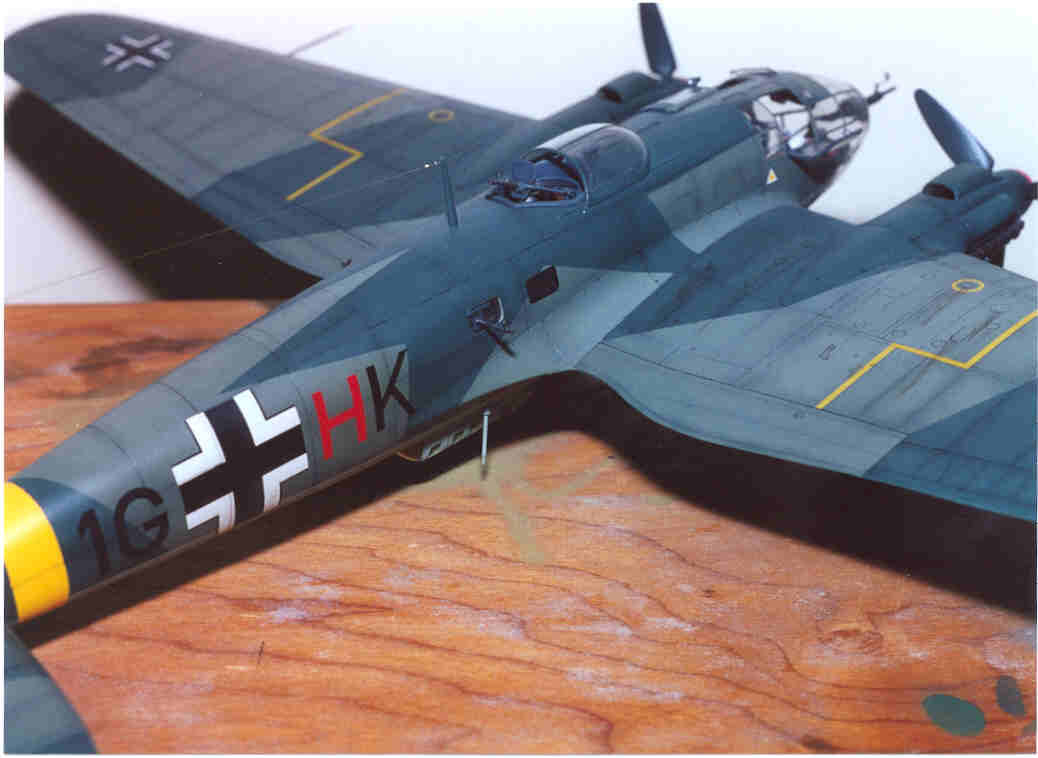
I began the construction of the interior by chopping up the clear nose section with a razor saw and a pin vise. The sliding hatch and the folding "vent" over the pilot's seat, the side access door and the nose "ball" were removed and the resulting holes were cleaned up. The entire section was then masked. Later the sliding hatch and nose ball were replaced with ones from the Koster set.
The entire fuselage interior was painted in RLM 66, given a dark oil wash and drybrushed. The cockpit was assembled pretty much stock except for the addition of lead foil seat belts with photo etch buckles, photo etch rudder pedals and the bombardiers pad from the Koster set. All the machine guns and cannon were replaced with Koster pieces. I also used some pieces from Koster's photoetch for Luftwaffe bombers for the seat belt hardware, gunsights, rudder pedals and hinges for the main landing gear covers. There weren't many problems during the construction of this kit. The clear nose section was an area that really concerned me but was not much of a problem. One area that did need attention was the fit of the bomb bay panel insert in the belly and the large external bomb carrier, which is partially the reason there is only one. There were also some small gaps at the wing root, which I filled with white glue. The main gear doors were detailed with the hinge details from Koster. The tail "stinger" was made using the barrel section of one of the Koster guns, a small scoop I found somewhere and lead foil. The main gear bays were painted XtraColor RLM 02.
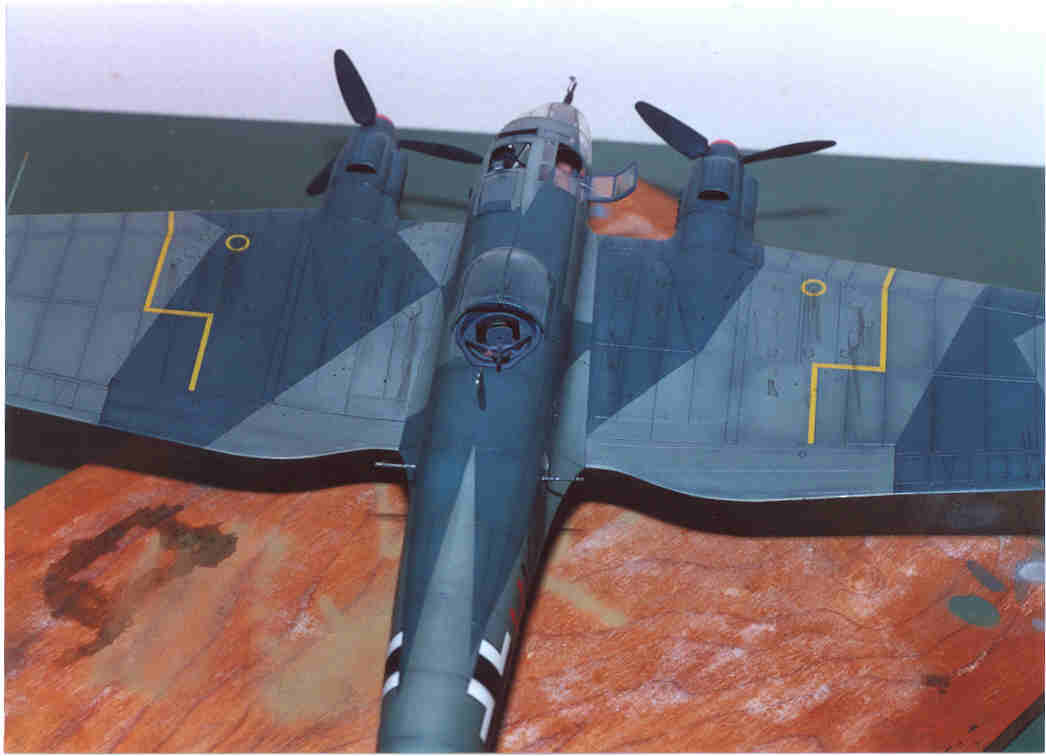
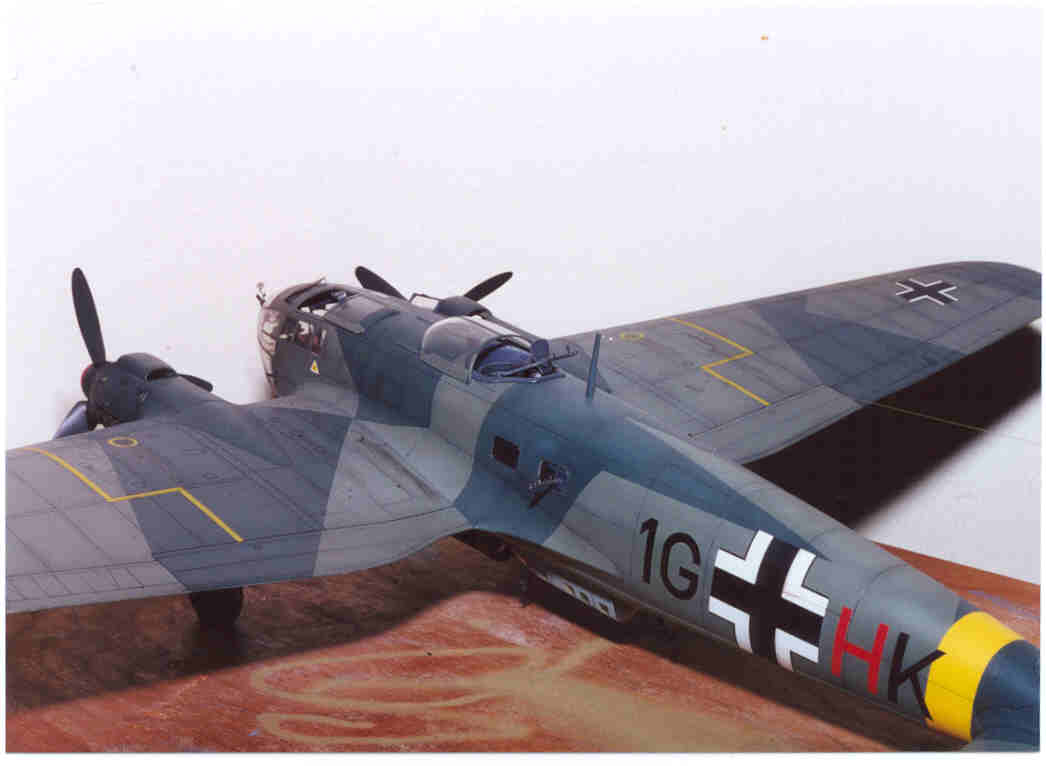
The earlier style propellers and spinners were replaced with wide chord VS-11 propellers and larger spinners taken from a DML Ju88. The main and tail wheels were replaced with True Details wheels. An invisible thread antenna aerial was added and insulators were made from small drops of white glue.
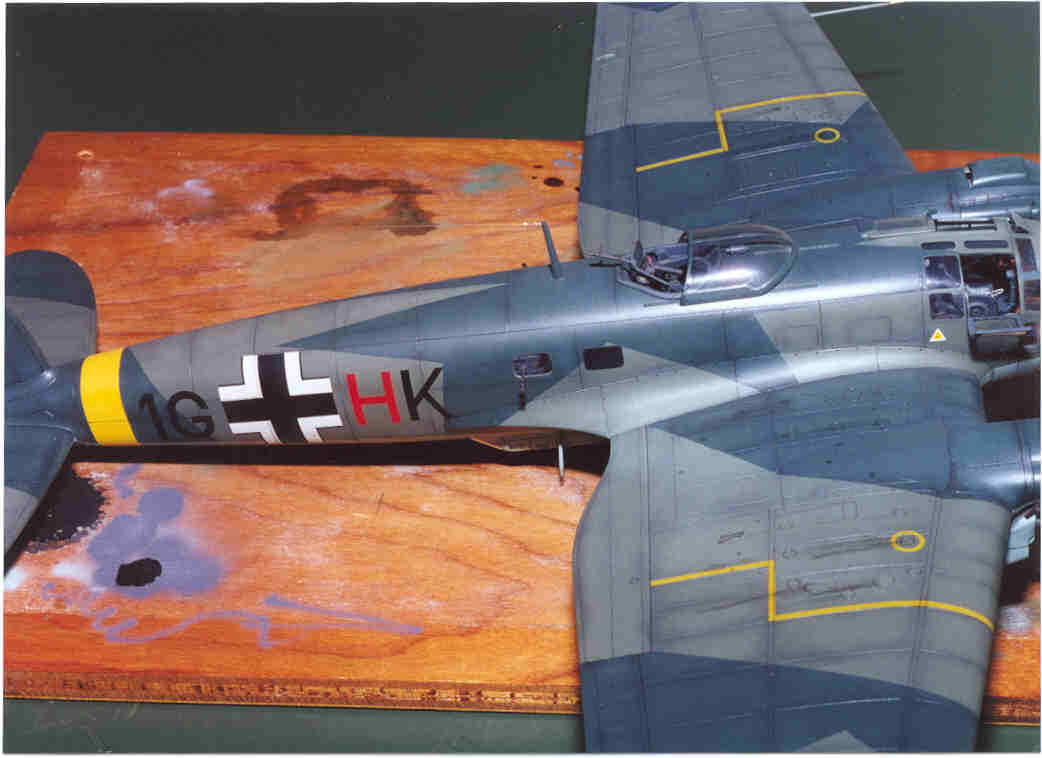
I wanted this model to depict a typical European scheme, but didn't want a Battle of Britain era machine (which seemed to be what everyone else was doing). After collecting several references, I found that many of the available decals covered Battle of Britain era or North African campaign A/C. The one I settled on was described by Aeromaster decals as an He 111 H-6 of II/KGr 27 in Russia, 1942 and depicts a later, European scheme used during Stalingrad, but it was whitewashed. I decided to bypass my normal practice to work from good reference pictures and backdate the He111 a few months. I'm not sure this aircraft was on strength at the time or if it actually wore this scheme.
The underside was sprayed with Xtracolor RLM 65, then I mixed RLM 65 with black and more thinner and sprayed along the panel lines. I then sprayed a very lightened RLM 65 in the center of each panel. Once this was dry, the under side was misted several times with RLM 65 heavily thinned with lacquer thinner. The upper surfaces were sprayed in the same manner with XtraColor RLM 70. When the upper surfaces were dry, the splinter camouflage was masked using Parafilm that had been stretched out and laid on a pane of glass, then cut into strips with a scalpel and straight edge. After recovering from a lengthy masking session, XtraColor RLM 71 was sprayed in the same manner as the other two camouflage colors. Weathering was done with artist's ink and pastel chalk.
I had a lot of fun and few difficulties building the He111. In my opinion this kit is a good build whether it's out of the box or an extensive conversion. With the Monogram ProModeler He111H-22 after market sets such as the Koster set, the Eduard bomb bay set and a He-111Z conversion available, it is possible to build virtually any of the P or H variants of this great airplane. For what it is worth this model won Second Place in its category at the 1996 IPMS Nationals in Virginia Beach.
Click the
thumbnails below to view images full-sized.
Model, Images and Article Copyright
© 2000 by Roy Long Back to HyperScale Main Page Back to Features Page |