Home
| What's New |
Features |
Gallery |
Reviews |
Reference |
Forum |
Search
Home
| What's New |
Features |
Gallery |
Reviews |
Reference |
Forum |
Search
|
|
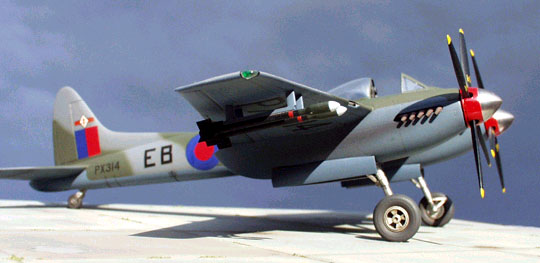
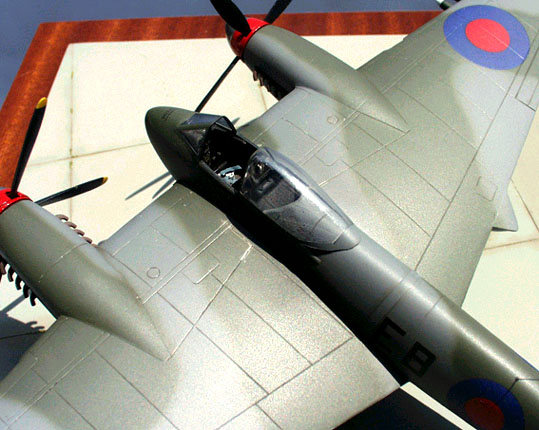
DeHavilland Hornet F.3 by Graham Green
The excellent Dynavector vacform kit of the Hornet F3 in 1/48 scale is very well produced with neat detail and fine panel lines. I reckon that, nowadays, these vacforms are the best on the market.
I found this an easy vacform to build while I kept to the sequence in the instructions. I added a little more detail in the cockpit area and to the carburettor intakes on the wing leading edges. These inlets were controlled by a tube with an elongated opening in it. This tube rotated which allowed the increase or decrease in airflow to the carburettor. To replicate this a piece of aluminium tube with a slot the same size as the opening on the wing was placed into the leading edge.
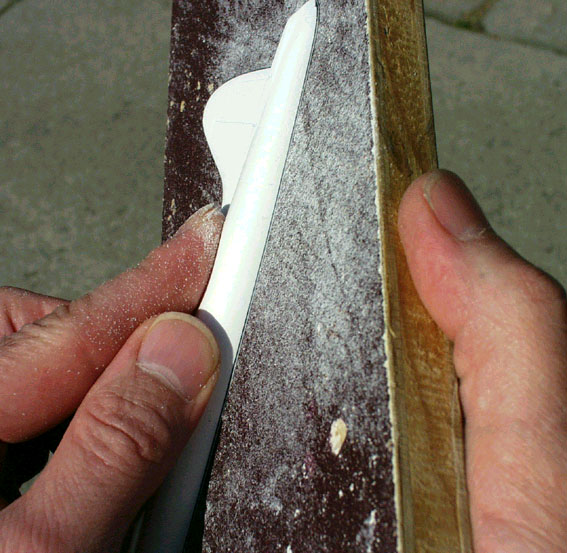
Do construct the nacelles first as per instructions, and then attach them to the lower wing halves before the tops of wings are glued to the bottoms. This ensures that the nacelles help to retain the curve of the lower wing skin. I also added bulkheads inside the front and rear of the wheel wells to blank them off. The secret of all vacforms is not to be afraid of them, and to do several 'dry-runs' to ensure that the parts fit together. Do sand the mating faces of the pieces per the instructions and not as has been done in the past by rubbing the whole of the piece on a sheet of paper lying flat on a table. Use a flat block about 4 to 5 inches wide by about a 12 inches long with about 300 wet and dry paper stuck to it, as shown in the picture below. I can assure you that once you get the hang of it, it is much easier than the old way.
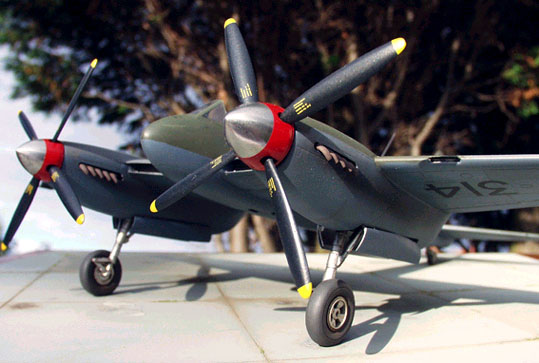
The undercarriage and wheels are from Pewter and if you carefully rub the exposed section of the oleo leg with the back edge of a scalpel blade, it will turn highly polished, representing the 'Chrome' finish. The full sized aeroplane had polished spinner cones and it was a simple matter of rubbing the pewter spinner cones with metal polish until the lustre is achieved then buffing up with a soft cloth.
The rockets provided were slightly modified by drilling the rear end to simulate the rocket motor tube and cutting off the fins and replacing them with some from 5 thou. plasticard.
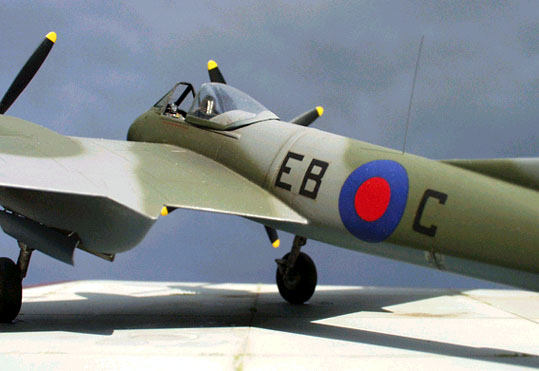
The model was given a coat of grey primer. I think this is always a good idea to check for irregularities at joins and on the surface as a whole. When satisfied with the overall look of the main airframe it was given the underside colour of PRU Blue appropriate for the scheme of the chosen 41 Squadron aircraft. After masking the lower surfaces the top colours of Dark Green and Ocean Grey were applied using Xtracolor paints. Roundels were from an Xtradecal post-war RAF roundel sheet and all the other markings were home made, printed onto clear decal sheet via a Laser printer.
The kit is well thought out part wise, and does require a little more time than the usual injection moulded kit to build, but makes up into a great representation of the Hornet a good comparison with it's predecessor, the Mosquito. A full construction article about this model appeared in 'Military In Scale' back in September 1999 and the Sea Hornet is not far away!
Click the thumbnail to view the
image full size.
Model, Text and Images Copyright © 2000 by Graham
Green
|