Home
| What's New |
Features |
Gallery |
Reviews |
Reference |
Forum |
Search
Home
| What's New |
Features |
Gallery |
Reviews |
Reference |
Forum |
Search
|
|
|
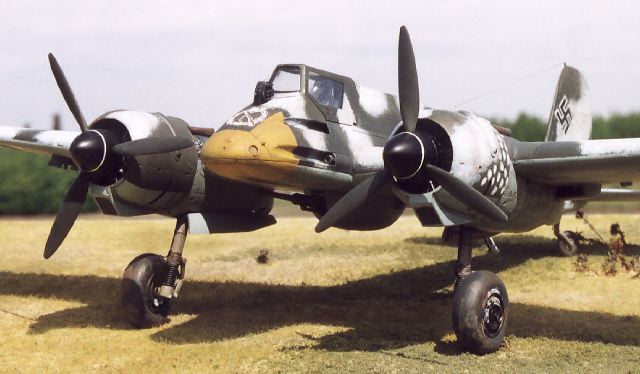
Henschel Hs 129B-2 by Ian Robertson
An excellent descriptive history of the Hs129, along with a detailed review of Hasegawa's 1/48 kit, is provided on HyperScale by Milton Bell.
I chose to build my Hasegawa Hs129B-2 in the winter camouflage of an aircraft belonging to IV(Pz)/SG 9 on the eastern front in early 1944. Construction of the kit was straightforward and without surprises. I replaced the kit's exhaust stacks with metal exhaust tubes from Moskit. Seatbelts are from Reheat. Brake lines were added using electrical wire, and the antenna wire was made from stretched sprue.
The photograph upon which my model is based showed that the aircraft did not have an antenna loop or mast. Instead, the antenna wire was attached directly to the fuselage from a post on the rudder.
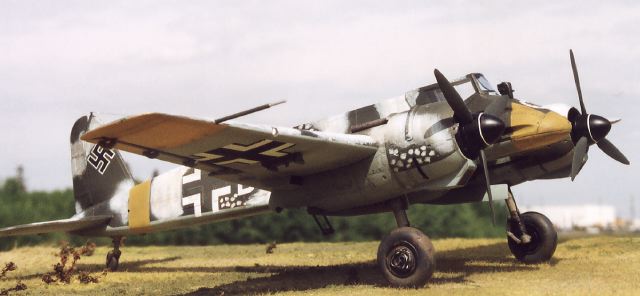
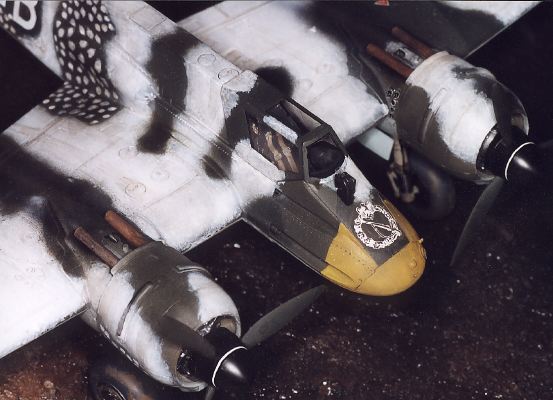
After preshading the panel lines in black I applied the yellow theatre identification marks on the aft fuselage, nose, and undersides of the wing tips. These areas were masked until the rest of the painting was complete. The base camouflage was a standard splinter pattern of RLM 70/71, with RLM 65 on the under surfaces. I painted the cockpit RLM 66, the undercarriage and wheel bays RLM 02, the spinner black, and the propeller blades RLM 70. Exhaust stains were airbrushed with thinned black paint. All painting was done using Polly Scale acrylics. The winter distemper added to German aircraft (Russian and Rumanian as well) was water soluble and from photographs it often looked "worn" (i.e., uneven coverage, scuffed, dirty).
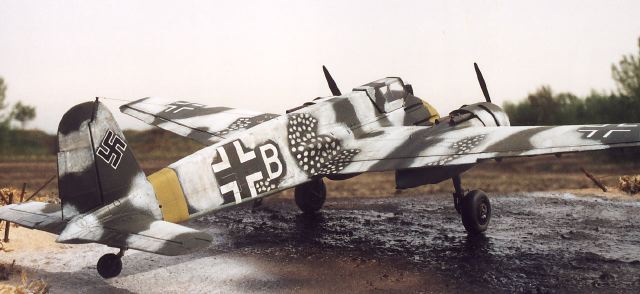
To achieve this effect on my model I first applied thinned white paint with a flat brush (3 mm width) to the areas I wanted covered. The brush produced sharp edges to the areas of distemper, which was desirable given that distemper on aircraft was often applied with mops, rags and brushes. No effort was made to brush the white paint evenly on the model. In fact, I broke all the rules for painting with a brush, and at this point the model looked terrible! Patience. The next step was to airbrush white paint over the areas roughed-in with the brush in order to "fill in" some of the blotchiness. I like to leave a hint of the uneven coverage produced by the brush (otherwise why not just skip the brush step, mask the model, and apply white paint with an airbrush?). The final step was to wash a highly thinned mixture of raw ochre and burnt umber paint over the model's surfaces to remove the "clean & fresh" look of the white paint. I used a broad flat brush (15 mm width) to do this, but I didn't hesitate to smear the wash with my fingers (on the fuselage sides use a downward motion when smearing or brushing the wash, on the wings move towards the trailing edge). In the end I got the look I wanted - uneven coverage of dirty and scuffed distemper. The dots of distemper were applied with a brush. Decals were scrounged from various sources. Eagle Cals produces a decal for the winter Hs129, "white K". I chose "white B" because I had that letter left over from another decal set. Frugality over accuracy I suppose.
Click the
thumbnails below to view images full-sized.
Model, Text and Images Copyright © 2000 by Ian
Robertson
|