Home
| What's New |
Features |
Gallery |
Reviews |
Reference |
Forum |
Search
Home
| What's New |
Features |
Gallery |
Reviews |
Reference |
Forum |
Search
|
|
|
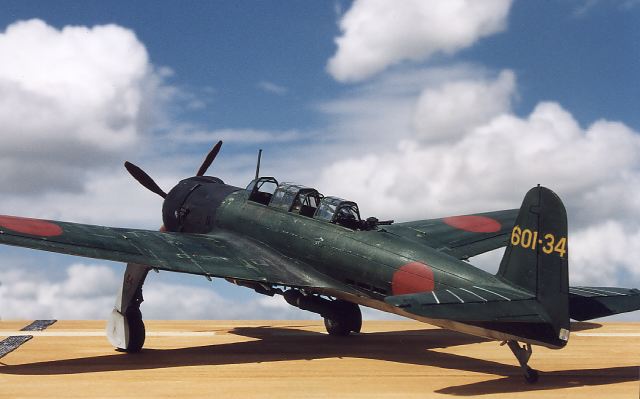
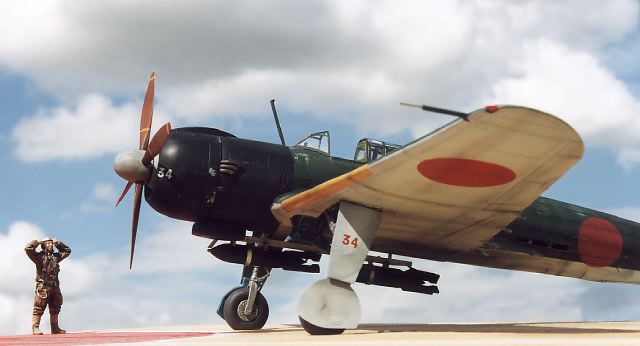
B6N2 Type 12 Tenzan "Jill" by Ian Robertson
The B6N Tenzan (Heavenly Mountain) carrier torpedo bomber was intended as a replacement for the B5N "Kate". Armament consisted of a 7.7 mm machine gun aimed from the rear cockpit and one aimed from the rear ventral position (there is a retractable ventral door aft of the trailing edge of the wing).
The distinctive shape of the vertical tail was to reduce stowage length on carriers. Tenzans went into action off Bougainville in the Marshalls campaign in June 1944 and served until the end of the war. Many were used in kamikaze attacks.
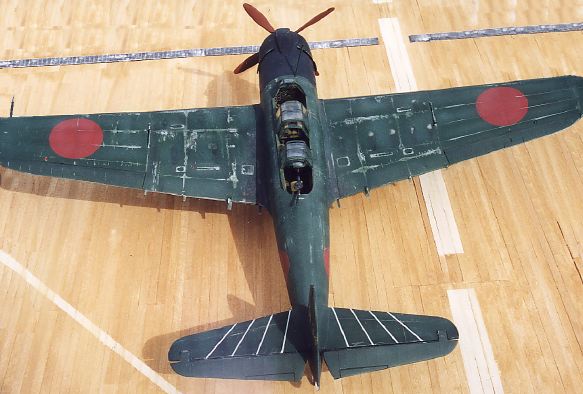
I built Hasegawa's B6N2 type 12 "Jill" (with 250 kg bombs) in the markings of an aircraft belonging to the 601st Naval Flying Group. The kit rivals Hasegawa's B7A "Grace" for clean fit and excellent detail, which bodes well for Hasegawa's upcoming B5N "Kate" release. The only weakness in construction involves the (large and heavy) wings if you plan to have them extended. The design of the kit is such that extended wings have very little structural support and would likely droop and/or be very fragile. To remedy this potential problem I attached the lower portions of the wings together, reinforced them along their length with sheet styrene and wooden dowl, and then attached the upper portions of the wing (thanks to Tom Cleaver for the warning and suggestion). I suspect that the wings could be positioned in the folded position as per instructions without much difficulty. The pitot tube on the port wing was made from syringe tubing.
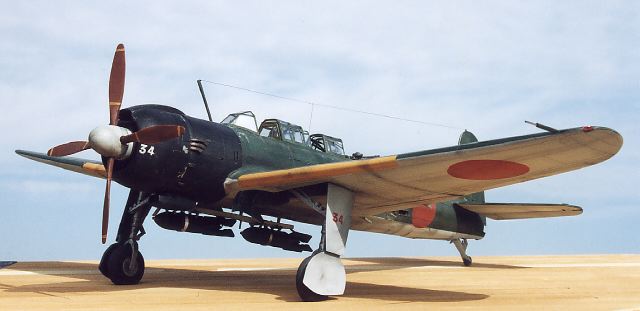
The Jill's canopy comes in 3 pieces and is not intended to be displayed in the open position (which would be near impossible due to the thickness of the parts). However, given the excellent detail of the cockpit I felt the model would be best viewed with wings extended and canopy open. I used a combination of Squadron's vacuform canopy and the kit-supplied canopy to open the cockpit and expose the rear machine gun. A dremel cutting disk was used to section the kit's styrene canopy. The vacuform parts, which were cut with a hobby knife, were tucked beneath the thicker kit parts that I used.
As with their Ki-84 Hayate "Frank", Hasegawa provides Fowler wing flaps that can be displayed extended or retracted. These flaps were needed for the Jill's heavy all-metal airframe to land safely on carriers. For a parked aircraft I decided to show the flaps retracted. I made an antenna wire from stretched sprue. However, it is visible in only one of the shots because I broke it while taking these pictures (thanks Murphy). The figure is from Jaguar.
Several coats of SnJ aluminum were sprayed on the model before applying the standard JNAF green over sky grey camouflage using Polly Scale acrylics. The underside could also have been left in a natural metal finish, with grey-green on the control surfaces. The cowl was painted a mixture of navy blue and black, the spinner sky grey, the propeller red-brown, the cockpit light olive green with a touch of brown, the undercarriage natural metal, and the wheel wells and interior gear doors aotake (metallic blue-green).
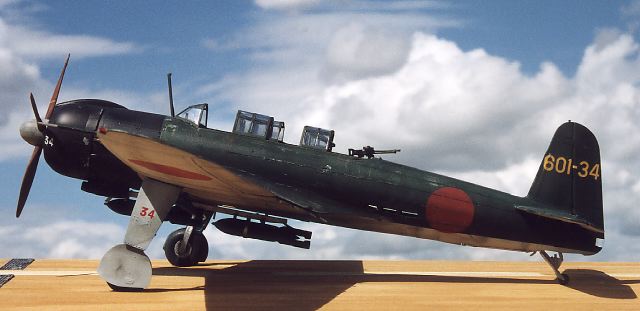
The hinomarus were masked and painted using a mixture of red and red-brown. The only decals used were the number codes and the drift markings on the horizontal tail. The identification bands on the leading edge of the wings were painted chrome yellow with a touch of red.
Various shades of JNAF green were applied to the wings and fuselage to give the appearance of fading, particularly on the exposed upper areas. Worn paint on the wings and fuselage was simulated by rubbing panel lines with a Q-tip (cotton swab) dipped in Polly Scale thinner until the acrylic paint started to lift. I then sanded the wet areas lightly with ultra-fine grit sandpaper, moving back and forth in the direction of air flow. This further exposed the natural metal finish beneath. I experimented with a cloth polishing wheel on a dremel rotary tool to alter the paint texture and color on the wings and fuselage. The technique darkened the paint and made it extremely glossy. The glossiness was later toned down by applying a clear dull coat to the model. Weathering was completed by spraying the model unevenly with thinned black paint and scuffing the walked-on areas near the wing roots. Model, Text and Images Copyright © 2000 by Ian
Robertson
|