Home
| What's New |
Features |
Gallery |
Reviews |
Reference |
Forum |
Search
Home
| What's New |
Features |
Gallery |
Reviews |
Reference |
Forum |
Search
|
|
|
by Frank Crenshaw
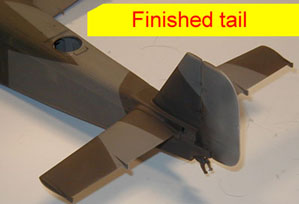
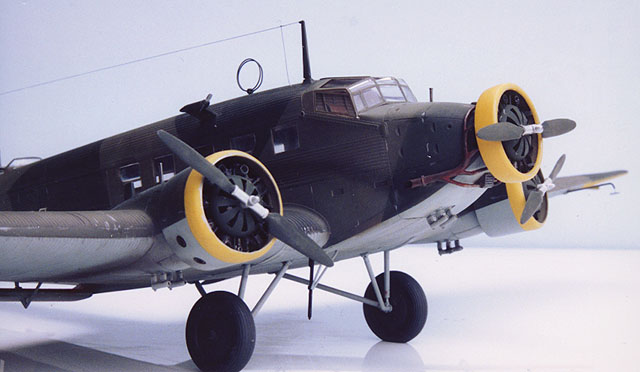
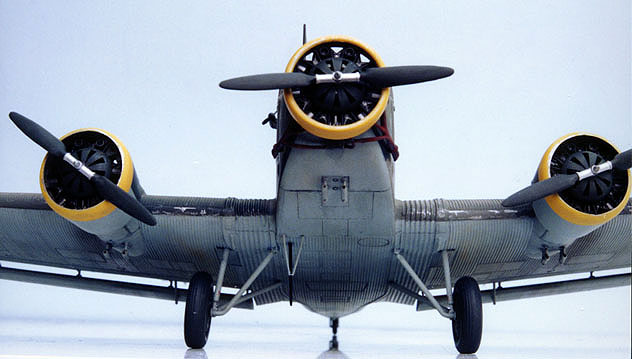
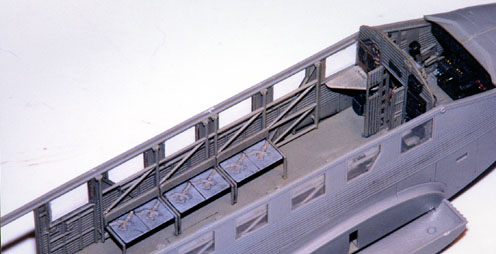
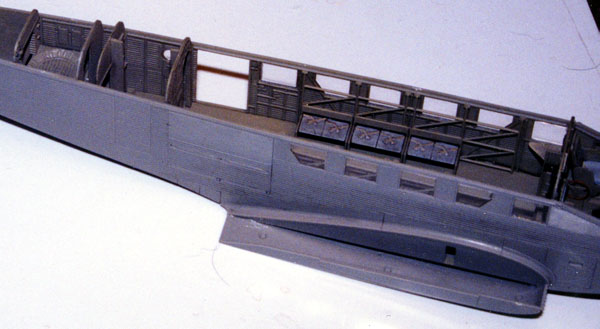
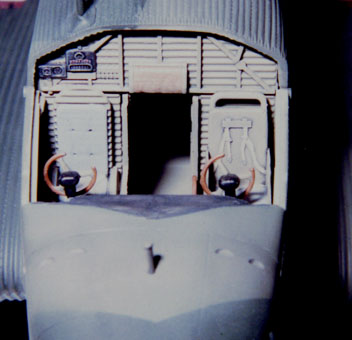
This is Revell-Monogram's Junkers Ju-52 "Tante Ju" in 1/48 scale. "Tante Ju" is German for Auntie Ju (Junkers). This is undoubtedly a good-natured reference to the aircraft's matronly lines and gentle nature. Kit moldings are crisp and highly detailed. The surface detail includes very convincing corrugations, engraved access ports, doors, and other details, and also rivets! The detail has to be seen to be fully appreciated. Clear parts are realistically thin and everything fits like a dream. I used only a few spots of putty during construction. The biggest surprise to me was the extent of the detailing. This kit features a fully detailed fuselage interior. It is very complete and in my opinion makes this the most detailed model I have ever seen right out of the box! Also included are very nicely detailed engines and Fallschirmjager figures. The only trouble I had was removing the direction finding antenna parts from their sprue tree. The parts are so thin that I ruined this part. I fabricated a new one by wrapping some copper wire around a wooden dowel to capture the correct diameter. Other than this little detour, this kit was built right out of the box.
The interior of this kit is very good. I built mine right out of the box. I painted the overall interior RLM 02 grey. The cockpit is fantastic and includes many knobs, switches and levers. The front panel was painted black and after installed after a light drybrushing.
Click
on the thumbnail images below to view full sized.
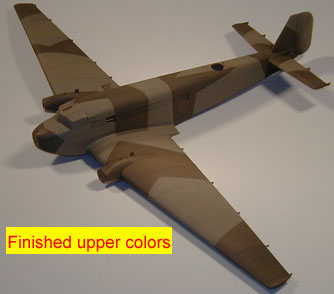
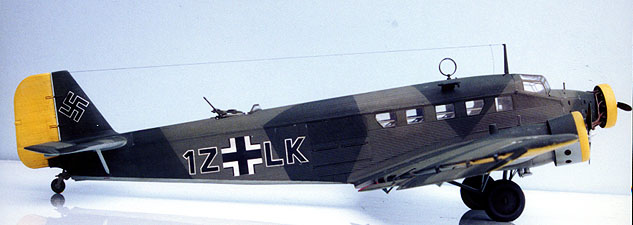
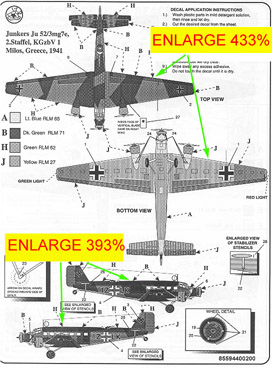
Decals One of the great disappointments about this otherwise beautiful kit is the lack of aftermarket decals. The kit provides markings for two Ju-52s. One set is for a Spanish Civil bomber, and the other is a Troop carrier that participated in the airborne invasion of Crete, and I was not really interested in either. Since most Ju-52s were marked similarly, I just decided to leave the Chess Knight marking off and paint the cowlings slightly differently than indicated in the instructions. This makes my Ju look more like a hard working transport.
I had heard that the kit decals were impossible to use due to distortions caused by the corrugations. This turned out to be completely untrue. I used the kit markings for everything but the underwing and fuselages crosses. I did not use the kits white outline cross as I felt the earlier filled in style would be more accurate based on profiles I have.
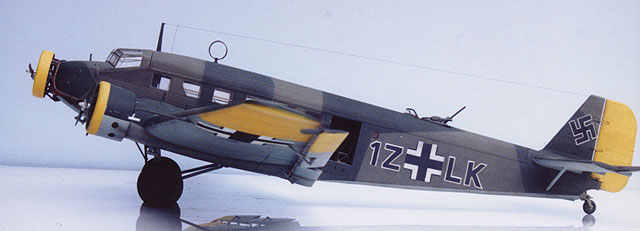
I had little trouble getting the decals to conform using Solvaset and cannot tell that they are shorter due to the corrugations. To break up the monotony of the scheme (this is a very large model) I used a form of post-shading along the rivet lines after all the camouflage colors had been painted and decals had been applied using thinned Tamiya smoke. This creates very subtle hints of the rivet lines that look great up close - they don't seem to show up well on the photos though.
Overall this was the best model I have ever had the pleasure of owning. Nevertheless, I would liked to have had more markings to choose from. Don't let this model sit! It is a fantastic kit and builds up beautifully.
Click
on the thumbnail images below to view full sized.
Text and Images Copyright © 2000 by Frank
Crenshaw
|

 Masks
Masks Painting