Home
| What's New |
Features |
Gallery |
Reviews |
Reference |
Forum |
Search
Home
| What's New |
Features |
Gallery |
Reviews |
Reference |
Forum |
Search
|
|
|
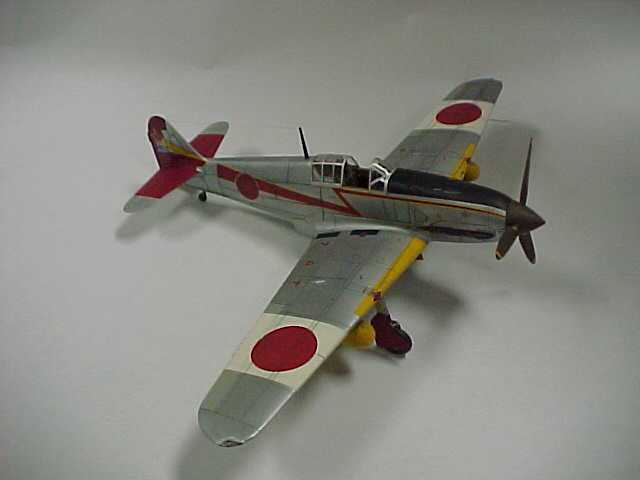
Ki-61 Hein "Tony" by Kevin M. Batterman
In the early 1990s, "Right Staff" released a 1/48 scale, mixed media kit of the early short nose version of the Ki-61 Hein, better known as the Tony. The kit consisted of a beautifully molded resin fuselage, one-piece wing, tail planes and drop tanks etc. The resin parts are injection molded so there are no plugs to remove. The cockpit detail is very nice and includes a white metal seat, gun sight and photoetched ring sight. The white metal parts are superb and include the landing gear, gun barrels, etc. Photoetched parts are excellent too. They are used to make the radiator, landing gear doors and other details. Decals for several different aircraft all in natural metal are included in the kit. You can build a great model OOB and with extra detail it could be turned into a masterpiece. I paid $75 for the kit and it retailed for $100, which might seem a bit steep. However, I really liked the plane and aside from the Otaki kit, it was the only one available at the time. Hasegawa later released a kit of the later Tei version with the longer nose. "Right Staff" also released a Tei version as well, but since I don't have it I cannot comment on it. Finally, after the model sat on a shelf for about seven years, I decided to build it.
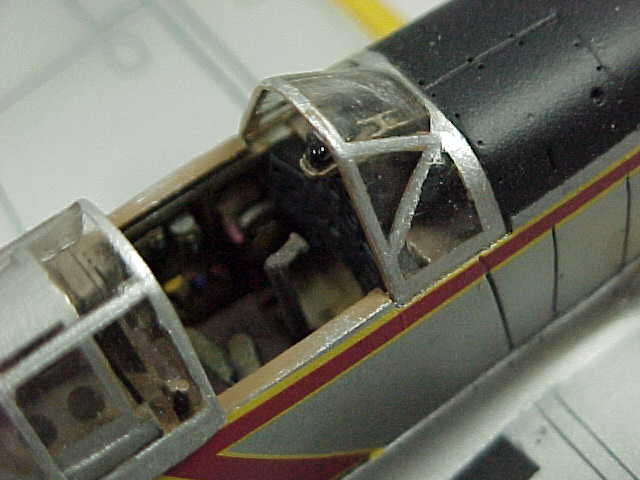
My first task was to build the cockpit, which went together easily. I added seat belts and the instrument panel from the Eduard PE set for the Hasegawa kit. The cockpit was sprayed with Gunze RLM 79, which is supposed to match the unusual color Kawasaki used. I applied a wash of Tamiya Smoke and Semi-Gloss Black, dry brushed it and then painted the small details.
After I finished the interior, I glued the fuselage halves together with Super Glue along with the cowl parts, wings, and stabilizers. I assembled the metal ducting for the radiator and added radiator fronts from the Eduard set which fit perfectly. Since the radiator fitted so well to the fuselage, I left it off until the final assembly. The wings were slightly warped so I heated them with a blow dryer to repair the flaw. They were then glued to the fuselage with minimal filling due to the excellent fit. Before painting the exterior, I sanded all of the surfaces with various grades of fine grit sandpaper to get a smooth surface for the natural metal finish.
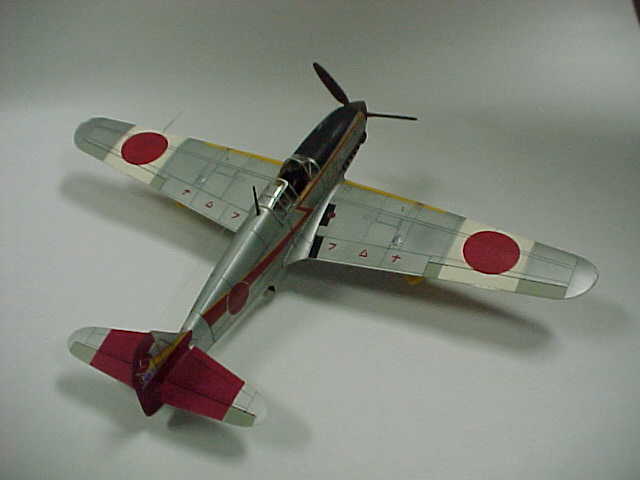
I decided to build a bird featured on an AeroMaster Decals sheet that had a red tail, red main gear door covers, a yellow and red lightning bolt down the length of the fuselage and white home defense bands on the wings. First I painted the antiglare panel with AeroMaster Blue Black and masked it off. For many years, I had a bottle of Floquil Platinum Mist that I had never used, but I knew it would bond well to the resin and give a tough finish. I thinned it with Dio-Sol and once applied it looked like dull aluminum, which matched the finish on the actual plane. Next I buffed it using Blue Magic and SNJ polishing powder to get some tonal variation. Then I masked off the areas for the white bands and sprayed them Floquil Flat White. The yellow ID panels were done next using AeroMaster ID Yellow and they required multiple coats. I painted the stabilizers, rudder and gear doors red then sprayed the prop and spinner with AeroMaster Red Brown. The fabric surfaces were masked and painted JAA Gray except for the white and red areas.
After removing the masking, a wash of Payne Grey oil paint was applied to all surfaces to accentuate the panel lines and the excess wiped off before it dried. Then I glued on the landing gear with brake lines from wire and the radiator assembly. To prepare for the decals, I applied a coat of Testors Gloss Cote and let it dry. The AeroMaster Decals were applied, but I noticed that many small wrinkles appeared on the lightning bolts where they were applied over the Platinum Mist. I found this unusual since I had not experienced this problem with AeroMaster Decals in the past. The wrinkles would not come out and I tried multiple coats of Micro Sol with no effect. I eventually took them off and sent the unused part of the sheet back to AeroMaster Decals. They were kind enough to send me a new sheet, but Gaston Bernal at AeroMaster Decals said he tried the decals and had no problem. Go figure! I applied the new decals and had the same problem, but I kept wetting them with Micro Sol and eventually they snuggled down. Next I glued on some of the small PE parts like the rudder actuators and painted them. I then gave the model a coat of Testors Dullcoat, which left it with a slight sheen.
Now I approached the home stretch and I had just a few more steps left. The kit canopy was very thin and I decided to cut it apart and replace the sliding part with a vacformed piece. I used a Squadron canopy made for the Otaki Tony. Before painting them, I dipped the clear parts in Future. Next I masked the frames off and sprayed them with the interior color and a coat of Platinum Mist. After removing the masking, I did not like the results so I soaked the parts in ammonia and repainted the frames. This time I used cut strips of silver decal and the results looked much better. I attached the parts with white glue and left them to dry.
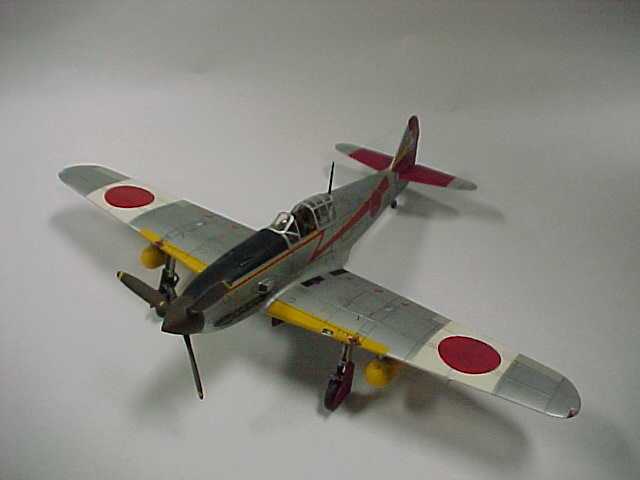
Next I drilled holes in the wing tip light lenses and painted one green and one red then attached them with white glue. The landing light was installed and I added a MV lens and used yellow decal strips for the frame. The finishing touches included adding the tail light lens, prop, an antenna wire from stretched sprue, and some pastel for gun and exhaust stains. After all this it looked really good and is one of the best models I have ever built.
I enjoyed building "Right Staff's" Tony. If you disregard the price, and that it is out of production, it is still a great kit. If you like the Tony and can find one for a price of $40 or less, it is worth picking up. To the best of my knowledge, it is the only early version ever done in 1/48 and it wore some very colorful schemes.
Model, Images and Text Copyright © 2000 by Kevin
M. Batterman
|