Home
| What's New |
Features |
Gallery |
Reviews |
Reference |
Forum |
Search
Home
| What's New |
Features |
Gallery |
Reviews |
Reference |
Forum |
Search
|
|
Leopard II by Valentin E. Bueno
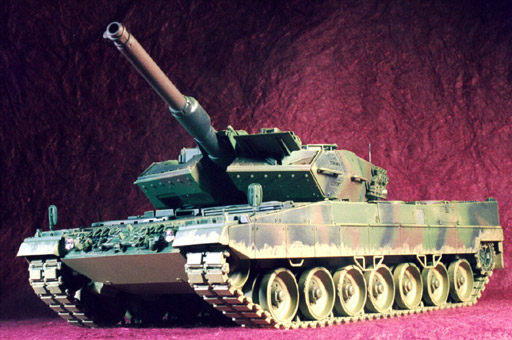
Leopard ga kakoi desu ka? (Isn't the Leopard cool?) The Leopard 2A5 is Germany's latest MBT. With its highly developed turret covered with exploding supplemental armor and sleek hull shape, I think they should have given it an all new name, Tiger III, Löwen (lion) or something like that. The vehicle is equipped with a 120mm smoothbore gun that can fire different types of shells. The turret is so large that it's supplemental armor that can swing out to allow access to the engine compartment. The Tamiya kit is the first new tank kit since the Cromwell in 1998. What can I say about the Leopard that hasn't been said about all of Tamiya's other armor kits? There are only so many superlatives I can use without sounding like a broken record (Record? What's that?) The kit has a beautifully molded one-piece lower hull and another one piece for the upper hull. I actually had a fit problem at the front of the hull where the upper and lower hulls attach, but that was due to my inattention when gluing on the rear hull plate. It had drifted a bit before the CA set, and this caused the upper hull to more rearwards a micron or two. This difference then showed up at the front hull join line. One thing that Mark Sindiong noticed was the loose fit of the tracks. I followed his suggestion to shorten the tracks by two links, but now the tracks are too tight. One link is probably best, but I am getting ahead of my self, on to the construction sequence.
Getting the Hull Out of Here! The one-piece lower hull is beautiful. The attachment points for the swing arms are nicely detailed and have very positive locating tabs that reduce the risk of having a floating boogie wheel. The shock absorbers are separate items that are attached prior to the wheels being pushed on. The wheels have Tamiya's usual poly-cap inside that allows you to add the wheels later if you so desire. As I cleaned the attachment points off the wheels, I added a few gouges and nicks just to give them that not so fresh look. The tracks are the one-piece "rubber band" type. This is the glue-able type plastic Tamiya likes to use. I painted the entire underside Polly S Mud. This is a yellowish brown color that matches the mud in the color photos in the Verlinden Lock-On series of old. The tracks were painted off the model the same color. I wanted to depict a Leopard that had just finished fording a shallow stream. I then added the rear hull plate and had the above-mentioned glitch occur. The gap at the front was fixed with a strip of plastic and a bit of light sanding. All the tools, grouser blocks, screens and lights were added at this time. I did scrape off all the molded on bumps meant to represent handles and replaced them with wire solder. That pretty much does it for the hull. Let's move on to the turret.
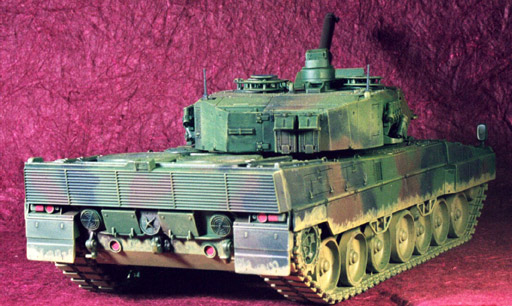
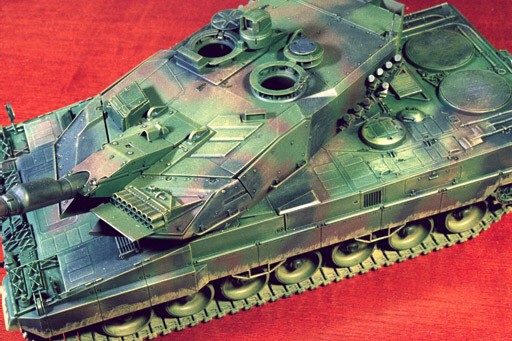
Titantic Turret This turret is huge. It has lower profile than most turrets I have seen on WWII tanks, but it sure does take up a lot of real estate. This crew isn't storing anything on that engine deck! The periscope faces are supplied as a long piece of clear acetate that is to be cut in 4mm sections. Not having my trusty metric ruler at hand, I eyeballed the 4mm and cut enough pieces for the commander's periscopes. The interiors of the hollow molded periscopes were painted black prior to attaching the clear faces. The hatches were added in the open position with the intent of adding crewmembers. Tamiya supplies the tank commander and I picked up Jaguar's modern tank crewman and soldier set. The resin figure then became the gunner. The turret went together very quickly without any major snags. I had a little trouble in setting the smoke grenade launchers at the proper angles. The mounting tabs are not very positive.
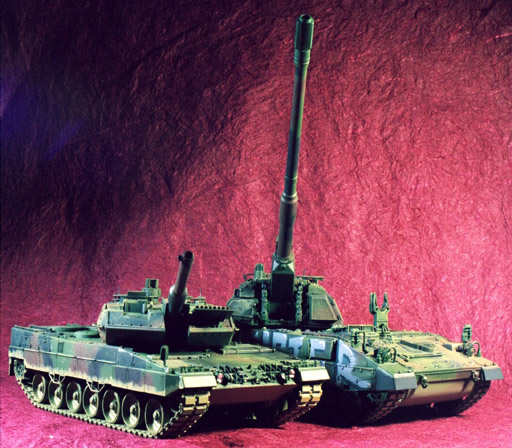
Samui desu! (It's cold!) This vehicle was built at the same time as the Panzer Haubitz 2000. Breaking from tradition, the vehicle was airbrushed with Polly S NATO Green. The camouflage was airbrushed on using Polly S NATO brown and RLM 66 mixed with RLM 23 Night black and a little Future. This allows the paint to flow without clotting. I hand painted the winter white distemper camouflage with mix of Polly S RLM 23 white and a droplet of Mud to tone it down. The first coat looked absolutely horrible. I loaded up the airbrush with the white mix and some Future and filled in the inner areas. This was a technique I read about on Hyperscale. This made it look a whole lot better. I added the decals directly to the flat paint with massive applications of Solvaset. I splashed more mud around the sides of the sideskirts (tanks with skirts, can't we call them Kilts?) for that fresh out of the mud look. Washes of dirty Tamiya thinner for the shadows and a final highlight drybrush of pure RLM 23 brought out all that Tamiya detail.
I allowed myself one month to finish this model. By building the PzH 2000 at the same time, I saved time by painting two models with similar schemes at the same time. What can I say about Tamiya's latest tank kit? It was a joy to put together. I was careful not to shake or drop the box in fear of the kit assembling itself. Now, to start on my U.S.S. Alabama in 1/700 scale!
Model, Text and Images Copyright © 2000 by Valentin
E. Bueno
|