|
M8
Greyhound
by
Luke Pitt

|
|
M8 Greyhound |
What makes us build models?
How can the seemingly simple task of building a model out of the box with a
few details turn into a major production?
I just can't leave well enough alone. The very thought of building a model
out of the box makes me dizzy, compelling me to have a nice hot cup of tea and a
good lie down.
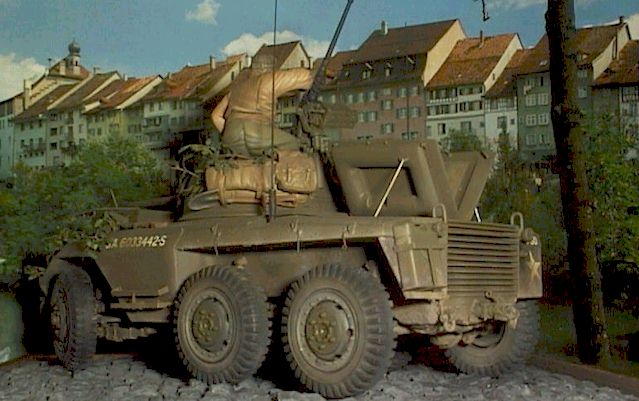
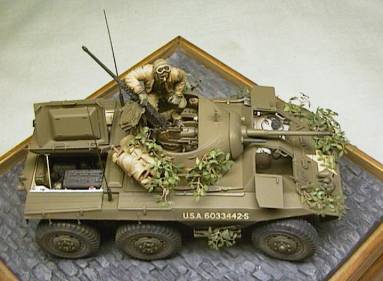
We all want to put our own individually into any model we build. For that
reason I tend to pick subjects that have what I call "the look". The
M8 Greyhound in my mind looks pretty ordinary with the mudguards fitted, but
when you take those guards off - wow!! It becomes something like an armoured
"dune buggy"…. way cool. When Tamiya released the M8 in 1/35 scale I
immediately when out and bought it sight unseen, something I very rarely
do.
Tamiya's
1/35 Scale Greyhound
|
The model looks quite good in the box, but something troubled me - the wheels
looked too big. Strange, I thought, Mr Tamiya doesn't make mistakes. This time
apparently Mr Tamiya did make a mistake though - but fixing mistakes is
half the fun, isn't it?
 Many
aftermarket sets are available for this kit from Verlinden, Tank Workshop,
Royal Model, Eduard and Aber - talk about choice dilemma. Many
aftermarket sets are available for this kit from Verlinden, Tank Workshop,
Royal Model, Eduard and Aber - talk about choice dilemma.
There are way too many options for this kit, so much so if you
added them all you would have a kit worth a couple of hundred
dollars!
I chose the Verlinden update sets as they were the first out and quite
frankly the budget would only stretch so far !!
The following text is a rework of my construction notes used for
competitions. So lets go though the steps I took to undertake this
project:
|
Wheels
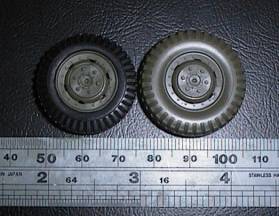 The
kit wheels are somewhat oversize and this is very evident when the guards
are left off the vehicle. This is because the tyre itself seems to be too
"thick" in diameter. The hub, on the other hand, is of the
correct scale diameter. The air hole cutouts are far too small. I cut off
the tyre completely and replaced it the tyres from the Tamiya Flak 88 kit.
The air hole cut outs were then increased in size. The
kit wheels are somewhat oversize and this is very evident when the guards
are left off the vehicle. This is because the tyre itself seems to be too
"thick" in diameter. The hub, on the other hand, is of the
correct scale diameter. The air hole cutouts are far too small. I cut off
the tyre completely and replaced it the tyres from the Tamiya Flak 88 kit.
The air hole cut outs were then increased in size. |
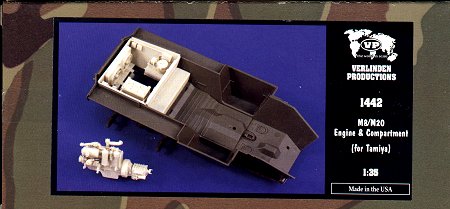
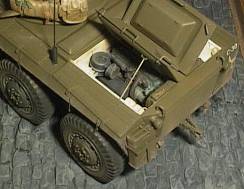
Engine Bay
 I
used the Verlinden update here. It is quite a good set, however there are
a few problems around the sidewalls, fuel tank and fan assembly. I
used the Verlinden update here. It is quite a good set, however there are
a few problems around the sidewalls, fuel tank and fan assembly.
Firstly the sidewalls are provided in a thin one piece that should fit
onto the kit engine bay. The problem with these parts is that even if you
do sand them down to wafer thickness their will be a "ridge
"when viewed from the top of the engine bay .If you disregard these
pieces the fuel tank provide will be way too small (the fuel tank is
incorrectly shaped and needs replacement anyway). The fan assembly is
generally the wrong shape at the top and needs to be improved. These are
the improvements made to the "engine bay" |
-
Engine bay bottom cut out to fit Verlinden
engine.
-
New fuel tank from plastic card
-
Verlinden Radiator and fan housing modified
to include mounting points and correctly contoured radiator top, and
radiator cap added
-
Sidewalls, the kit side walls are of the
wrong profile angle and as a result, I have reprofiled them from the
inside and added numerous details to the sidewalls themselves
-
The armored radiator covers have been
replaced with plastic card to give that "see through effect"
(not that you bloody well can!)
-
Engine latch covers added from strip
Engine
Covers
 These
Tamiya pieces were thinned to scale thickness and the leading edge of
the cut out removed . These
Tamiya pieces were thinned to scale thickness and the leading edge of
the cut out removed .
-
The domed covers had the square leading
edge removed (you can see it through the opening on the engine cover)
Four tie downs added to each dome cover from micro strip
-
Internal fittings to cover consisting of
bolts for handle and latch opening mechanism
|
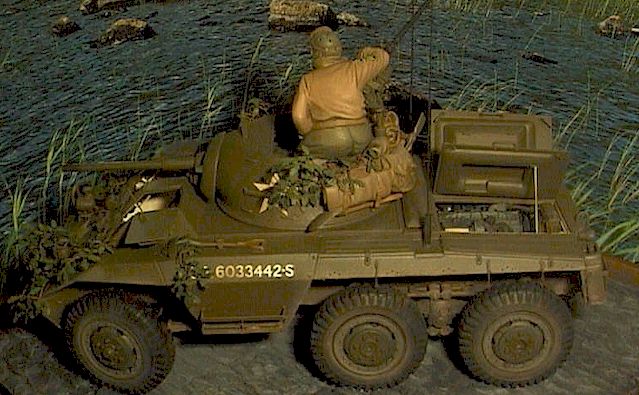
Rear
Mudguards
 The
rear mudguards are a little too narrow for a vehicle without the
full-length brush guards fitted. I firstly extended these covers with
plastic card. I then thinned them down to wafer thickness, added the
"press pattern" on the inside of the guard and drilled the three
attachment holes required for the mudguards. The
rear mudguards are a little too narrow for a vehicle without the
full-length brush guards fitted. I firstly extended these covers with
plastic card. I then thinned them down to wafer thickness, added the
"press pattern" on the inside of the guard and drilled the three
attachment holes required for the mudguards. |
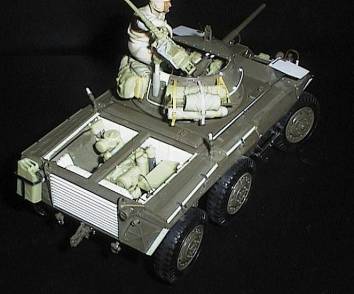
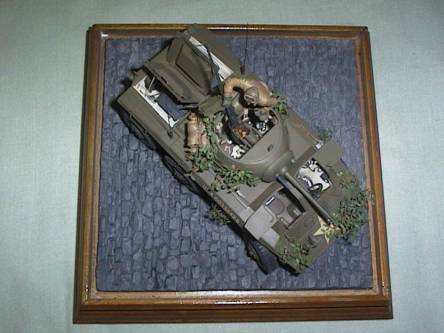
Hull
 The
mudguards were to be left off the vehicle. I have added the 12 attachment
holes to the hull sides (some photos show the hinges still att attached to
the vehicle). The other improvements are The
mudguards were to be left off the vehicle. I have added the 12 attachment
holes to the hull sides (some photos show the hinges still att attached to
the vehicle). The other improvements are
-
Storage box hinge scratch build from
lead foil
-
Storage cover sides re-defined with
plastic strip
-
Storage box latch brackets added from
thin fuse wire and attachment chains added
-
Numerous bolt head replaced
-
Velinden mine rack added
|
Hull Front
|
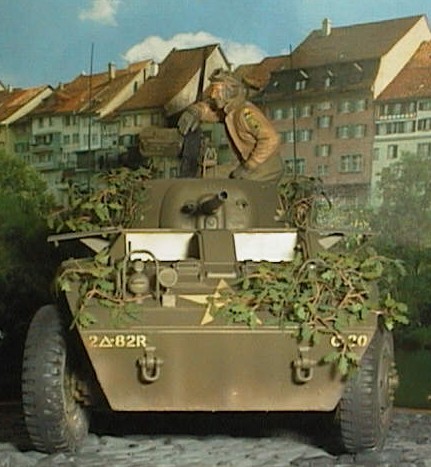
The front of the vehicle had a number of additions including
-
Verlinden headlight guards; and small
canisters added to the sides of these guards as per all reference
photos
-
Verlinden front armored guards thinned
down and 5 thou plastic card added to the rear in order to give a
stepped profile
-
Top hatches replaced with 10 thou
plastic card and wire handles added
-
Weld seam added to front plate.
-
Siren mount scratch built.
|
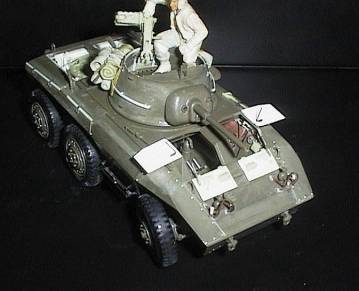
Turret
The turret had the following detail added to it
-
 20
tie downs were added from micro rod 20
tie downs were added from micro rod
-
Turret thinned and leading edge added to
turret lip
-
New 50 CAL Machine gun mount added
-
Main gun detailed as per ref various bolts
ect added
-
Main Gun has had the addition of the
Verlinden "shell bag added". This bag was hollowed out and
detailed with spent shell casings
-
50 cal Machine detailed, note hollowed out
cooling jacket, tie chains etc
-
Turret bracket re-made from plastic
strip.
-
Sight housing added to inside turret
-
Turret shells modified and Verlinden shell
brackets installed.
-
Bed rolls manufactured from Milliput and
added with straps made from Tamiya Masking tape.
Interior
The interior was improved in the following ways
-
 Verlinden
Set added of this I improved the set in the following ways Verlinden
Set added of this I improved the set in the following ways
-
Radio detailed and wires added
-
Cabling in Vehicle added
-
Various details added to give it that
"lived in look"
|
Turret
Ring
This was improved by the addition of small bolt heads around the base then
painted white. The turret traverse numbers were then added by railroad decals of
the appropriate size and shape.
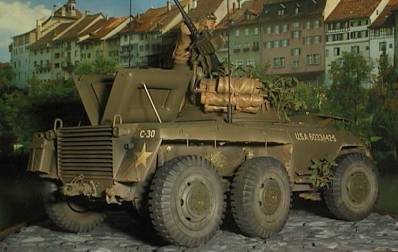
The vehicle represents one of the many found in Europe at around the end of
World War Two.
Model, Text and Images Copyright © 2000 by Luke
Pitt
Page Created 07 June, 2000
Last Updated 26 July, 2007
Back to HyperScale
Main Page
Back to Features Index
|
 Home
| What's New |
Features |
Gallery |
Reviews |
Reference |
Forum |
Search
Home
| What's New |
Features |
Gallery |
Reviews |
Reference |
Forum |
Search