Home
| What's New |
Features |
Gallery |
Reviews |
Reference |
Forum |
Search
Home
| What's New |
Features |
Gallery |
Reviews |
Reference |
Forum |
Search
|
|
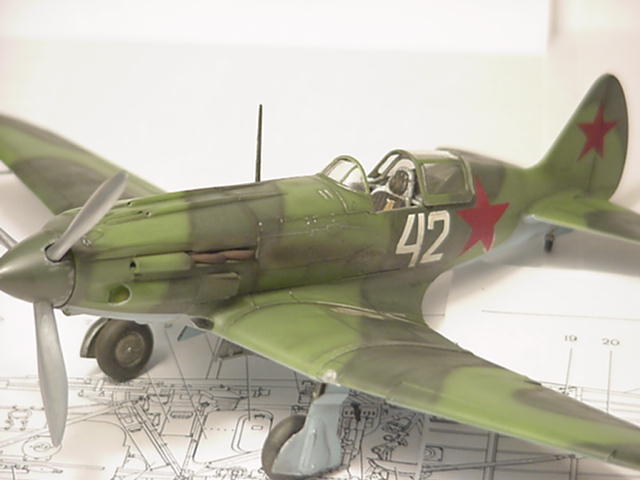
MiG-3 by Steve Mazzarelli
The MiG-3 was built to meet a Soviet Air Force requirement for a high speed, high altitude interceptor. capable of very good performance above 16,400 feet (5,000 meters). The MiG was at a distinct disadvantage at lower altitudes, where the primarily tactical airwar on the Eastern Front was fought. It is interesting to note that the MiG-3 had better performance than the 109E at height, and on par with the famed 'F' model. Armament was light, consisting of two ShKAS 7.62mm machine guns and a UBS 12.7mm HMG. The UBS is said to have been very effective, nearly approaching the contemporary 20mm cannon then in use. The MiG-3 was produced in many variants, but two types predominate. The ICM kit represents the later variant with a slightly longer fuselage, engine cooling louvers deleted, more prominent gun covers and other minor details. The Classic Airframes kit represents the early variant.
ICM have already come to the rescue of modellers wishing to make Soviet fighters of WW2 with their earlier releases, and this kit adds to their good reputation. The fine panel lines and attractive outline of the Mig-3 are captured well. I have not measured the kit, and I don't care to, as it looks good to me. The cockpit is nicely detailed, with a few exceptions that I'll discuss later.
The decals are extensive and include 8 different machines - 4 dark camouflage and 4 winter schemes. I wanted to make a summer scheme, so I chose 'white 42'. One issue needs to be addressed here: 'White 42' is an early variant. I know some will cringe, but I wanted to a dark color scheme, and this looked the best. Actually, there is only plane in summer colors that is a late variant. As far as I am aware, most of the winter types are later types. As I'm in the confessional, I'll also say that the red stars on the fuselage are too big, and the camouflage pattern looks a bit different to the real aircraft. I will just have to say this was a later incarnation of 'white 42'!
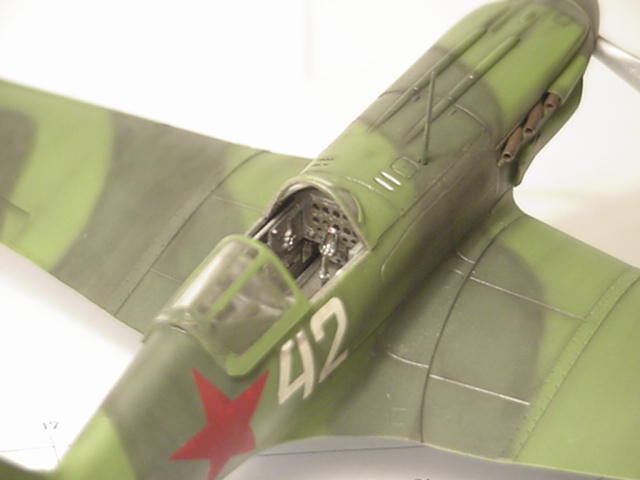
I began with the cockpit. This is well detailed with separately molded duraluminum tubing and other nice details. I did not like the seat as it seemed too angular and thick to me. I had old HitKit vac Mig-3 on hand and I used a few of the resin and etched parts from this. I replaced the seat and the instrument panel. I had to sand down the control surfaces before commencing with the major assemblies. These required considerable work, as the finish is simply atrocious! A bit of patient sanding left a much more appropriately subtle surface texture. The fuselage goes together well. There were no problems fitting the cockpit at all.
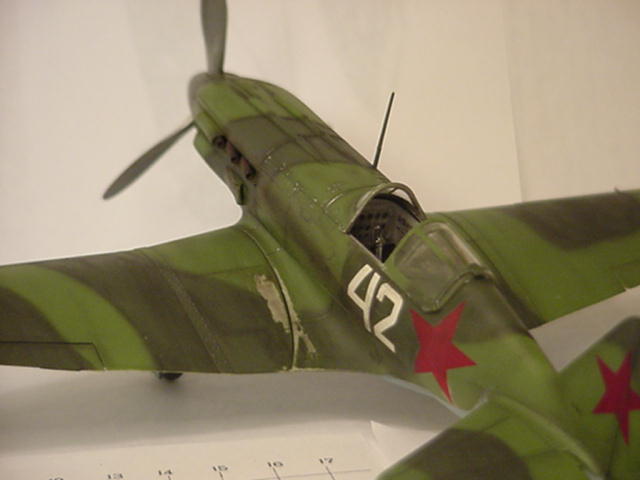
The wing to fuselage fit is, conversely, rather fiddly. I found that a little patience, some sanding, and a lot of dry-fitting was needed. Putty was used in a few spots, primarily on the lower lower fuselage/wing join. Again, dry fitting, and a bit of sanding goes a long way here. The rest of the kit went together quite nicely. The landing gear was detailed with wire for the brake lines, and the wheel covers were resin parts from the Karo-As/Hit-Kit MiG as I found these to be more accurate and detailed. I chose not to install the engine, as I read here on HyperScale that the cover does not fit when it's installed!
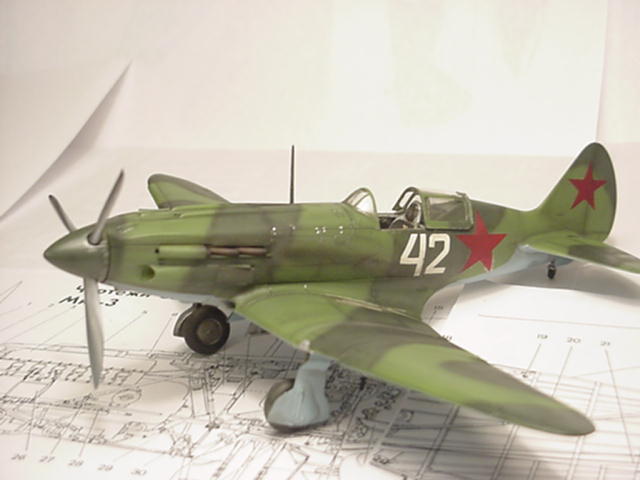
I find the colours on Soviet aircraft to be very subjective so I always mix my colors. The problem is compounded by the fact that I sometimes (as in this case) don't keep track of the actual colors or mixing proportions! Well, I'm not too worried as the Soviet paint stocks varied greatly. Other variables such as weather and unit preference added to the variety. I try to capture the image in my mind's eye, and that's good enough for me! I airbrushed whole top in the light green color, followed by the darker green (same color plus dark grey). The bottom color is Aeromaster Russian Underside Blue. I then proceeded to highlight all the panel lines with a sharp pencil. I find this is the easiest method, as any mistakes can be erased quickly. I also added a few panel lines not included in the kit. Once this is done, I move to my favorite job - one that I feel adds a 3D effect to the whole project.
I use two or three sizes (size 2-4) of flat shading brushes to apply dry pastels to all the panel lines. I also apply a dark color to the soft outlines of the camouflage. I then lightly smudge large areas of the painted surface to give the color a faded and uneven tone. This must all be done very lightly and in successive steps, as any attempt to shade the kit in one go will result in a heavy handed look. Gradual application and patience will really pay off here! Another tip about panels - I find that all of them have to be shaded, some less others more, to give the effect a universal look, and thus less noticeable. The kit then is sprayed with a light coat of Kleer. This ensures that the pastels are sealed nicely. A healthy coat of Testors Dullcote comes next, again in light successive coats, allowing plenty of drying time between applications. I sometimes apply the Dullcoat with a brush, but it can be airbrushed too. I find this gives the kit a nice even finish, covering the invariable mistakes in the paint-job.
The kit decals are okay, but a bit dull and somewhat translucent. I had to paint over the red stars to give them a bit more life. The stars with white outline were a bit off register (thus the reason I built 'white 42'). I suggest using the Aeromaster MiG decals, or anything from the parts box.
This is a very nice late version MiG-3 by ICM. If you have the Classic Airframes' MiG and you don't think you'll build it, use the interior bits. They are better. Maybe someone will even produce a resin/etched update - who knows?
Model, Images and Article Copyright
© 1999 by Steve Mazzarelli Back to HyperScale Main Page Back to Features Page |