 Home
| What's New |
Features |
Gallery |
Reviews |
Reference |
Forum |
Search
Home
| What's New |
Features |
Gallery |
Reviews |
Reference |
Forum |
Search
|
|
|
A Modeler's Evolution Part Four by Russell M. Field
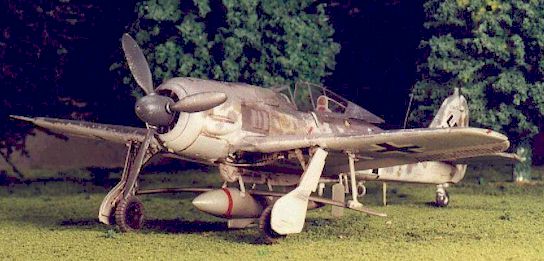
I decided after finishing the first three planes in this series that I needed a little break from AMS (Advanced Modeler's Syndrome). I wanted to build something OOB (Out Of the Box). I'd bought two of the "new" Revell/Germany 1/72 Focke-Wulf Fw 190A-8 with the Hagelkorn glidebomb (kit #04135). The cockpit is fairly nice, so I thought this would make a good OOB build with just the addition of a vacform canopy and photoetched seatbelts. At least that is what I intended.
I won't cover all the work in detail here, since two other articles have been written on this project - one on preshading and the other on scratch-building the wheel wells. Reference these articles on Hyperscale for those aspects of this build. I will, however, show some key comparisons between the first one of these I built and one I forced myself to build strictly OOB (remember I said I bought two?). I'm still working on my photography. It's getting to be as much fun as the modeling!
This is a pretty nice little kit, especially for the money (US$6 in mid-1999). There are a few issues with it, though: If you're fairly picky, the nose shape is not quite right. Not much to do about it, and it looks OK to me when built up (still looks like a 190); The landing gear, if assembled per directions, does not have the characteristic Butcher Bird "pigeon-toed" stance. This takes just a little minor surgery; The wing mounting hardware for the glide bomb is inaccurate; The kit's belly rack is probably not entirely correct. It extends aft far enough to cover the underside access panel, which I suspect it should not The pilots head armor is molded as part of the fuselage, which means that the canopy cannot be posed open without modification; The wheel wells apparently represent the bulk of 1/72 190's in that there is a solid wall between the wells and relatively little detail (obviously a production consideration, but it seems to me it would be relatively simple to correct). I really was going to build this OOB (honest!) until I found out about the wheel wells. I looked at several articles on HyperScale, asked a bunch of questions and got a slew of answers from helpful HyperScalers; curiously, detailed pictures of 190A wheel wells are not plentiful, at least in the more common references I have. With the help of a host of HyperScalers I finally understood (I think) what the wells should look like. The difference between the OOB representation and the reality was just too much to bear … I simply had to rework the wheel wells - just the wells - nothing else.
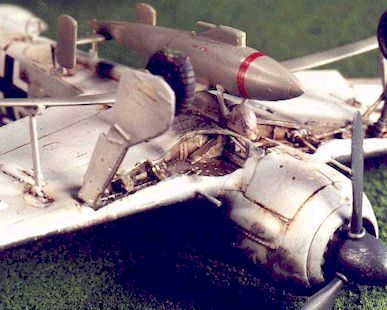
Then, there's the glide bomb. The kit wing struts are GROSSLY over-simplified, and not even an acceptable approximation of the real things. The curious part is that the real hardware is very simple to duplicate and could be molded just as easily as the "stick figure" parts supplied in the kit. Obviously, that had to be fixed … I used ˝ half round, channel and strip styrene to make the struts. So my relaxing OOB project wasn't, exactly. When the smoke cleared and the dust settled, the major features and modifications included:
The biggies on this one were the wheel wells (again, refer to the related article elsewhere on Hyperscale) and the glide bomb mounting. In reality, there was more time spent in research and understanding the real configurations than in actually doing the modeling work.
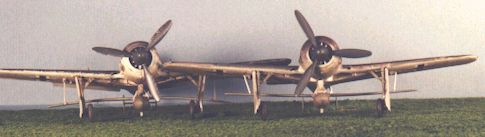
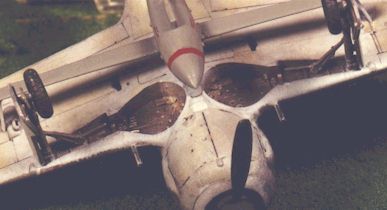
Here are a few pictures comparing the OOB with the "NOT OOB". First, a head-on view showing the OOB on the right with the straight bomb wings and perpendicular landing gear:
Now the wheel wells (guess which is the OOB!)
:
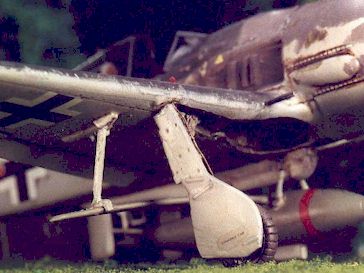
And the glide bomb hardware:
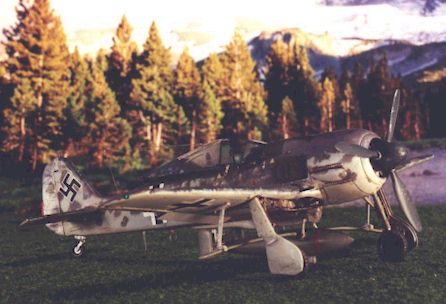
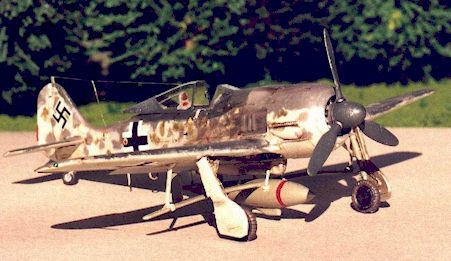
This plane is the subject of the Preshading article on Hyperscale; the main paint job is described there. That leaves the mottling. This was my first mottled model ("modeled mottle"?). I used paper masks cut from "right-sized" copies of the kit instructions; the results were less than spectacular and rather than repaint the sides I decided just to touch it up with MicroBrushes (BTW, these things are GREAT - you gotta try some!) This left a rather hard-edged mottle - not bad, but not the soft, feathered look I wanted. The wheel wells were treated to a two-course meal of Testor's Model Master Metallizers - a base coat of Non-Buffing Aluminum followed by almost a dry-brush of Brass. I used Testors Metallizer Sealer to get a gloss finish for decalling (thank you Mr. Ritger!), and it worked great! However, the kit decals (printed by Revell/Germany) were … how shall I say this … "somewhat less than anticipated in the application". They were a little difficult to get off the paper, and once on the model surface I found it virtually impossible to adjust their position. Fortunately, the markings for the plane I chose were extremely simple and I was able to use SSI national markings and stencil decals instead (no problem whatsoever with these). I don't know if this was just me or if it's common in R/G kits; makes me wonder about how the decals in the P-51B kit will behave…
The aerial is 2 lb. monofilament fishing line. Its installation had to be coordinated with the canopy installation, as it was threaded through holes drilled in the canopy and head armor, glued to the rear deck, then pulled back and attached to the rudder horn after the canopy was glued in place. When dry, I tightened it with the old "match from three feet" trick. The final touch was the wingtip nav lights. They're really too small to do much with in 1/72, so I used a pin to paint them white, then chrome, then clear red and green. The result is quite good - clearly defined and distinct, but not overpowering or bright.
Some lessons from this project: Once again, the scale effect was reinforced. There's one major scale error, and (of course!) it's in the most noticeable spot. I'm talking about the head armor. Despite a lot of thinning it still looks too thick. Also, the angle and height are all wrong for a canopy in the open position. The use of Bare Metal Foil under the paint job for simulating paint chipping (see the Preshading article) was not entirely successful; I will, however, try it again. The paper masks did not work well this time. While I'm practicing my airbrush mottling technique, I also intend to try this approach again. The preshading is kind of tricky in smaller scales from the standpoint of completing the job. The top coats must be thin, and you can't add a bunch of effects on top or you'll lose the preshading. Kit decals can be unreliable. Whenever possible, either assure yourself of the quality of the kit decals or make sure you have (on hand or access to) aftermarket decals in a scheme you want. This would be particularly heartbreaking if you bought the kit because of the decals, and they turn out to be … less than anticipated … A final clear coat can really help a model's appearance. I had some trouble with surface texture on this one; a thin coat of Model Master flat overall just kind of pulled the whole surface together and gave the plane a more unified look. On photography: Some of the "completed plane" pics in this article are taken with a diorama-type background, but one uses a calendar page as a backdrop. The calendar trick works really well if you have the right picture and coordinate the lighting effects! Next up (I think; I've got three in process): Helmut Wick's Me 109E-4, made from the 1/72 Academy kit (the one with the exhausts molded BACKWARD)! Article, Model and Images Copyright © 1999 by Russell
M. Field
|
 This
one only took me ~3 ˝ months - again. Sometimes it's hard to say how long I
spend on a project because I'll make some progress then set the model aside for
days/weeks/months. I'd already started the cockpit a while ago, then picked it
up again for some variety. Though I started with all good intentions to build
out-of-the-box, it wasn't long until the semi-dormant AMS gene kicked in.
This
one only took me ~3 ˝ months - again. Sometimes it's hard to say how long I
spend on a project because I'll make some progress then set the model aside for
days/weeks/months. I'd already started the cockpit a while ago, then picked it
up again for some variety. Though I started with all good intentions to build
out-of-the-box, it wasn't long until the semi-dormant AMS gene kicked in.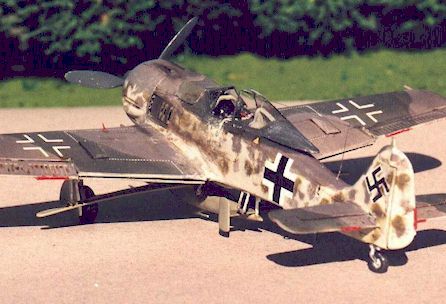 My major
source for research data was HyperScale visitors. My primary published
references included the Squadron-Signal Hurricane In Action (the older one), the
Squadron/Signal Walkaround for the 190D, and the Profile book.
My major
source for research data was HyperScale visitors. My primary published
references included the Squadron-Signal Hurricane In Action (the older one), the
Squadron/Signal Walkaround for the 190D, and the Profile book.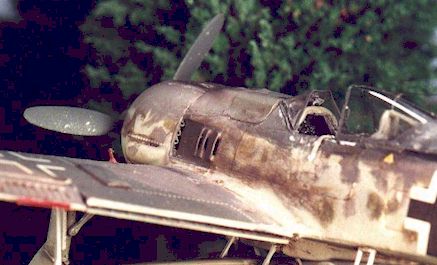 Then,
of course, the solid cooling louvres would be quick and easy enough to open up;
and add a few hypo tubes for exhaust stacks, that's all; and of COURSE, the guns
- just a couple of tubes there; uh - oh, I think the AMS gene is waking up …
Then,
of course, the solid cooling louvres would be quick and easy enough to open up;
and add a few hypo tubes for exhaust stacks, that's all; and of COURSE, the guns
- just a couple of tubes there; uh - oh, I think the AMS gene is waking up …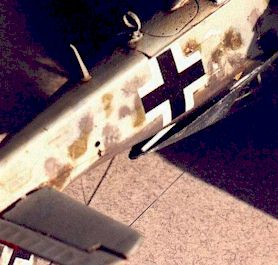
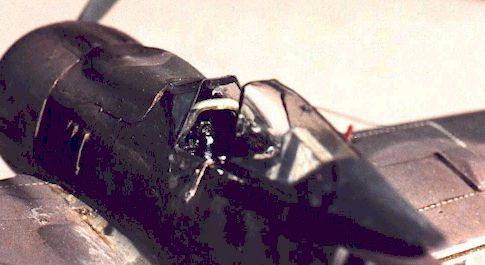
 Exhaust
stains are a combination of drybrush and pastels. The gunpowder stains are soft
pencil lead smudged with a blending stick. The plane itself shows fading and
wear, but little dirt. The logic was that this was likely an active plane
withdrawn from service to be used as a test bed; as such, with rear echelon
attention and occasional visiting dignitaries, one might expect it to be
somewhat worn but not real dirty.
Exhaust
stains are a combination of drybrush and pastels. The gunpowder stains are soft
pencil lead smudged with a blending stick. The plane itself shows fading and
wear, but little dirt. The logic was that this was likely an active plane
withdrawn from service to be used as a test bed; as such, with rear echelon
attention and occasional visiting dignitaries, one might expect it to be
somewhat worn but not real dirty.