![]()
Naboo N-1 Fighter
by
Floyd S. Werner, Jr.
|
Naboo
N-1 Fighter |
I n t r o d u c t i o n |
When Episode 1 was released early this year, Anakin Skywalker was found hiding out in the sleek and nimble Naboo N-1. More colorful than any previous starship in George Lucas’ universe, the shiny chrome and sleek yellow fighter looked more like a manta ray than a fighter - unlike anything we’ve seen before.
The N-1was originally designed as a ceremonial fighter but was quite
capable of holding it’s own with proton torpedoes and lasers.
It had an R2 unit behind the canopy and an autopilot that allowed Anakin
to get to the battle.
Look, I made it two whole paragraphs without one reference to a German color or airplane!
T h e K i t |
The 1/48 scale MPC model is a Snap-Tite kit molded in yellow, chrome
plating, plus some clear parts. Construction
is fairly easy. After all it is a
Snap-Tite. The cockpit is a
one-piece insert that just cries out for some detail work.
I easily let that feeling pass. The
cockpit tub has a hole for the pilot. A
decent looking pilot figure is provided. Be
careful to make sure that he sits firmly in the seat otherwise his head will hit
the canopy. I painted the cockpit
light ghost gray and drybrushed some dark gull gray.
The seat cushion was painted black.
The finished assembly was attached to the top half of the fuselage and
get ready to close it up.
 Before you
can do that you need to build the engine exhaust tips. These are three-piece
assemblies that require a little bit of putty, but look very nice when
assembled. Make sure that they are
straight because there is no way to adjust them later.
Put these exhaust tips in the fuselage top and seal with the lower half.
Hint - strip the chrome now if you are going to do it at all.
I used fingernail polish remover (acetone) for this task. Stripping the
chrome allows you to fill as necessary.
Before you
can do that you need to build the engine exhaust tips. These are three-piece
assemblies that require a little bit of putty, but look very nice when
assembled. Make sure that they are
straight because there is no way to adjust them later.
Put these exhaust tips in the fuselage top and seal with the lower half.
Hint - strip the chrome now if you are going to do it at all.
I used fingernail polish remover (acetone) for this task. Stripping the
chrome allows you to fill as necessary.
The bottom snaps into place (neat concept Snap Tite).
The front of the fighter consists of a chromed piece of plastic. This attaches to the top fuselage and the bottom wing assembly. Would it really matter if it fit real well? Well it fits real nice. Short of painting the model is done in four easy steps. Of course if you really want to build it properly there is a seam across the top hull that will need to be filled but that is really about it. All other seams appear on natural panel lines, like engine access panels. The canopy just snapped into place (wow). A touch of white glue and I was ready to paint.
P a i n t i n g a n d D e c a l s |
The yellow paint should be applied first followed by masking for the chrome. I painted mine a Testor’s Model Master deep yellow and chrome. Next time I would use a color that was a slight paler. The chrome didn’t give me the look I was looking for, but it was good enough. I have, since taking the pictures, got some Bare Metal Foil for the front. I’m sure this will give a better shine to the front.
After
a coat of Future the model is ready for decals. Yes,
there are decals in this kit. They are located behind and below the cockpit.
They fit well
Weathering was achieved using pastels, and then I added the gun and engine exhaust stains. I sealed it with a flat coat. Don’t forget to add the R2 unit. That brings this to a conclusion, sort of. I have Bare Metal foil to redo the front, but the photos were taken before that was applied.
C o n c l u s i o n |
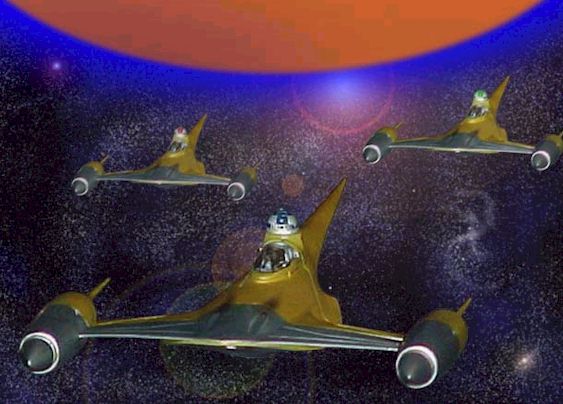
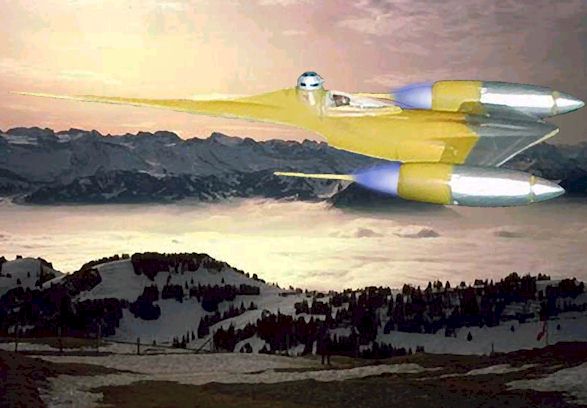
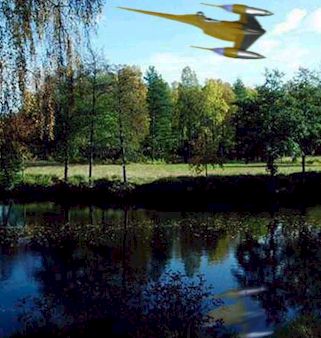
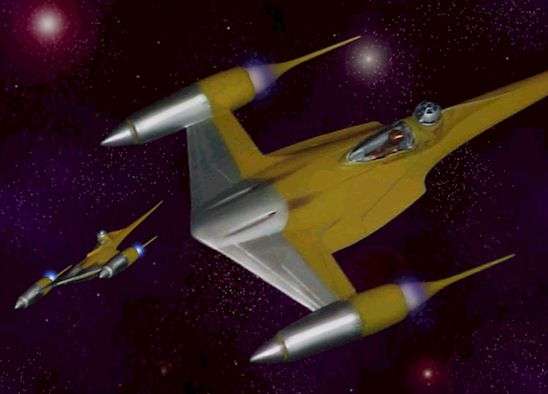
I took the photos but the computer artistry is done by Don Musel from
Boeing. While the Yellow Manta Ray
shape looks neat it is difficult to photograph. Don has been experimenting with Adobe PhotoShop.
The results add a lot to the model.
In conclusion, this kit is easy and fun to build and paint.
It is what every model should be, fun.
Floyd S. Werner, Jr.
IPMS #26266
Back to HyperScale Main Page
Back to Features Page