Home
| What's New |
Features |
Gallery |
Reviews |
Reference |
Forum |
Search
Home
| What's New |
Features |
Gallery |
Reviews |
Reference |
Forum |
Search
|
|
|
Curtiss P-40B by
Randy Lutz
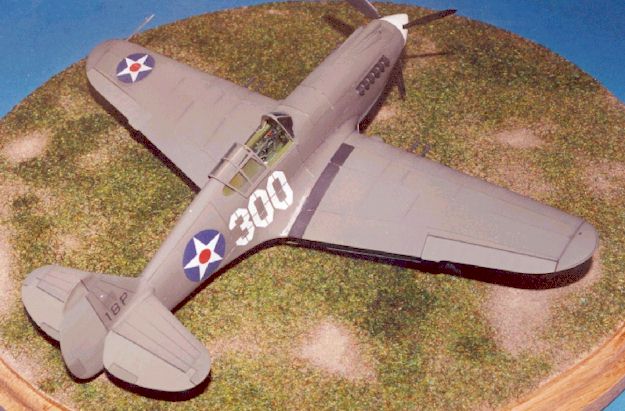
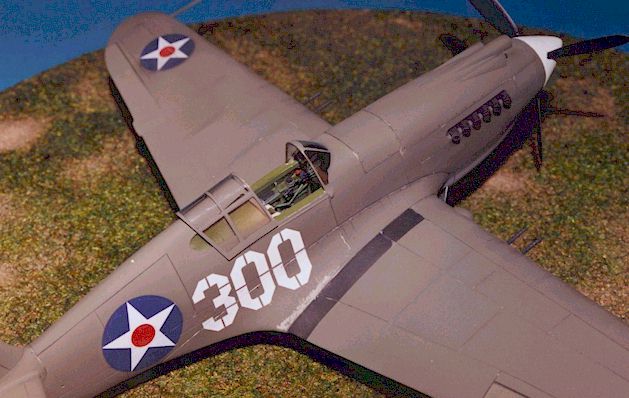
Improving Hobby Craft Canada's 1/48 Curtiss P-40B using the KMC resin cockpit set and the Eduard photo-etched detail set. The model is finished in the markings of a machine from the 44th Pursuit Squadron, 18th Pursuit Group, based at Bellows Field, Hawaii during December, 1941.
I have no idea if the P-40 in this article ever got airborne during the attack on Pearl Harbor, or if it even survived past December 7. I have located only one photograph which the caption has dated around December 1941.
The "Pearl Harbor Defender" is one of three Hobby Craft Canada kits in the Curtiss Hawk 81 series. Upon first inspection of the kit, I was confused over the number of parts that did not appear on the instruction sheet. After a little research it became evident that Hobby Craft has utilised some of the sprues from their Curtiss Hawk 75 series of kits which contained common parts. As a result you get an extra tail wheel, propeller, gun barrels and exhausts. In keeping with the newer Hobby Craft releases, the P-40B has fine recessed panel lines, thin clear parts, and flattened tires. The cockpit detail, while not extensive, is more than acceptable out-of-the-box and consists of eight parts. I did not notice any major errors in the kit other than the area behind the cowl flaps. Some publications have suggested that the leading edge of the wing sits too high. That may account for some of the problem, but I am not so sure that is the only issue. In addition, I feel that the central bulge on the underside slopes upwards too much at the front, resulting in an overly large gap between the cowl flaps and bulge.
Aside from that error, it is only small things that need correcting, such as adding the scribing on the tail planes and on the main wing for the wing gun bay covers. Also the vertical braces in the rear quarter windows are angled, whereas they should be straight up and down, as well as drilling out the two fuel access openings in the left rear window. Hobby Craft provides decal choices for 4 aircraft, all of which are Olive Drab over Neutral Grey in keeping with the Pearl Harbor theme. These are a major improvement over their earlier attempts and feature perfect registration. Painting guidelines are keyed to Floquil, Humbrol and Testors Model Master, but as is annoyingly common with Hobby Craft kits, no internal painting details are provided. While this may not pose a serious problem for those of us who have been building for a while, I pity the poor novice or youngster who aspires to finish their model as accurately as possible.
Following the instructions, the propeller was next to be assembled. Hobby Craft splits the spinner in two with the joint running down the middle of the prop openings. This is incorrect, as the seam should be in front of the blade cutouts. To remedy this, glue the spinner halves together without the blades, sand the joint and scribe a new line just slightly ahead of the glue joint. Afterwards, the spinner was airbrushed gloss white and the prop blades were finished with Metalizer Non-buffing aluminium on the front and black on the rear faces. Note that there are no yellow tips on the propeller blades. The instructions suggest adding the yellow tips, but based on an excellent photograph on page 22 in the "P-40 Warhawk in World War II Color" publication by Jeff Ethell, it is evident that they were not applied to natural metal props.
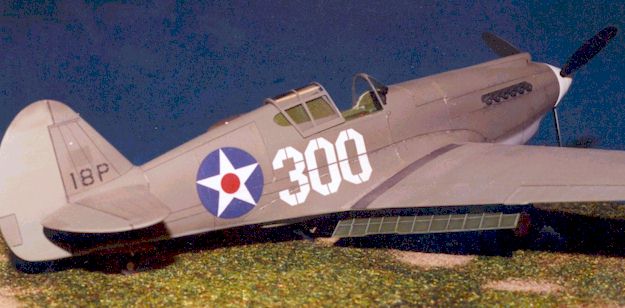
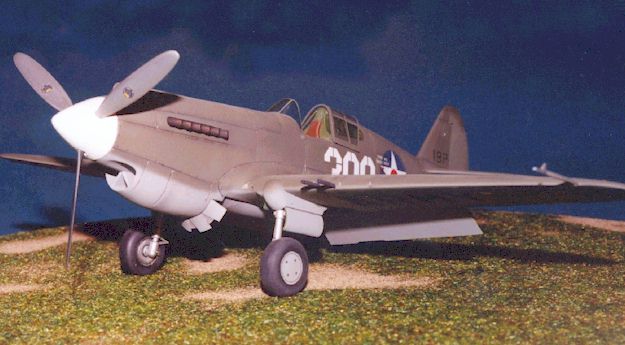
When it came time to assemble the wings, I wanted my P-40 to be a little different from most others. Thanks to the "good folks" at Precision Parts, I was able to incorporate a nice set of photo-etched landing flaps from set number 48-195. Installation of these units is virtually trouble-free, and they fit perfectly. The only things you might wish to add to the flap assemblies are the actuating rods and aileron cables which run spanwise. Prior to assembling the top and bottom halves of the wing, the shell ejection ports were hollowed out from the inside and the landing light drilled out in preparation for an M.V. Products lens which was added after all the final painting was completed. The completed wing was fastened to the fuselage, and it was at this point that I had to remove a small amount of plastic from the left wing fillet. If not done, the resulting dihedral will be too flat and uneven from one side to the other. The windscreen was glued in place, the seam filled with CA glue and then sanded and polished to blend it into the fuselage. To install the rear quarter windows, a slightly different approach was selected. They were first glued in using a thin bead of white glue as the main adhesive. Once dry, they were coated with cyanoacrylate (CA) glue and then sanded and polished to blend them into the rear turtledeck. Initially I had tried, on three separate occasions to glue the windows in place, using only minute amounts of CA, but in each case the inside of the windows fogged. Once the clear parts were installed, a set of E-Z Masks were used to mask the windows prior to painting. I found it necessary to trim the E-Z Masks which were to be applied to the rear quarter windows, as they are produced to the exact dimensions as the clear part, instead of being slightly undersize to allow for the window framing. A prominent feature on P-40s were the engine cowl flaps, which were usually open when the aircraft was on the ground. Hobby Craft's attempt at reproducing the cowl flaps is a little less than desirable, but again thanks to the Eduard set, a more refined set of open flaps can be added to the model. To augment these flaps, I added the two main actuating rods to the centre cowl flaps and the four smaller rods which link the centre flaps with the outboard flaps. For those modellers who would like to have a nicer set of closed cowl flaps, pick up Eduard set # 48-213 for the P-40K. The flaps on this set are identical to the flaps on the P-40B set, but they are supplied in both open and closed configurations. One drawback to using the open photo-etched cowl flaps is the impression of an exaggerated gap which results between the flaps and the wing bulge. This all goes back to my earlier comment about the angle of wing incidence/undersize fuselage bulge. To remedy this, I added some sheet styrene to the fuselage to correct the overall appearance in this area. The landing gear struts were detailed with pieces from the Eduard photo-etched set and then they were painted Testors Metalizer Steel, and then given a dark wash. The tires were first painted Testors Rubber, then black was airbrushed on the tread portion, and this was followed by various shades of grey dry-brushing.
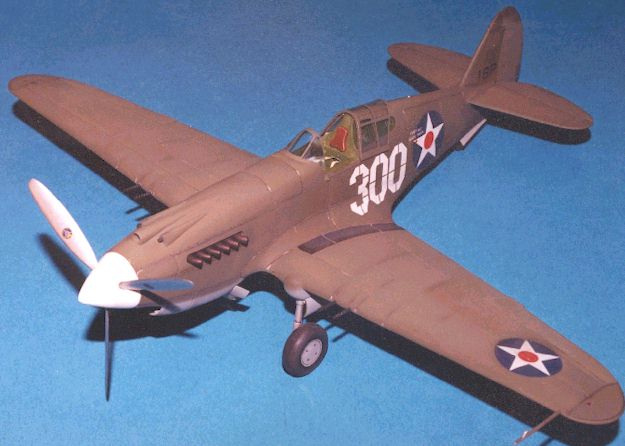
It was time to paint the camouflage for this Hawaiian P-40B. Apart from a bucket of white paint, there is nothing more boring than the U.S. Army Air Corps Olive Drab over Neutral Grey. In an attempt to add some life to the Olive Drab, I first airbrushed the fabric control surfaces with Xtracolor X113 Faded Olive Drab. The control surfaces were then masked off, leaving the metal trim-tabs exposed.
This was followed by a mixture of X112 Olive Drab ANA613 and X113 Faded Olive Drab which was sprayed on the lower sides of the fuselage. After this, another mixture, but lighter than the previous was airbrushed on the mid-point of the fuselage sides and the leading edges of the wings. Finally, a lighter yet mixture, but not as light as X113 Faded Olive Drab was applied to all the surfaces viewed directly from above. Lastly, some small areas on the vertical fin and rudder were sprayed with X112 to represent areas that were touched-up on the original. This was all based on the only photograph of this aircraft I was able to locate, which can be found on page 28, in the Ian Allen publication "P-40 Hawks at War". Now the easy part! The under surfaces were finished in Xtracolor X133 Neutral Grey FS16270.
The quality of the Hobby Craft Canada decals was excellent. They went on with no silvering, the whites are opaque and they responded well to small amounts of Solvaset. The only drawback to the kit decals was the lack of stencilling. I added the most prominent of the stencils, which was the "First Aid Inside Door" from an old Superscale sheet.
After the decals had set, I applied a dark wash to all panel lines followed by some chipping using a mixture of Testors Silver, Winsor and Newton Raw Umber oil paint and turpentine. Next, a few coats of Testors Dullcoat were airbrushed over the model to provide a flat finish and give some tooth for the pastels to adhere. All the panel lines on the underside were accentuated with a grey chalk pastel, darker than the underside Neutral Grey. Black pastel was sparingly applied to the wings immediately behind the gun barrels and shell ejection ports. A very dark grey was added to the underside of the fuselage behind the radiator outlet and the wheels were first dusted with medium grey and then a light tan colour. The upper surface is where you can really try your hand at weathering with pastels as Olive Drab was notorious for fading, bleaching, or just changing colours. I wanted to give the appearance of an aircraft exposed to the sun, but not weathered to the extent of an aircraft that has seen years of service. First, the panel lines running perpendicular to the line of flight were given a light olive pastel, applied behind the lines and drawn back with a wide sable brush. All panel lines which run in the same direction as the fuselage were picked out with a dark grey. The key with the dark grey pastel is to use it in moderation. The intent is to have the panel lines more noticeable, but at the same time, you do not want them to stand out like a two-lane blacktop running through the desert. Then an olive coloured pastel, which is lighter than the upper surface paint, was scrubbed into the surface of the model in a circular fashion, doing each panel one at a time, trying to avoid the panel lines. A soft, muted effect is what you are striving for, and not something that resembles your grandmother's patchwork quilt. This was followed by a lighter yet shade of olive scrubbed into selected areas of high wear or sun exposure. Once finished the overall effect is very convincing, but at first glance, is barely discernable.
The last steps involved painting the navigation lights, installing the landing light and placing the sliding section of the canopy on the fuselage. Extreme care must be taken when handling the sliding canopy, as it is very thin and has a small moulding defect which is all but invisible to the eye but will cause the canopy to split if too much pressure is applied. Actually, I broke my original sliding part and had to obtain a replacement from Hobby Craft Canada (no easy task).
I know a lot of people might prefer to build the old Monogram P-40B but, for me, the Hobby Craft kit is the way to go. While it does suffer from the cowl flap/bulge problem, it also sports scribed panel lines, a better interior, and does not have the proliferation of rivets found on the Monogram kit. Once finished, it sure looks like an early P-40 and can hold its own against the Monogram kit.
Article, Images and Model Copyright © 2000 by Randy Lutz
|
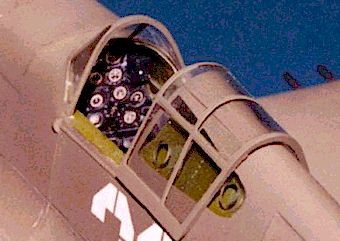 While
Hobby Craft has done a reasonable job at reproducing the cockpit details,
I felt it could stand some improvement. I therefore elected to add the KMC
resin cockpit set, #48-6006. This detail set provides a new seat with
seatbelts, floor, rear bulkhead, control column, rudder pedals, sidewalls,
instrument panel and headrest.
While
Hobby Craft has done a reasonable job at reproducing the cockpit details,
I felt it could stand some improvement. I therefore elected to add the KMC
resin cockpit set, #48-6006. This detail set provides a new seat with
seatbelts, floor, rear bulkhead, control column, rudder pedals, sidewalls,
instrument panel and headrest.
 All this
was done after the panel was painted black and dry-brushed with light grey. The
KMC lap belts were finished in tan and the shoulder harness was painted
off-white.
All this
was done after the panel was painted black and dry-brushed with light grey. The
KMC lap belts were finished in tan and the shoulder harness was painted
off-white.