Home
| What's New |
Features |
Gallery |
Reviews |
Reference |
Forum |
Search
Home
| What's New |
Features |
Gallery |
Reviews |
Reference |
Forum |
Search
|
|
|
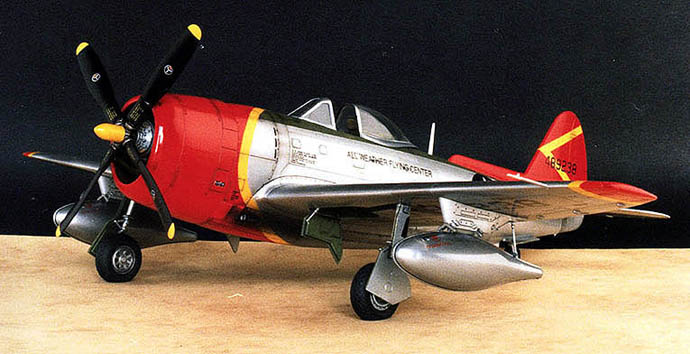
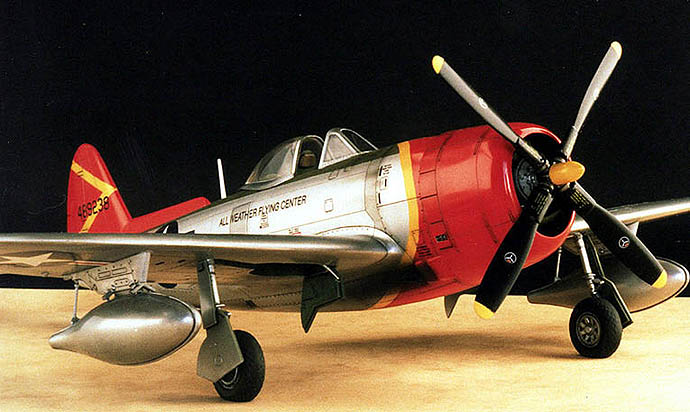
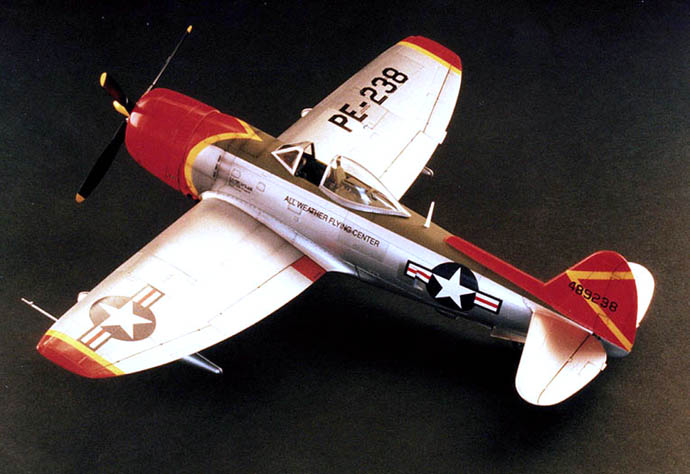
P-47N Thunderbolt by
Darren Mottram
Darren builds a late Thunderbolt using mainly Academy's 1/48 scale kit.
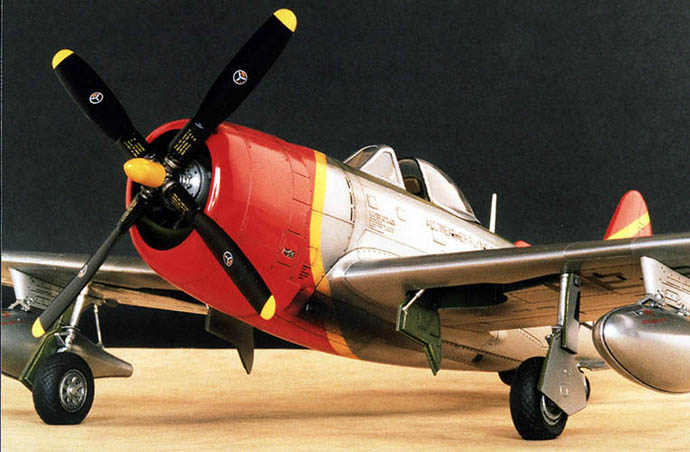
I built this kit at the same time as the Hasegawa Drone Hellcat featured in another article. The majority of the kit is the Academy offering but I chose to use many of the Pro-Modeller detail parts, having decided that (externally and quality wise) this kit just wasn't up to scratch compared to the Academy mouldings. As such, the cockpit (with the exception of the seat and straps), engine, prop, drop-tank support struts and wheels are from the Pro-Modeller version.
The exhaust louvers were also hollowed out, as these are moulded solid on the Academy kit. All interior surfaces were painted with a gloss Interior Green, a wash applied, matt varnished and then dry-brushed with zinc chromate yellow Details were painted as appropriate then a Light Grey dry-brush applied.
Construction proceeded normally up to the painting stage. As this was to be my first serious attempt at a natural metal finish, it was all a bit experimental from there on.
Once the kit was assembled I gave it a buff/polish with a buffing wheel in a Demel motor tool to polish out minor scratches. I then undercoated it with Humbrol matt white that was also rubbed smooth with very fine sandpaper when dry. All the non-silver areas were then masked up and sprayed. I deviated from the paint plan on the decal sheet by continuing the nose scallop under the fuselage to match the pattern on the upper nose. I did this because, from the way this scheme was applied to other aircraft, it seemed more likely than the solid red underfuselage of the instructions combined with a close examination of one photo that indicated that this might be the case. I also painted the wing tips red and yellow for the same reason.
These areas were then masked over when dry and the SNJ applied. Despite having read the directions for it's use both in the package and in modelling articles, I seemed to break most of the rules (as usual :-) )when applying the SNJ. I applied it as I would normal paint (heavier and in less coats than recommended) and found that this worked well. It went on like somewhat thinly mixed normal paint which allowed me to use it to fill some minor scratches and imperfections and provided a nice, even coat. Once this had dried for about an hour, as per instructions (gasp!), I applied some of the buffing powder in a couple of areas to test the effect. It came up very nice although it would have to be a very clean and polished aircraft to look that shiny as a model. Another experiment that I tried on the drop-tanks was the effect of buffing the paint with the motor tool. This in itself didn't work but when I then applied buffing powder to the now very smooth tanks, WOW! With a little buffing with a cloth they came up like chrome! They were so shiny that I had to apply another coat of paint to dull them back as they were way too shiny for this aeroplane (although it was clean, it wasn't polished). A bit of information to file away for later (I reckon you could do one of those highly polished warbirds with this method). Another new technique I decided to try was to varnish the kit. One thing I thought this might do would be to reduce the effect created by just buffing panels for different tones so I mixed a little Testors Metaliser (can't remember which one but it was a bit darker) with the SNJ and, by using Post-It-Notes to mask, created varying shades of panels by applying different amounts of this new colour. I didn't go too overboard as from the two photos I had of this aircraft (sent to me by Corey Jordan after a request on the net) it didn't have a lot of obvious tonal differences. Although the application of a varnish over the top (I used Floquil Crystal Cote) did dull back the brightly buffed areas slightly, there was still a tonal difference between buffed and un-buffed areas. This, combined with the panels tinted with Metaliser, gave an effect that I was very happy with.
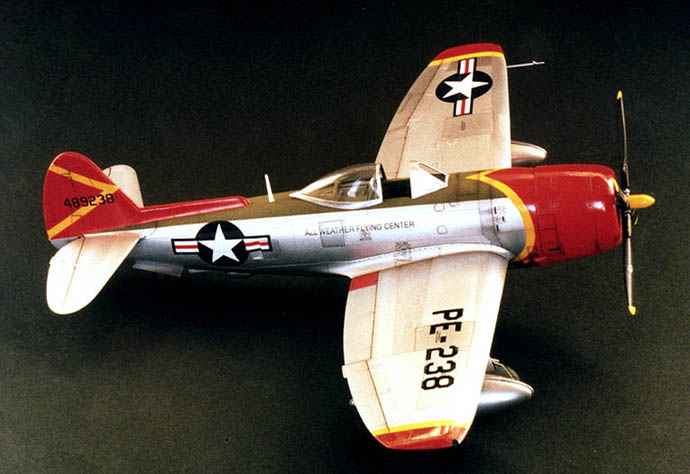
I continued as per a normal kit and applied the decals. Most of the stencilling is from the Academy Kit with a couple from Monogram. I thought it was a little odd that the stencilling from both kits had the same decal reference number for each item and that the solid red square decals for the flap root no-step areas from both kits broke up as soon as I tried to move them off their backing papers!
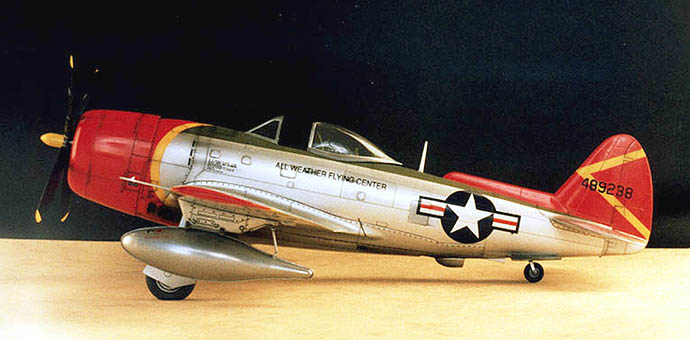
The photos that were sent to me suggested that there was some form of lettering under the port wing, part of which was visible on the gear door. After a bit of investigating I came up with the fact that, just after the war, the "Buzz Code" for P-47s was "PE-XXX". This fitted with the location and shape of the little bit that was visible so I went with it. The numbers and letters were from spares sheets (each of the letters "PE" of the buzz No are made up of about six elements of numbers), the national insignia are from a recent Aeromaster sheet and the "All Weather Flying Centre" titles are from the Ministry Of Small Aircraft Production sheet for this aeroplane (#4854). As the decals were all thin and had been applied over a gloss coat, the carrier film all but disappeared.
Washes were applied to the panel lines (using shades of grey and black acrylics) and Tamiya enamel Tamiya Smoke was sprayed around the engine panels and underfuselage to represent grime. Everything was sealed with another coat of gloss varnish. Differing tones of varnish could be used at this stage to provide further variations of metal tone and weathering. The Olive Drab area was given a matt varnish and exhaust staining applied under the fuselage using Humbrol enamels. The remaining masking was removed and all the final bits added to finish the kit.
When I am working on my next natural metal model I will paint the whole kit silver and just mask and paint over this for any non metal colours instead of masking and painting each separately as I did here (which created a lot of grief). The SNJ finish is durable enough to handle this (even more so under a coat of varnish). I was quite happy with the model and many people have commented favourably on the look of the finished kit, which has given me the confidence to have a go at other natural metal paint jobs in the future. Happy Modelling to all.
Click on the thumbnail to view the
image full-size.
Article, Model and Images Copyright © 1999 by Darren
Mottram
|