Home
| What's New |
Features |
Gallery |
Reviews |
Reference |
Forum |
Search
Home
| What's New |
Features |
Gallery |
Reviews |
Reference |
Forum |
Search
|
|
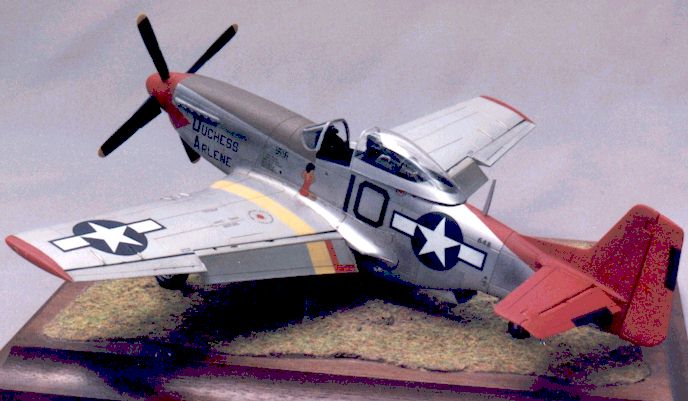
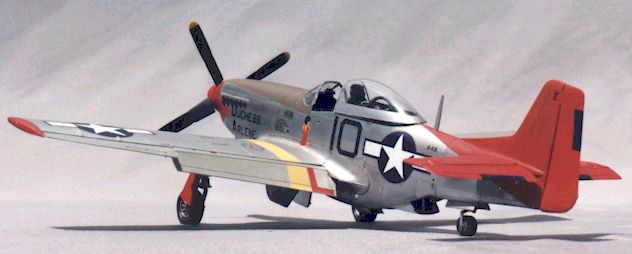
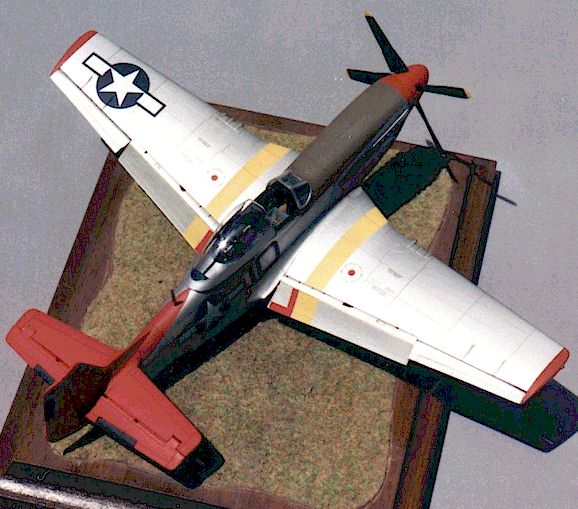
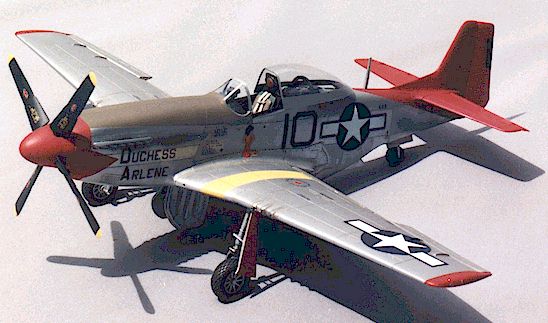
P-51D Mustang by Cameron Lynch
I built this model in early 1997 for a good friend who wanted a P-51D in the markings of the 332nd FG who have become famous the world over as the "Tuskegee Airmen".
For those not familiar with the Tuskegee Airmen's story here is a brief synopsis. Prior to an Executive Order in 1948 by President Harry Truman, the US military was strictly segregated by race. The 332nd was the first and last fighter group to see combat as an entirely black unit having seen action with the 15th Air Force in Italy. They were ably led by the redoubtable Col. Benjamin O. Davis who later became the first black General Officer in US history. In spite of racism, both subtle and overt, the 332nd became one of the best bomber escort units in the USAAF, with no bomber under their care lost to enemy fighter action during the war.
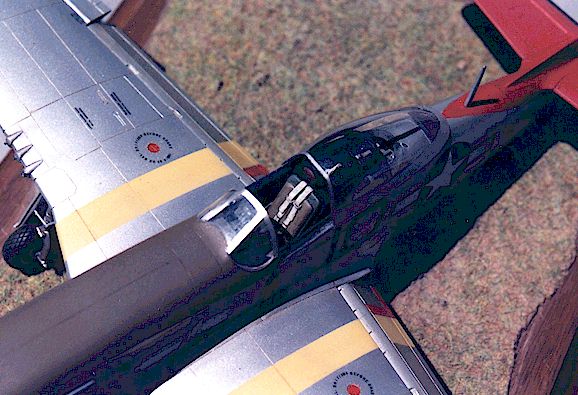
I began this project shortly after Tamiya released it's first P-51D in 1/48 but I already had two unbuilt Hasegawa kits on the shelf so I elected to use one of them instead. After having built the Tamiya offering I would no longer bother with the Hasegawa kit as there are some engineering and fit problems that become problematic, particularly when you are doing a natural metal finish. Kudos must be given to Hasegawa for including just about everything you'll ever need to build a P-51D/K in 1/48 from prop blades and canopies to drop tanks and rockets. It is a shame that Tamiya wasn't as comprehensive. I departed from the standard kit in several areas. I decided to use the superb True Details cockpit that was designed for the Tamiya kit. While it drop fits into the Tamiya kit, it must be narrowed aft of the seat so it will fit in the slightly tighter confines of the Hasegawa fuselage.
The radiator pieces also require the Hasegawa kit ti be modified. The key here is to be prepared to test fit and then sand and then test fit again. Be sure to tape the kit fuselages together often to make sure the cockpit will fit properly. The only addition to the TD cockpit was some wiring for the radios mounted on top of the auxiliary fuel tank behind the pilot. I also used the KMC control surfaces and flaps to represent the characteristic dropped flaps of the P-51D. These aren't included in the Hasegawa kit. If you ever find yourself considering using KMC control surfaces on a kit you are building, stop and deposit them in the nearest trash receptacle. A neat idea in theory, KMC's control surfaces sets are, in my opinion, universally crap. In my experience they are warped 99% of the time, and even if they aren't the cross section isn't right and they won't fit when you try and install them. Most of the time you don't figure this out until you've already trashed the kit control surfaces removing them and you don't have much alternative. This was learned with hard won experience in three different projects. If you really want to have separate control surfaces, take the extra time and use the kit parts carefully removed with a razor saw.
One experiment I undertook on this kit was using the then-new True Details Fast Frames. I came away with very mixed feelings about them. They looked fine on the bubble-topped sliding canopy where they didn't have to negotiate a sharp corner. But on the angular windscreen they looked decidedly "soft" on the corners no matter what I did. They just don't seem to lay down on the corners very well and I decided never to use them again. I have since obtained a few sets of EZ-Masks and a couple sets of the new Black Magic sets from Cutting Edge. I like the theory behind these much better as they "mask" the clear parts so you can paint the canopy frames. SnJ spray metal was used for the natural metal finish on the fuselage. Floquil silver enamel replicated the aluminum lacquer used by North American on the wings of all P-51Ds. Everywhere else I used Floquil Polly Scale acrylics.
Three Guys Replicas sheet TGR48017 was the source of the decals. I applied them using the standard Microscale system but didn't use a gloss to seal the finish first as the SNJ is smooth enough to prevent silvering and a gloss would alter the natural metal effect. True Details resin wheels were used as was a Squadron vac canopy so you could see the cockpit detail. The cockpit was weathered with a wash of Windsor and Newton artists oils and a little dry brushing.
The exterior was weathered with very thinned Polly scale acrylics for the exhaust stain and Liquitex acrylic artists oils for the was in the panel lines.
Model, Images and Article Copyright
© 1999 by Cameron Lynch Back to HyperScale Main Page Back to Features Page |