 |
Alan Hobbies' Panzer IF |
Panzer
IF
Building and Detailing
Alan Hobbies' Panzer I Ausf. F
by
Chris Leeman
Images by Barry Crook
|
Alan Hobbies' Panzer IF |
H i s t o r y |
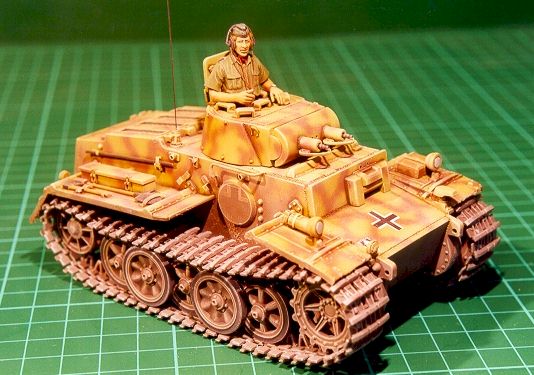
The Panzer I Ausf F was the last development of the diminutive Panzer 1 first conceived in 1934. After the Polish campaign it was shown that the German needed a well armored infantry support tank. In September 1939 it was decided to build a series of 30 of the PzKpfw I Ausf F. The main difference in this design was that the armor was increased up to 80mm. Also interleaved wheels where used to disperse the increase in weight and used a torsion bar suspension instead of springs as used on the earlier Panzer I. It was powered by a Maybach HL 45P engine giving a top speed of 25 km/hr and a range of 150 km.
The PzKpfw I Ausf F saw limited action on the Eastern front with both the1st and 12th Panzer Divisions. Some units were also used in partisan duties in Yugoslavia.
B u i l d i n g t h e A l a n H o b b i e s K i t |
Alan are a Russian company and people might be familiar was some of their earlier releases. They have done a Wespe, PzKpfw II Ausf C and also a couple of kits that have been released under license by Dragon. I have seen reports on some of these Alan kits and they weren't too good. There seemed to be a lot of work needed to bring them up to scratch. When I saw that they were doing the IF I just had to take a punt.
Upon looking at the kit it seemed quite well done. The standard is similar to early 80's Italeri kits. The thing I was impressed with was the individual track links. These are nicely molded and even have a hollow guide horn. But as with most kits there is room for improvements and I will detail them in the next few pages.
The first 4 stages consist of the construction of the hull. All the hull components are individual plates that have to be joined together. You need to take care in lining these up or the hull will be out of shape and have some quite bad gaps. After all the pieces were together I re-did all the weld seams with a Pyrogravure. The side entrance hatches can be made to be open but as there is no interior I decided to leave them closed.
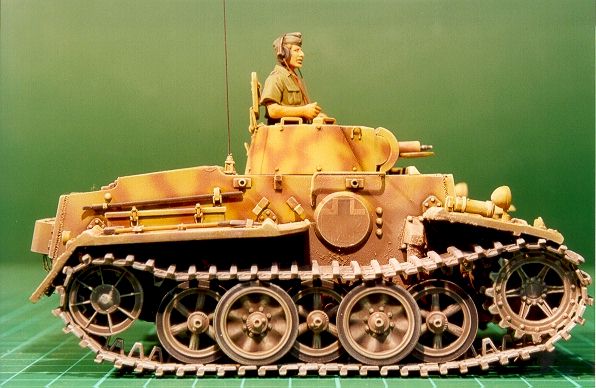
 The next step consists of putting on the torsion bars, final drive housings
and the suspension components. I left off the wheels at this stage, I like to paint them
separately and add them later. I added bolts on the final drive housing with the punch and
die set. Also weld lines were added around the mounting points for the suspension arms.
The next step consists of putting on the torsion bars, final drive housings
and the suspension components. I left off the wheels at this stage, I like to paint them
separately and add them later. I added bolts on the final drive housing with the punch and
die set. Also weld lines were added around the mounting points for the suspension arms.
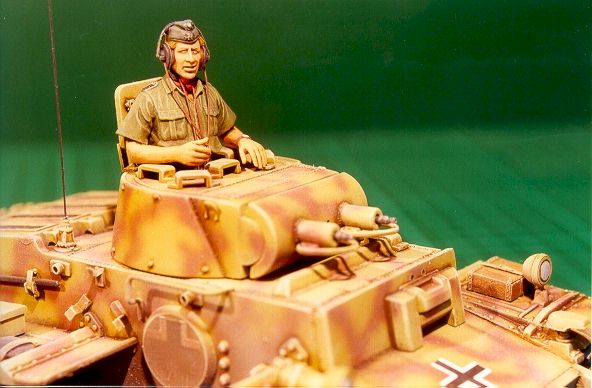
Next is the turret. This is a fairly simple step but there are a few things that need to be done. First of all is the join between the gun mantlet and the turret. The join isn't good and will need to be filled and sanded. I replaced the bolts around the turret edges with Grandt line rivets (set No 153). All weld seams were enhanced with the Pyro again. The lifting rings on the turret were replaced with brass wire, bent to shape. The turret hatch has some internal detail but it's a little basic. As I was going to have the hatch open, I sanded off the existing detail and replaced the locking lever with plastic strip, lead foil bracket and an etched brass handle taken from the Eduard PzKpfw III set. I also added a head pad carved from plasti-card. The MG-34 barrels were drilled out and added. Two bolts were also added to the L shaped brackets that restrain the hatch when open.
The next step is adding the large mudguards. These are nicely molded but there was some big injector pin marks that had to be cleaned up on the undersides though. I had to do a little sanding of the edges of the rear guards to get them to fit properly. I also removed the extensions on the front mudguards as most pictures show that these were either removed or lost in action. I removed the molded on bracket on the front left mud for the horn, added an etched bracket from the Aber etched German tool holders set (No 35 A03). Just a quick word on the Aber etched sets. I have been using these now for about a year and I would go as far to say they are the best photo-etched sets on the market. They have an ever-expanding range of individual vehicle sets as well as accessory sets such as tool clamps, ammo belts and even a set of cutlery! They are made so well it is possible to get the tool clamps to actually work like the original thing. Many of the Vehicle sets contain two or three etched frets and are great value for money. NKR has a full stock of these and if he doesn't have a set in it only takes a couple of weeks to get them in. Do yourself a favor and check them out. I replaced the kit horn with one from the Tamiya On vehicle Equipment set (No 35185) as well as the Notek light and mount. I replaced all the kit tools with ones taken from this set and replaced all the tool clamps with ones from the above-mentioned Aber set. The jack block was scratch built from balsa wood and detailed with straps and braces from the Aber set.
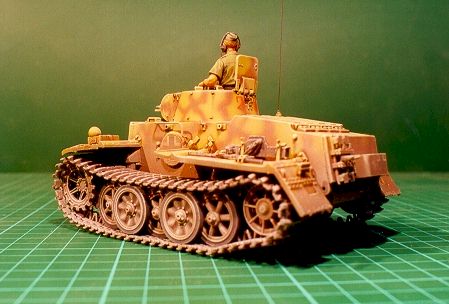
The headlights had large sink marks in the inner faces so I added disks from plastic card to cover them. The tool box on the left rear mud guard wasn't very good so I scratch built a new one out of plastic card and added Aber locking latches. The right rear convoy light was replaced with one from Tamiya OVE set as well. I replaced the spare track brackets with ones made from plastic strip and Aber etched wing nuts (set No 35 A26) The smoke discharger on the rear doesn't have the smoke candles inside it so I made some from plastic rod and cards with etched chains once again from Aber (set No 35 A16).
The grab handles above the side hatches were replaced with wire bent to shape. The tow rope brackets were replaced with ones made from brass strip bent to shape. Three bolts from the Punch and Die set were added to the base of the aerial and the aerial itself was made from piano wire.
P a i n t i n g a n d F i n i s h i n g |
The next step was painting. I gave the tank a base coat of Tamiya dark yellow (XF-60) and then a wavy pattern of Tamiya red brown (XF-64) for the camouflage colour. I used the kit decals, as they aren't too bad. I chose the markings for the vehicle from the Ist Panzer division on the Eastern front. I gloss coated the areas that were to receive the decals and then applied them, using Gunze Mr Softer as a setting agent. I mixed up a color of Tamiya earth (XF-52), red brown (XF-64) and flat black (XF-1) and then sprayed the lower hull, wheels and tracks. I then gave the whole tank a wash with Vandyke brown gouache paint. After drying I wiped off the excess with cotton buds then dry brushed with a mix of Humbrol matt ochre (No 83) and white oil paint. The rubber rims of the wheels were painted Gunze tire black (No 77) then glued on. The tracks were dry brushed with Tamiya metallic gray (XF-56) then glued together and put them on the tank. All the tools were hand painted with various Humbrol enamels. I find for airbrushing Acrylic paints are best but for hand painting you can't beat enamels.
The figure was from The Verlinden Africa Korps set (No 137) with a head added from the Warriors German head set No 12 (35106). The head phone leads were added from fine wire.
Well that's basically it. I found this an enjoyable kit to make and you can still build a nice model from what's in the box but with a little more work it can become a very good model. I would recommend it to anyone who would like to do something a bit different.
R e f e r e n c e s |
Encyclopedia of German Tanks of WW II by Peter Chamberlain & Hilary Doyle
Arms and Armor Press (P-26)
German Armored Rarities by Michael Sowodny
Schiffer Military History (P-11)
Ground Power No 6 (P79-81)
Fine Scale Modeller (October 1998) Photos and 1/35 scale drawings
Back to HyperScale Main Page
Back to Features Page