Home
| What's New |
Features |
Gallery |
Reviews |
Reference |
Forum |
Search
Home
| What's New |
Features |
Gallery |
Reviews |
Reference |
Forum |
Search
|
|
|
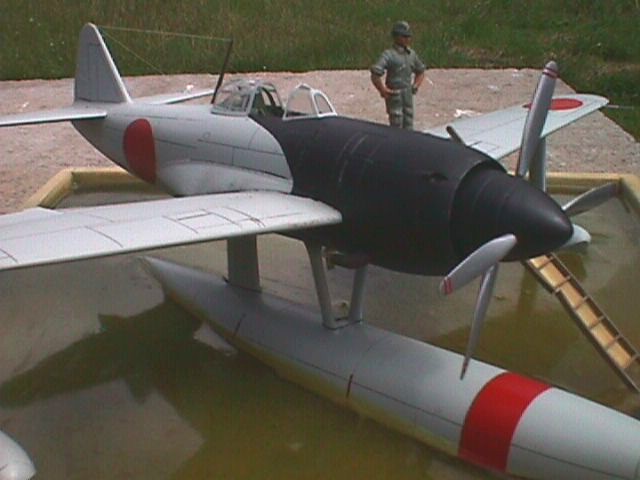
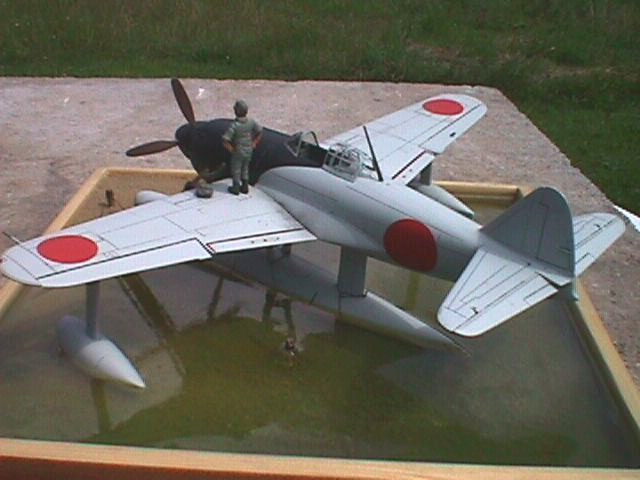
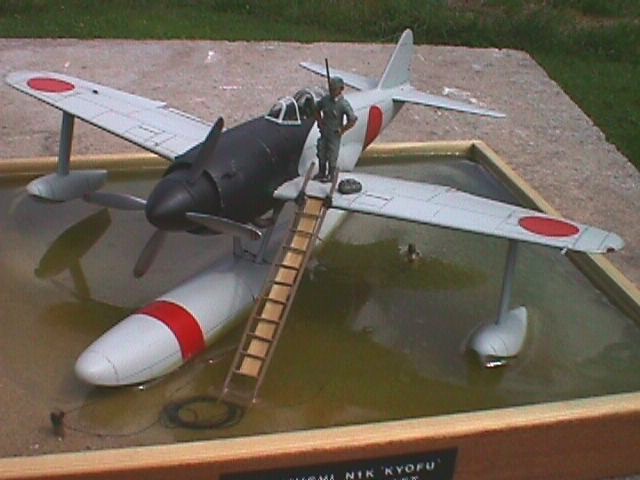
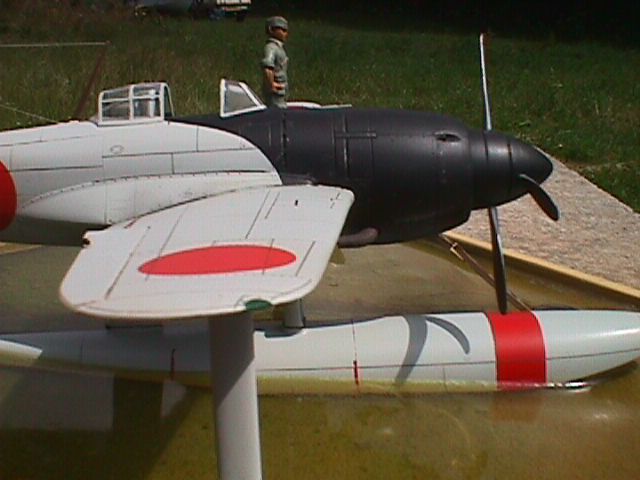
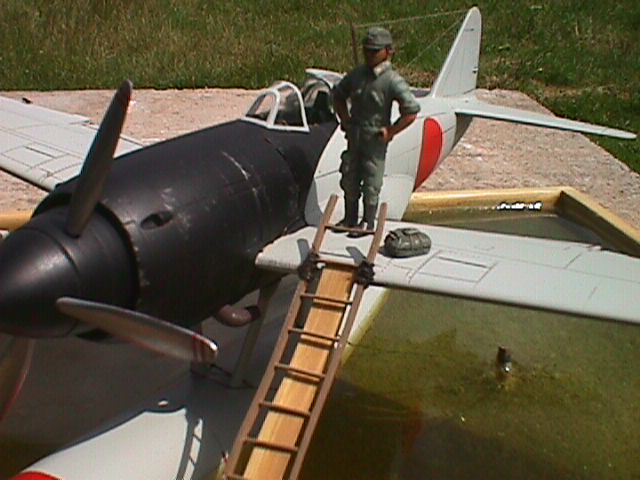
Kawanishi N1K1 Kyofu (Rex) Part Two by Roy Caunce
This is a conversion based on Tamiya`s 1/48 Kyofu as featured in my earlier article.
I know little of the history on this particular aircraft as all my references are in Japanese but it seems to be either a prototype or an engine test-bed for the contra-rotating propeller arrangement. It is just one of those unique subjects that cries out to be done.
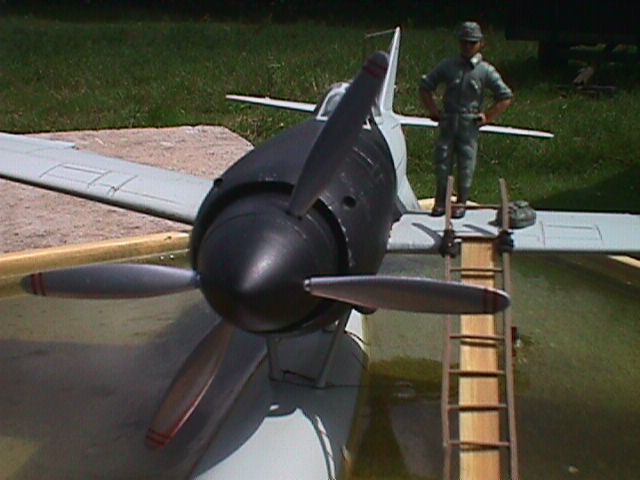
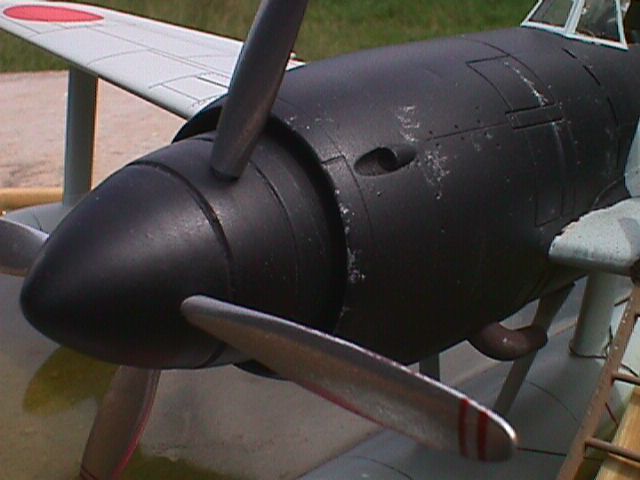
First the spinner was made by mounting the kits spinner on a brass tube shaft with 5 minute epoxy so it can be spun using an electric drill as a lathe, the surface of the plastic was roughed up with very course sand paper to act as a key to the Automotive filler (a two part mix used to fill dents in car body work) which was applied thickly around the spinner to bulk it up.
I blew a good side photo up to 1/48 to set the correct diameter as this is a much bigger spinner than the kits. Several applications of the filler may be needed at this stage just keep it even. When enough filler has been applied and set (about 30 minutes usually) the spinner is spun in the drill and a coarse file used to form to a rough shape working from the photo. Just hold the file and let the drill do the work. Once a rough shape was achieved a finer modelling filler was applied and smoothed again in the drill with wet and dry paper used wet. Once smooth a primer was applied to check for imperfections. When happy the spinner again was mounted in the drill and the section line were scribed in using a scribing tool and a steady hand. A final polish removed any burrs. Next, two sets of holes were marked and drilled for the prop blades. The propeller blades came from the spares box, from a Hasegawa P-51K kit. They were cut to length and reshaped to profile. One pair was twisted to the reverse direction using boiling water and fingers (not at the same time). The blades then simply push into the predrilled holes.
The rest of the conversion consists of a narrower cord fin, narrower main float support, wing armament removal and new aerial mast made from brass strip. The cowl opening was made slightly larger with a large round file, the gun ports were drilled out and tubes set in place. The only other part was the front canopy which need the framing altering by sanding off the original and the new one painted on. The front screen should be more rounded at the front but I omitted this part to laziness (no-one have ever noticed, so I confess all now). Paint was a mix of Humbrol to “Ash Grey” using Ian Bakers excellent Japanese Navy Aircraft colouring guide, the cowl was blue/black (blue added to black (you really didn’t need me to tell you this, did you? )) The kit's Insignia decals were applied with stencilling (no codes were needed) The base was covered in Part One so I won't go into this one. The only difference is a sloped beech edge with the model lightly out of the water. The figure was from a Reheat set of three Japanese pilots.
On the whole this was not a difficult conversion once the spinner was made.
Click
on the thumbnail images below to view full sized.
Model, Text and Images Copyright © 2000 by Roy
Caunce
|