Home
| What's New |
Features |
Gallery |
Reviews |
Reference |
Forum |
Search
Home
| What's New |
Features |
Gallery |
Reviews |
Reference |
Forum |
Search
|
|
|
North American F-86E-10 Sabre by Julien Haccoun
The F-86 Sabre was originally built by the North American company as the successor of the famous P-51 Mustang. The prototype XP-86 was powered by a GE J-35 and featured a swept wing with slats, inspired by the Messerschmitt Me 262. Its first flight occured the 1st October 1947. The aircraft broke the sound barrier in a shallow dive barely six months after Chuck Yeager's historical flight. The F-86A entered service during 1949 and was the only US aircraft capable of efficiently engaging the MiG 15 when the Korean war broke out. Armed with six 12.7 mm Colt-Browning machine guns, it was a dangerous adversary for the little Russian fighter, even though it had poorer performances overall. Later in the course of the war, the model A was backed up and partially replaced by the F-86E which had one-piece horizontal tailplanes and other minor modifications which offered better handling near Mach 1. The F-86 As and Es were characterized by a slatted wing which created vibration problems under heavy G-load manoeuvres. To overcome this phenomenon, a new hard wing called "6-3 wing" (with a broader chord and no slats) was introduced on the model F production lines and as retrofit kits for the earlier variants. The F-86F reached operational units in 1952 and was powered by a J-47-GE-27 (model F-30) that, in conjunction with the new wing, gave it a better top speed, climb rate and operational ceiling.
The Sabre's kill ratio of 1:8 (or 1:10 according to the sources) was largely due to the quality and training of the pilots who flew it. Most of them were WWII veterans and had an invaluable combat experience which left little chance to their relatively inexperienced Korean and Chinese opponents. The Sabre also equipped the South African Air Force during the Korean conflict, as well as a number of other air forces after the war. Other variants were developped (F-86D, H, K...) and Canadair, CAC, Fiat and Mitsubishi built numbers of this formidable aircraft. The total production number reached 8683.
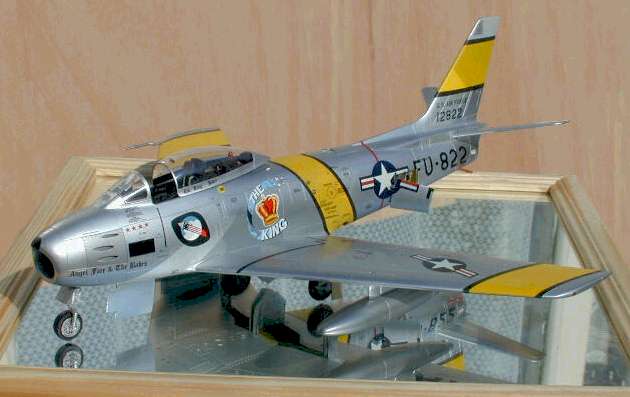
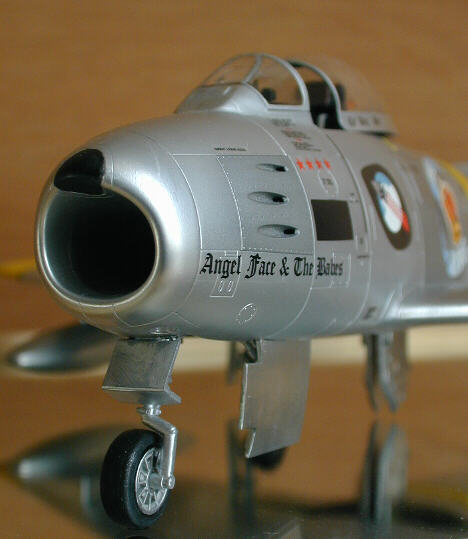
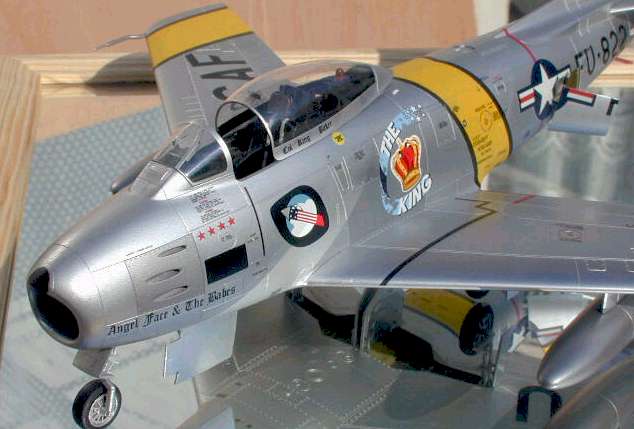
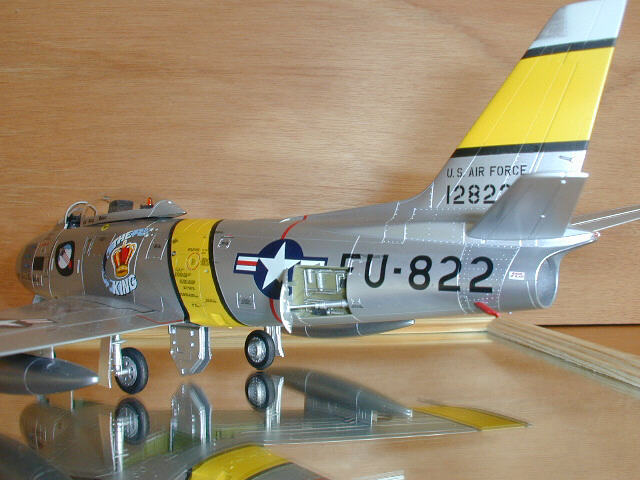
This model is Hasegawa's 1/48 F-86 F-30, ref Pt13. Having already built Tamiya's MiG 15, I wanted to build a Sabre to display the former adversaries on my shelves. The model is beautifully molded in the usual light gray styrene and has very fine surface details. There are no less than 14 sprues for the parts. The clear parts are perfect and the canopy has its distinctive shape. As an F-30, the model has the hard wing. Two schemes are provided on a large decal sheet, but the colors seem a bit greenish. Markings are provided for the 21st Fighter Bomber Wing Commander's aircraft, coded FU 222. It is a colorful aircraft with red, yellow, blue and white bands, stars and stripes. It also sports a nose art featuring a rat with a helmet, painted over the large "US AIR FORCE" logo on the sides of fuselage. A real eye catcher! The other one is the 8th Fighter Bomber Wing Commander's aircraft, coded FU 877. It wears dark blue, yellow and red stripes on the nose and tail in addition to the yellow & black identification bands for the Korean War theater. Here is for the content of the box! I chose to build this model with a few aftermarket additions - an Aires cockpit (ref 4022) and Aeromaster decals (sheet 48-449) to represent another Korean vet with interesting markings, the King (FU 822). Immediately I was confronted to the first dilemma: to find a scheme adapted to the variant featured in Hasegawa's box. After extensive researches in Aeromaster range of decals, I "fell in love with the King" as soon as I saw it. I knew it was this bird I wanted to build. The problem was it was an F-86 E-10, which means that it certainly had the slatted wing. There were three possibilities.
I chose the latter. If one decides not to backdate or superdetail the model, it is very simple to build. Though, given the finish of most Korean era aircraft, great care must be take to assemble all the parts, to avoid using putty or filler. Hopefully the parts are well designed and I encountered almost no fit problems.
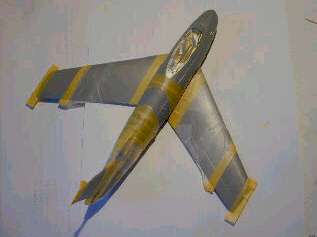
The Sabre's cockpit was black on most of the early models and grey on all models after 1953. I thus painted it black. It also helps to hide the differences between the E and F models... I have no references on the matter but I'm sure the instruments were different for the Es. Fitting the cockpit tub into the fuselage halves required no extra work, just a little attention to align it properly. The difficult point is to have the deck behind the pilot's seat flush with the top of the fuselage halves. A little filling and sanding was necessary here. I installed the seat after painting. The trickiest part of the assembly was to have the smoothest joint around the nose intake. I elected to glue the intake vane to the lips first (filling and sanding), then to glue the lips to the left fuselage half, add all the stuff that has to be inside the fuselage and eventually glue the right half. This allowed to align perfectly the intake lips with the nose and have a flush assembly. The slight gap on top of the fuselage in front of the windshield was filled with Zap a Gap (great stuff I discovered only recently). The rest of the assembly was quite straightforward. I only filled the fences locating holes on the upper wings with streched sprue and liquid cement, since I wanted to simulate the slatted wing with no fences. A good sanding and polishing gave a nice texture. As usual, I used my technique to assemble the wings: upper halves glued to the fuselage first and then lower wing added. No filler, no sanding! The landing gear was built with little extra details (brake lines only), painted and left aside for the final chapter. It was time to prepare physically and mentally for the most challenging paint job in modelling: natural metal finish!
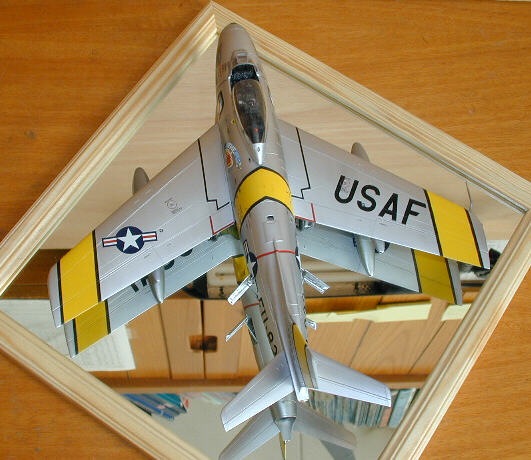
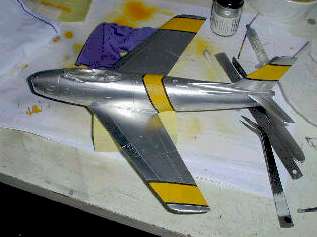
It was a breathtaking experience! I initially considered covering the entire model with Bare Metal Foil. But given the money and the time needed to do the job, I scaled down my ambitions and turned to metal paints. I had the choice between Testor Metalizers (that I had already use with very nice results but that I knew to be very fragile, especially considering that I wanted to paint large yellow bands), and SNJ metal paints. These are known to be strong enough to be masked over with masking tape, so I chose them. I was wrong!... I first polished the mistreated areas with Tamiya compound to obtain a nice shiny surface. Then, I sprayed the entire model with SNJ. I found the finish a little dull, but, oh well, since it was the war, the aircraft were not polished and the aluminium/duralumin skin was either covered with an alumina oxide coat or sprayed with clear coats. So, the flat finish wasn't that bad. I slightly polished some panels with SNJ powder to have different hues, though. Then came the time for masking: I used Tamiya masking tape previously stuck onto a clean surface to lower its sticking power. As it often happens I didn't put the tape at the right place at the first try, so I delicately removed it to reposition it properly... and the SNJ coat delicately came off with the tape!!! With a ruined NMF I had no choice than stripping the entire surface and repaint it. I did so with fine steel wool and no solvent at all. I was surprised to see that the surface came up very smooth so I decided not to polish it. I elected to paint the ID bands first, then mask them and paint the NMF after. I applied masking tape onto the selected areas, then put the ID bands decals over the covered areas, cut the tape along the bands, removed the decals and tape below, sprayed the yellow (Gunze H 413, RLM 04 again...) over a white coat, masked , painted the black stripes, masked, removed the outer masking tape and the sprayed Testor Metalizer Aluminium.
All the little bits and things were added at the last possible moment (pitot tube, airbrakes, fuel vent, underwing tanks, landing gear, etc). As I expected, I forgot something during the assembly and noticed it too late. I forgot to put weight into the nose, so my bird is a tail-sitter! It was therefore glued onto the mirror. Et voila! A nice and shiny addition to my growing collection of 1/48 models. It took only 17 days to build but was my most challenging paint job. Given the result (and taking the SNJ disaster into account) I consider it as a personal success despite the various (but discrete) inaccuracies. The rest is a matter of taste.
Click the thumbnails to view the
images full-size
Model, Images and
Text Copyright
© 2000 by Julien Haccoun Back to HyperScale Main Page Back to Features Index | ||||||||||||||||
 As
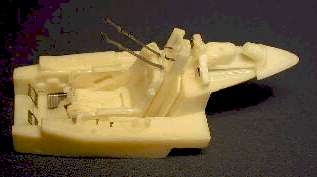
previously mentioned, the cockpit was replaced with Aires' beautiful set. It is
made of 7 delicately cast resin parts, 16 photoetched parts and an acetate film
for the instruments. The resin parts are, as usual, flash and bubble free. Two
PE instrument panels are supplied: one for an F-25, the other for an F-30.
As
previously mentioned, the cockpit was replaced with Aires' beautiful set. It is
made of 7 delicately cast resin parts, 16 photoetched parts and an acetate film
for the instruments. The resin parts are, as usual, flash and bubble free. Two
PE instrument panels are supplied: one for an F-25, the other for an F-30.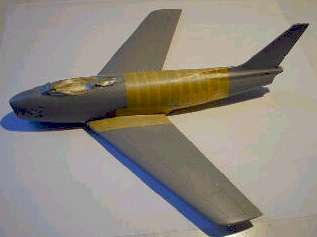
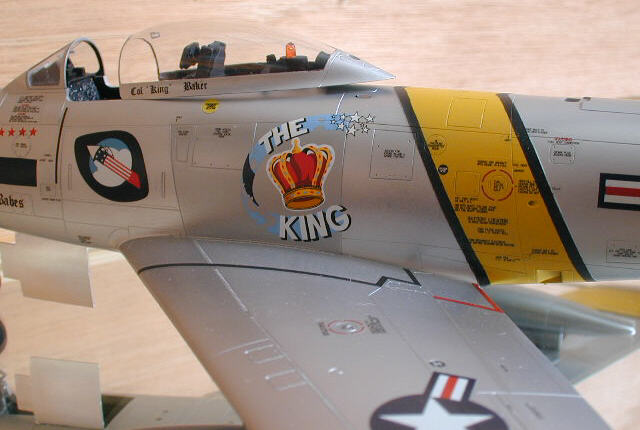
 The
aircraft I chose is "the King", the personal mount of Colonel R.
N. Baker, 4th FIW, 336th FIS based at Kimpo in 1952.
The
aircraft I chose is "the King", the personal mount of Colonel R.
N. Baker, 4th FIW, 336th FIS based at Kimpo in 1952.