Home
| What's New |
Features |
Gallery |
Reviews |
Reference |
Forum |
Search
Home
| What's New |
Features |
Gallery |
Reviews |
Reference |
Forum |
Search
|
|
|
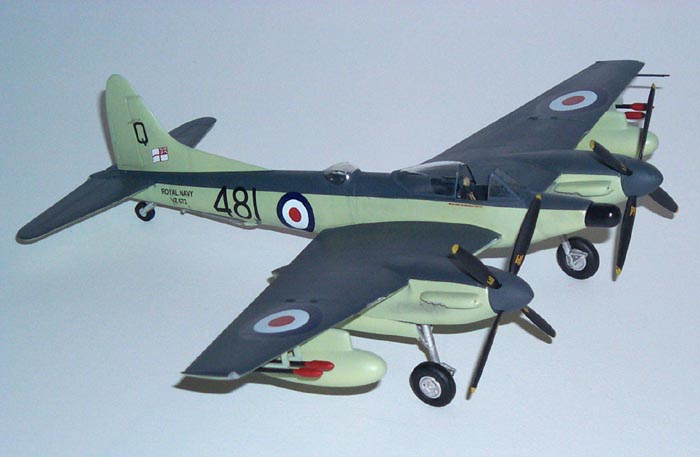
DeHavilland Sea Hornet by Rich Dann
Here is my recently completed 1/48 scale Dynavector Sea Hornet NF.21. This is the second Vacuform kit I have ever built. If only all other vacs were done the way Dynavector does them.
I bought this kit and a Wyvern at the same time, which I'll write about at a later date.
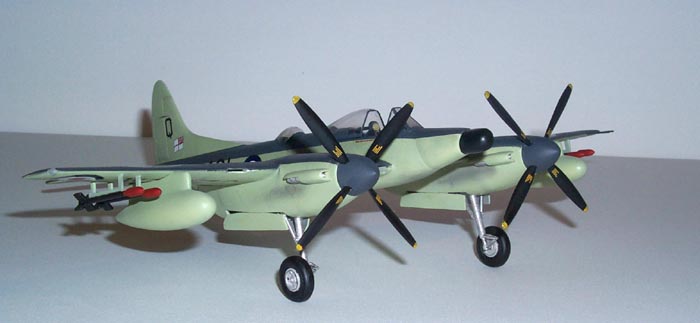
Assembly of this kit was very straightforward. Unlike all the rest of you out there, after cutting the pieces out and prepping them, I started construction with the engine nacelles. I added a front and rear bulkhead to each nacelle and then used Evergreen strips for additional detail, much like I saw in Scale Aircraft Modeling. I also glued the propeller spinner backs to their shafts. I made the mistake in installing the bulkhead before I did this. It took a while to work around this little detail.
The directions tell you to add strips of scrap plastic 95mm by 7mm to each wing half for strength. It works just great. Finally, I glued the radiators in to position and glued the wing halves together with super glue. Some filling and sanding was required, but a little Squadron white putty and some Mr Surface took care of any unsightly seams.
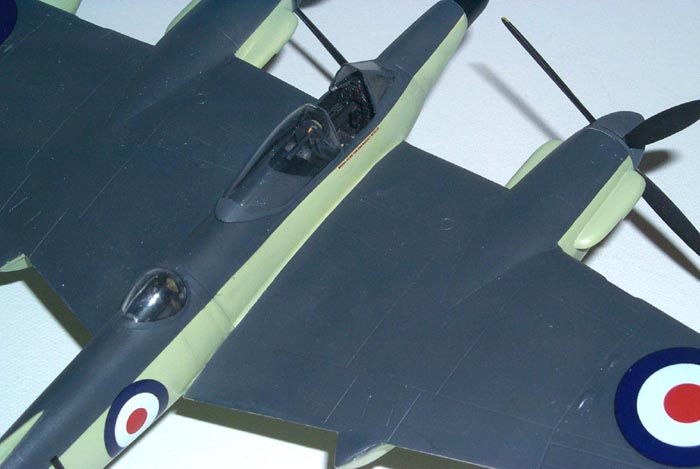
NOW I turned my attention to the fuselage. Cockpits are a combination of vac and white metal. They are very convincing when done. I added seat belts to both cockpits for added detail. The radar operators cockpit comes with two bulkheads, and this provides enough strength when the fuselage halves are joined. Both cockpits are painted black with drybrushing to bring out the detail. Once the cockpits were complete, the tailwheel well and horizontal stabilizer tab were installed and the fuselage halves were joined. Again, all seam work was accomplished and then the wings and horizontals were added and the joints cleaned up with putty and Mr Surfacer as well. Once I was happy with the primary portion of the airframe, I added the windshield which I had cut from the canopy. (Take a good look at the Warpaint book on this plane when installing the canopy. In the full open position it slides WAYYY BACK. In fact, almost to the observers canopy. I selected an intermediate position).
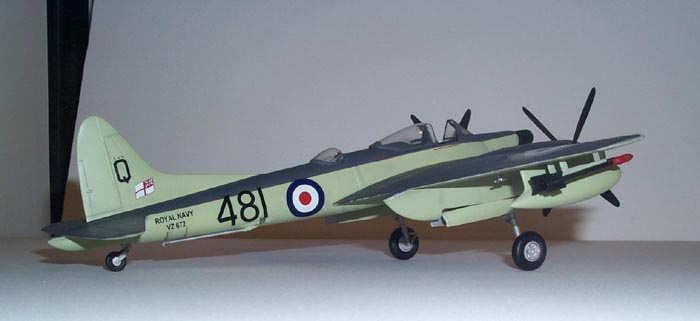
All masking then took place and a coat of Model MasterSky Type S was laid down. Following this, I masked off the appropriate parts and painted the upper surfaces Aeromaster Acrylic Extra Dark Sea Gray. After that, all the small items were painted and attached such as the rockets, antennas, landing gear struts and external fuel tanks. Following that, the canopy and some small antennas were added to the vertical tail by drilling a hole all the way through and passing stretched sprue through them. These were then trimmed with a toenail clipper. The decals on this kit were in my opinion, much better than the Wyvern decals. they went on without a problem.
This is one of the most enjoyable modeling experiences I've had. It was challenging, yet within my capabilites. I do need to push the envelope with my skills though, its part of the fun!
Don't forget to visit "Rich Dann's Aviation World" website Model, Text and Images Copyright © 2000 by Rich
Dann
|