Home
| What's New |
Features |
Gallery |
Reviews |
Reference |
Forum |
Search
Home
| What's New |
Features |
Gallery |
Reviews |
Reference |
Forum |
Search
|
|
|
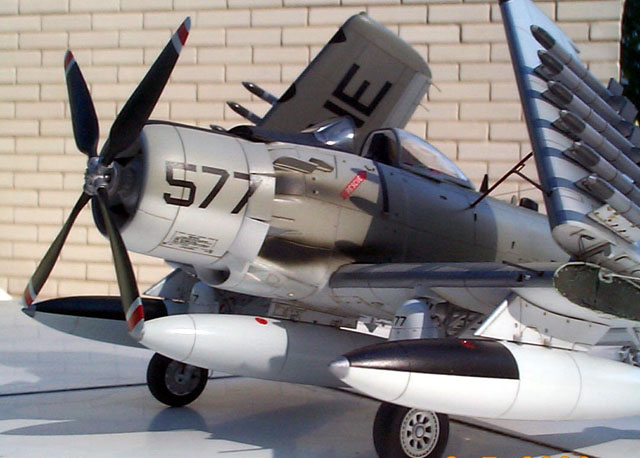
Douglas A1-H Skyraider by Guy Carriere
Here is my Tamiya 1/48 scale Skyraider.
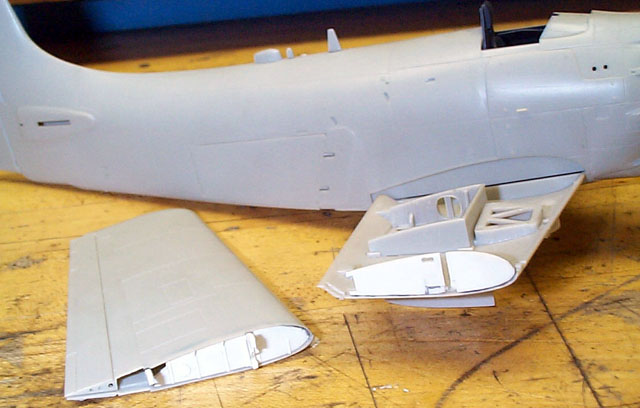
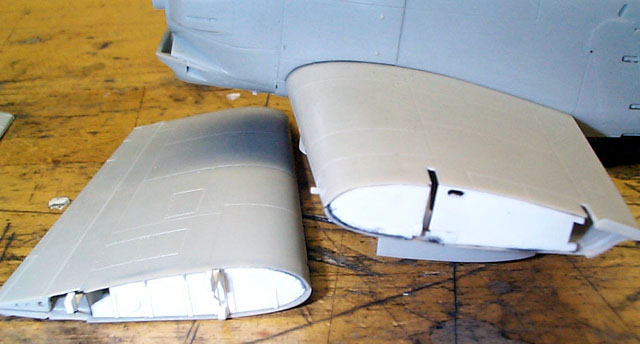
Instead of using the whole decal of the instrument panel, each individual dial was punched out with a punch and die. They were then soaked and slid into place. The result was quite effective. The only item I replaced was the seat. I used KMC's A1-H/J Navy seat (#48-5101). The fuselage halves went together in typical Tamiya fashion - without a hitch. Liquid cement was used for this important area. A touch of black super glue was applied along the seam to make it invisible. After some sanding, voila! A seamless fuselage in one hour. I like to use the black super glue (Loctite 380 "Black Max"#38050) for seams and sinkholes because it dries glossy and is visible. So, after sanding any low spots remaining will still be glossy. It takes a lot of the guesswork out of it, and it's FAST! The "barn doors" were simply glue in the closed position. I separated the elevators from the stabilisers and posed them in a droop position. I found two sinkholes near the tail wheel that needed attention from black max. Here is where my mind wandered a bit concerning the wings. My modelling friends know that I can't leave things well enough alone. So, I decided to fold the wings. It would have to be done from scratch since there was not anything in the after market range at the time. Oddly enough I had a hard time finding good close-ups of the wing fold. I'd like to thank the fellas at ARC who sent me what I was looking for. The wings were cut apart at the fold line, then with a flat cutter in the Dremel the edges were thinned to a more scale appearance. Starting with the inner fold, a blanking plate was fashioned using 0.030" plastic stock. It took some time carving and sanding to get a satisfactory fit. Openings for the fold mechanisms were cut then cemented in place, slightly recessed. A Liberal amount of CA glue on the inside was used for strength. A rendition of the locking bolt was made up with bits and pieces of plastic. The bottom centre section of the wing was now cemented to the fuselage. I did not glue the inner tops at this point.
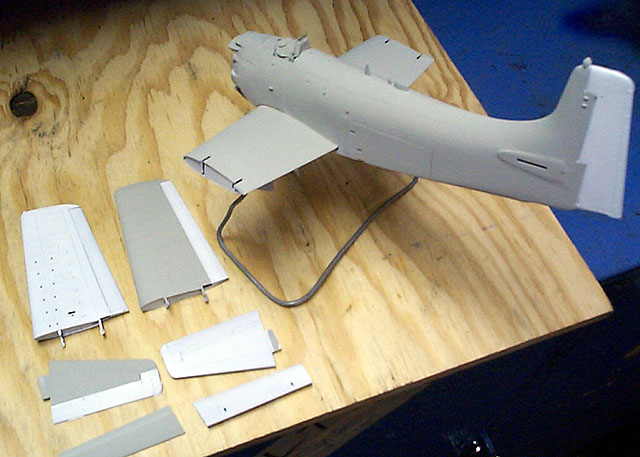
Attention now turned to the outer wings. I noted in photos that both ailerons sag inward when the wings are folded. With the bottom half of the outer wing, I thinned and cut through the end of the aileron but only scored along the hinge line so it can move. The top parts of ailerons were completely removed. This was left off until the wing halves were glued together.
Blanking plates were fashioned with various openings and glued to the lower half, with the upper soon joining it. Armed with numerous photos, hinges were made up along with a myriad of other details. Two small squares were glued to the ends of the hinges and mating seats for them were glued to the inner bottom wing. I fudged and fumble until I got the right angle and camber. After this the inner top wings were glued on.
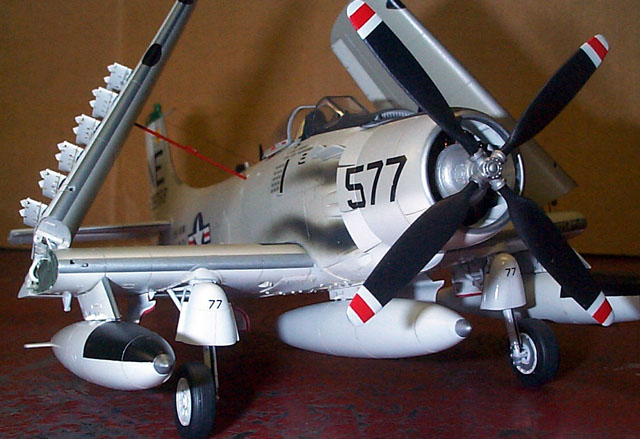
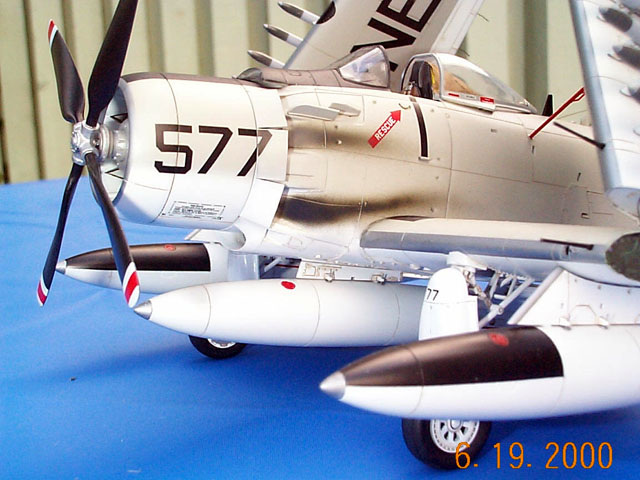
Time to paint. The cockpit was masked and the whole model was primed with Mr. Surfacer 1000. Imperfections were tidied up and spot primed again. I started with gloss white using Model Master Acryl. Rudder, ailerons, inner cowl and under surfaces all got blasted with white. One day later, it was wet sanded smooth. A second coat of very thin white paint was misted on. This made a nicely smooth and glossy finish. After drying, the appropriate areas were masked. The top colour according to references was called Gull Grey (FS 36440). Model Master Acryl was used again, but because it's a flat paint, a slightly different approach was needed. Two coats were applied within a couple of hours of each other and allowed to dry 24 hours. I wet sanded using fine and ultra fine grit until semi-gloss finish was achieved. I have no idea what grit numbers I used, all I know is that the last one I used was smoother than a baby's bottom.
The wing, tailplane and cowl were then masked, and the leading edges painted with Model Master Metalizer "stainless steel". A clear gloss coat was applied next. My preference is Polly Scale, but as long as it's an acrylic, any brand will do. I took a couple of days off to let the paints properly cure. The panel lines were given a "wash" of very thinned Artist Oil raw umber. I use a 000 brush with one-inch long bristles. The tip is held in the paint for a second to load the brush, then touch and hold at a panel line. The paint will flow a long way along the panel line. The trick here is, and I know most people will already know this, is that the model MUST be glossy for this to work. Do this and there will be very little clean up afterward. I used the kit decals, and I'm sorry I did. I have bone to pick with Tamiya on this. Simply put, they're too thick and don't like to snuggle down. This is, in my opinion, inexcusable for a high-end kit. After a lot of trimming and a gallon of decal solution, I managed to get them, in place. Once all the decals were applied and dry I gave the model a coat of Polly Scale clear satin finish.
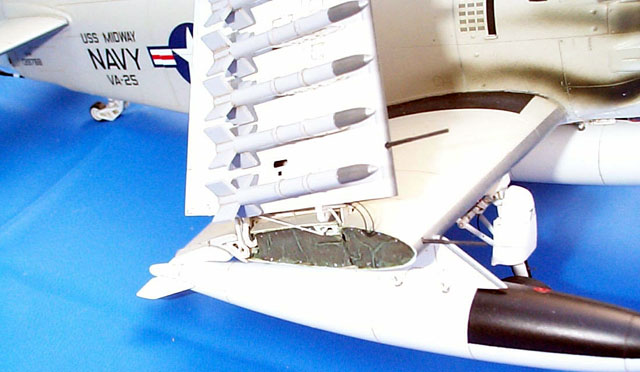
The engine and exhaust pipes and cowl were glue on. The front windscreen was glued in place with clear fix, a good fit by the way. After some masking, the wing walks and anti-glare panels were sprayed flat black, then dry brushed dark grey. I gave the prop the same treatment while I was at it. The tips of the prop were masked and sprayed white, then red a day later. Back to the wing fold. On the real aircraft, the exposed inner portion has what appears to be canvas covering the inner workings. To simulate this I dipped some tissue paper in thinned acrylic khaki (I'm not sure if this was the correct colour, but I had to pick something). I let this tissue hang to dry (20 minutes) then cut pieces larger than needed. I took this piece and formed it over the end of the wing to give me the shape I needed. The shape was cut out with scissors. It was slightly oversized, but that's what I wanted to get the wrinkles needed. With tweezers, it was redipped in the thinned khaki paint and applied. A little pushing and prodding here and there and it's done. No glue is necessary here, the paint once dry was more than enough to hold it.
The antenna was made with stretched sprue and added to the model. The canopy was attached, and any other minor details that were overlooked. I wanted all this done before attaching the outer wings to minimise handling afterward. There are many photos of Skyraiders that have ordnance with their wings folded. So, how could I resist? A Skyraider without ordnance couldn't be called an "Able Dog". All the ordnance was attached before the outer wing was attached to the rest of the model. It was easier to handle this way.
The outer wing was finally attached. The hinge ends were glued with epoxy for strength, also because of the working time it allowed. I had earlier made wing/fuselage braces from brass rod. These added more support and set the right angle. Final details like the actuating rod and wiring were put in. The prop was pushed into place, and Holy Cow I was DONE! Phew!
Click
on the thumbnail images below to view full sized.
Model, Text and Images Copyright © 2000 by Guy
Carriere
|
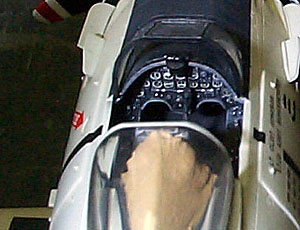 Like most
aircraft kits, construction starts in the cockpit. The parts were given a coat
of flat dark grey paint, and with some brushing that brought out the details
nicely. Switches and knobs were then picked out in silver and white. I brushed
on Polly Scale clear satin onto the console panels and the instrument panel,
leaving the rest flat. This is to represent that wrinkly baked on paint
reminiscent of the fifties. A drop of thinned gloss white paint was flowed into
the instrument locations.
Like most
aircraft kits, construction starts in the cockpit. The parts were given a coat
of flat dark grey paint, and with some brushing that brought out the details
nicely. Switches and knobs were then picked out in silver and white. I brushed
on Polly Scale clear satin onto the console panels and the instrument panel,
leaving the rest flat. This is to represent that wrinkly baked on paint
reminiscent of the fifties. A drop of thinned gloss white paint was flowed into
the instrument locations.