Home
| What's New |
Features |
Gallery |
Reviews |
Reference |
Forum |
Search
Home
| What's New |
Features |
Gallery |
Reviews |
Reference |
Forum |
Search
|
|
|
Supermarine Spitfire Vb by Brett Green
452 Squadron was the first RAAF unit to see service with RAF Fighter Command. The Squadron formed in April 1941 and was declared operational in early July of the same year. The Australians immediately made a big impression. Between August and November 1941, 452 Squadron was the top scoring unit in British Fighter Command. Flight Lieutenant Brendan "Paddy" Finucane (RAF) was leader of "A" flight from the formation of the Squadron, and an inspirational leader to his pilots and groundcrew. He was also one of the RAF's top scoring Aces, having scored 32 kills and attained the rank of Wing Commander by the time of his death in July, 1942. At least 19 of these victories were attained while serving with 452 Squadron.
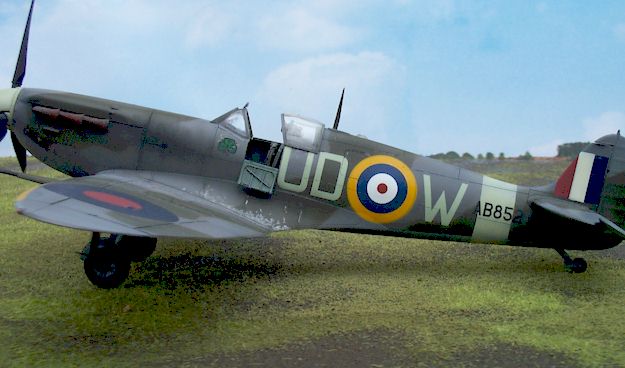
452 Squadron converted from the Spitfire Mk IIa to the Spitfire Mk Vb from August 1941. The Squadron's tenure in England was cut short by the desperate need to supplement the Australia's northern defences against rapidly advancing Japanese forces. By the time 452 Squadron suspended operations in March 1942, it had chalked up 62 enemy aircraft destroyed, 7 probables, 17 damaged and one destroyer sunk for the loss of 22 pilots killed or missing. My model depicts Paddy Finucane's Spitfire Vb in Septembe1941.
Tamiya signalled their intention to return to 1/48 scale aircraft production with their 1993 release of their Spitfire Mk. I. Their Spitfire Mk. Vb followed in 1994. Tamiya was clearly focussed on creating a model that was simple to build but uncompromising in detail. They succeeded. Some of Tamiya's more spectacular releases, such as the Betty, the Heinkel He 219 and the new Swordfish, may have overshadowed their earlier efforts. Nevertheless, the Spitfire kits will endure as testimony to Tamiya's empathy for today's modeller.
In The Box Tamiya's 1/48 scale Spitfire Vb comprises 59 medium-grey styrene parts on two sprues, and 10 clear parts. Decals are provided for two aircraft. The instructions are well presented and very straightforward. Options in this kit include a choice of windscreen and main canopy parts, alternate positions for the cockpit door and two styles of wheel hubs. Surface detail is superb. Panel lines are crisply engraved. The width of the panel lines vary, just as on the real aircraft. For instance, the chunky panel lines of the engine cowl are fearlessly depicted. The quick-release fasteners on the cowl are also beautifully rendered.
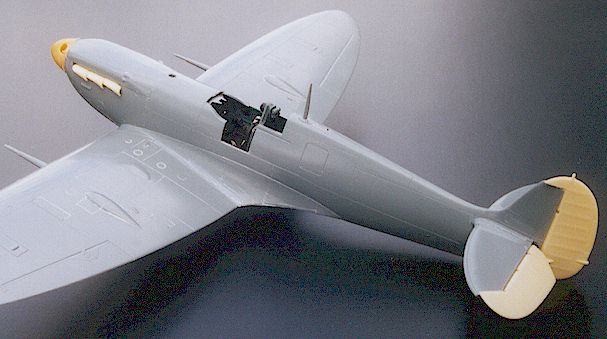
Tamiya's Spitfire Vb almost builds itself. Clever engineering supports flawless fit. There is little to tell about assembling the standard kit parts. I decided to depart slightly from the basic kit with the addition of a few simple accessories. Finucane's Spitfire Vb was fitted with the early Rotol spinner and propeller blades. The Tamiya kit does not include this option, but PD Parts of Australia released a resin version some years ago. The resin propeller assembly was cleaned up and assembled with no problems. I also used several Ultracast accessories recently reviewed on HyperScale. These were:
I did not add much extra detail beyond these replacement parts. I used the kit instrument panel. This plastic part looks good with its crisp bezels and switches, but the instruments are featureless - no raised needles or digits are depicted. I therefore added Reheat instrument decals after painting the panel to inject some life in this area. Once the decals had set, I mixed up a small batch of two-part epoxy glue and added a tiny blob to each instrument to represent glass lenses. Painting the fuselage sidewalls and other small parts completed the cockpit. Following an airbrushed coat of mixed RAF Interior Grey Green, I liberally washed the parts with a thin mix of black oil paint. After a few minutes I wiped the excess off the parts to leave a dark "shadow" in the recesses. Details were then picked out using acrylic paints with a fine brush.
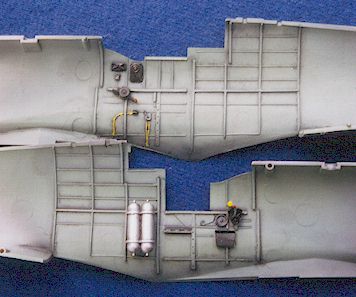
The seat was painted red-brown to represent raw Bakelite. This part also received a black oil wash. The backrest, harness and buckles were then hand-painted. Ultracast's exhaust set is a simple replacement for Tamiya's kit parts. Detail is very nice, with weld marks, rivets and the curved exhaust stubs hollowed out at the ends. Resin control surfaces by Ultracast are equally well detailed. I carefully removed the kit rudder and elevators by scoring the hinge lines repeatedly. I thinned the inside trailing surfaces of the fin before attaching the new rudder. The elevators simply butt-up against the back of the horizontal stabilisers. Before assembling the wing, I shaved off the two reinforcement strakes on each upper wing half using a sharp hobby knife. This task was simpler than I had expected. The fuselage and wings were completed as sub-assemblies, and then snapped together. The bottom wing is keyed to the fuselage wing root, guaranteeing a perfectly aligned fit with no gaps at the wing root.
The kit was completed with the addition of landing gear, canopy, the previously completed propeller assembly and other minor details.
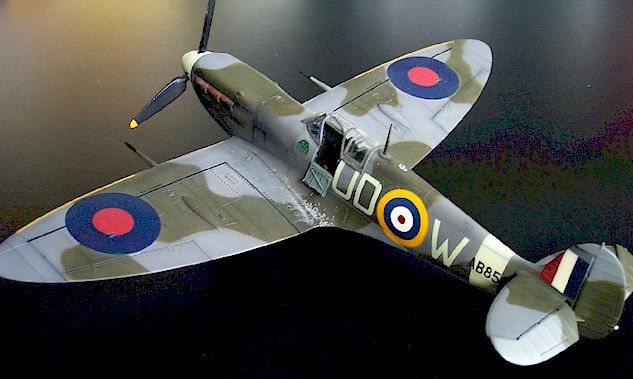
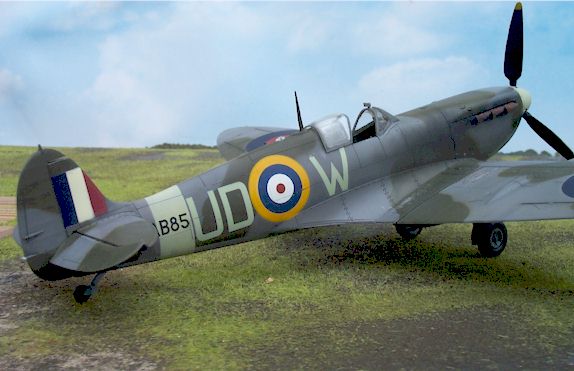
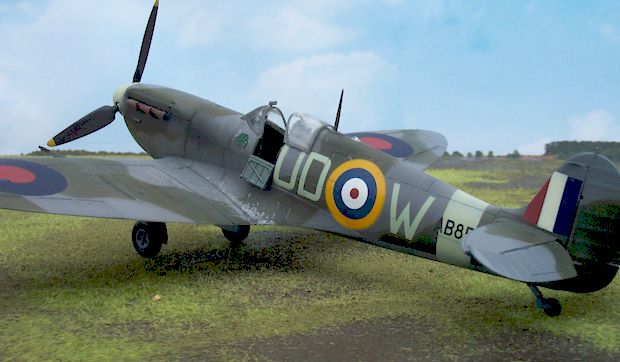
The Spitfires of 452 Squadron in late 1941 display an interesting transitional camouflage scheme. The RAF was converting from the early day-fighter camouflage scheme of Dark Earth, Dark Green and Sky, to the new scheme of Ocean Grey, Dark Green and Medium Sea Grey. Finucane's Spitfire still carries the old style roundels and fin flash, but the Dark Earth and Sky sections of the aircraft have been freshly overpainted with the new colours. Some sources suggest that the lower surfaces of this aircraft remained in Sky, but photographs of 452 Squadron Spitfires show a definite contrast between the Sky-coloured fuselage band and the lower surface colour. Painting commenced with pre-shading panel lines. Tamiya Flat Black was sprayed along panel lines and in the recesses of exhausts and shadowy areas. This was followed by a shot of Gunze Sky around the rear fuselage. When dry, this was masked for the fuselage band. Gunze acrylics were used for the camouflage painting. The lower surfaces were sprayed with Medium Sea Grey. I used RLM 75 as a substitute for Ocean Grey - the colours were very similar. Tamiya's instructions include 1/48 scale camouflage pattern printed on a separate sheet. I decided to cut the sections out and use them as camouflage masks. Each section was attached to the upper surface and fuselage using small blobs of BluTack. This permitted a very slightly feathered edge on some demarcation lines. The real aircraft were usually sprayed with the assistance of thick rubber mats as masks, so the combination of hard edge and slight feathering is appropriate.
I mixed a lighter shade of green, which was mottled over the Dark Green to simulate heavy wear on the older colour. Weathering and paint-chipping with a silver pencil also focussed on the Dark Green colour, as the Ocean Grey and Medium Sea Grey were relatively freshly applied. National markings were scrounged from a number of sources after disappointment with Tamiya's decals. The white of the fin flash was very translucent. I masked and sprayed the centre section white to rectify this problem. Squadron codes, serials and Finucane's Shamrock all came from PD Decals sheet no. 48-015. These decals were perfectly opaque and behaved themselves nicely on application. A coat of Gunze Flat Clear and aerial wires from monofilament completed this project.
Tamiya's Spitfires rate as some of my favourite aircraft models. They combine attractive subject matter with reasonable accuracy, brilliant engineering, perfect fit and great value.
This Spitfire provided a real tonic for me between long-term, complex modelling projects. If you are feeling jaded about modelling, try one of Tamiya's Spitfires yourself! Model, Text and Images Copyright © 2000 by Brett
T. Green
|
 The
cockpit is adequate for this scale but the seat is a bit thick and
oversimplified. The Spitfire did not have a cockpit floor. The kit deals
with this feature by using a single part with footrests and framing
moulded above a false partial floor. This looks fine in the dark recesses
of the bottom of the cockpit.
The
cockpit is adequate for this scale but the seat is a bit thick and
oversimplified. The Spitfire did not have a cockpit floor. The kit deals
with this feature by using a single part with footrests and framing
moulded above a false partial floor. This looks fine in the dark recesses
of the bottom of the cockpit.
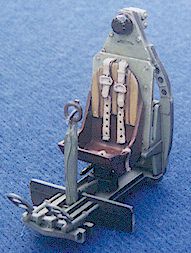 The
Ultracast Spitfire pilot's seat is a significant improvement over the kit part.
The backrest and harness set off the delicately moulded seat. Careful painting
really brings this small piece of resin to life. With the canopy and port-side
access door open, the seat is a very prominent feature.
The
Ultracast Spitfire pilot's seat is a significant improvement over the kit part.
The backrest and harness set off the delicately moulded seat. Careful painting
really brings this small piece of resin to life. With the canopy and port-side
access door open, the seat is a very prominent feature.