Home
| What's New |
Features |
Gallery |
Reviews |
Reference |
Forum |
Search
Home
| What's New |
Features |
Gallery |
Reviews |
Reference |
Forum |
Search
|
|
|
Sukhoi Su 27 by Peter Pelka
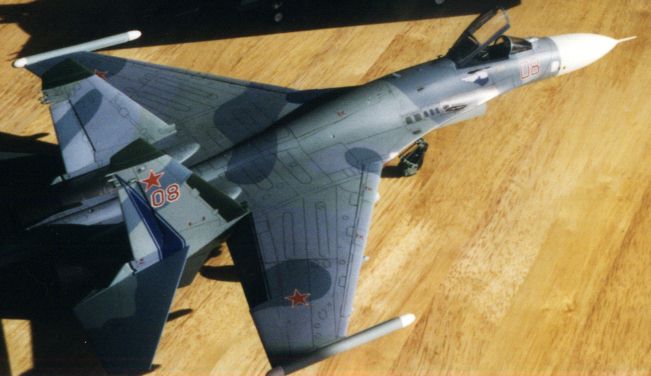
This is Academy's Su-27 Flanker. This is by far the best 1/48 scale Flanker available (quite old by now though). However, the kit has several accuracy problems which the Cutting Edge set addresses.
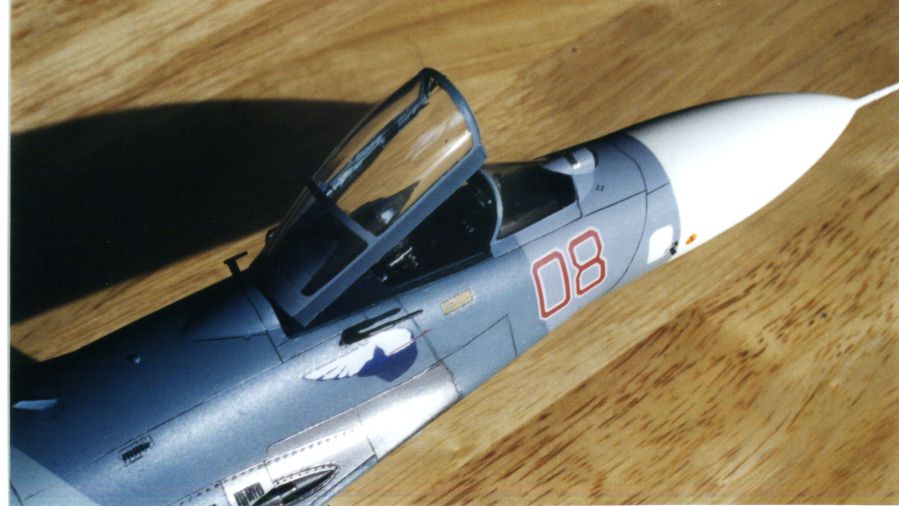
The cockpit is very sparse in the Academy kit, but the CE detailing set replaces the entire cockpit and looks awesome. The problem with the CE cockpit is that it is fairly deep (to correct the depth of the original Academy offering) and thus it doesn't fit very well as the wheel well is in the way. It required a lot of shaving and careful fitting to get it to fit well, but the end effect is well worth the trouble.
The CE set also provides a set of Sarbitsaya ECM pods for wingtips to replace Academy's missile rails. I made railing for these with strip styrene, which looks fairly close to the real thing. The Academy canopy is designed to be installed closed so some modifications needed to be made to make it open. Most of the necessary components are provided by the CE set but the actuator is not. I made it from the airbrake actuator that I didn't use as I installed the airbrake closed. I also drilled a hole in the fuselage and glued a brass pipe to the canopy to make it more secure.
The fit of most parts is pretty good, the wings are moulded with the fuselage and this greatly simplifies the building process. The engine intakes mate quite poorly with the fuselage and this will require a bit of filler, but nothing major. My model was a little worn and some panel lines needed rescribing, mostly on the fuselage around the cockpit.
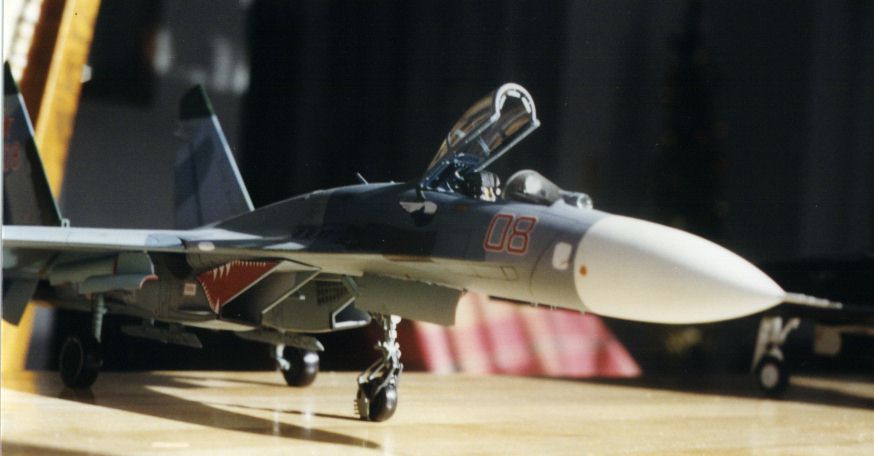
For painting I used a mix of Tamiya acrylic, Gunze Sangyo acrylics and ModelMaster Metallizer paints.
The decals provided with the kit are very good and fit very well, but they don't stick very well as I learned after ripping off most of the shark's head after it was applied and sealed with Future. As a consequence I had to repaint the entire head of the shark! I weathered the plane a bit with an oil wash. Overall, the model turned out pretty well although the colours aren't very accurate (I have no access to Russian colours here), just remember to replace the cockpit with some aftermarket set and you'll have an excellent looking model.
Model, Text and Images Copyright ©
2000 by Peter Pelka
|