Home
| What's New |
Features |
Gallery |
Reviews |
Reference |
Forum |
Search
Home
| What's New |
Features |
Gallery |
Reviews |
Reference |
Forum |
Search
|
|
|
Grumman TBF-1C Avenger by Neil Wynne
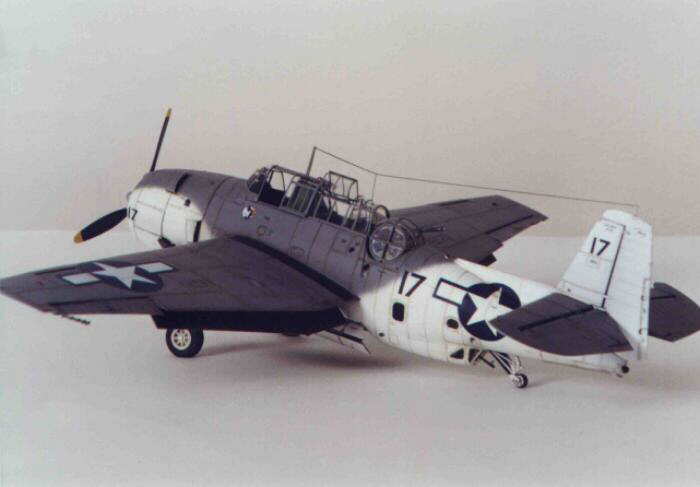
The model represents one of twelve Avengers carried by USS Block Island flying anti-submarine duty in the North Atlantic in May 1944. Sadly all were lost when the carrier was sunk on the 29 May 1944.
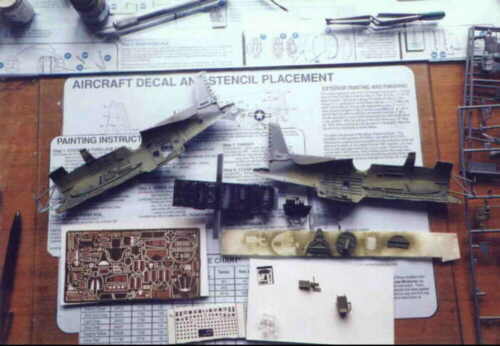
The picture below shows the top of my modelling bench located in my home in North Wales in the UK. On my bench I usually have 2 pieces of glass, the first at the back is a long narrow piece (an old shelve from a cabinet) is where you can se the instructions from the kit folded over to the part that I am currently working on, the instruction sheets in Accurate Miniatures kits really are first class, but proved to be a bit of a nuisance when having to unfold all the time to refer to the excellent painting guide, (the latest kits have the plans in a booklet style, much easier to work with), so my solution to this was to photocopy the painting guide and colour notes and put them under the second piece of glass at the front of the picture, where they can be referred to constantly during construction. In the bottom left is the brass fret from Eduard, and also instrument dial decals from True Details which I used on the back of the instrument panel supplied in the kit as a clear part, which is then painted on the front side with matt black. I have started to airbrush the parts in interior green. The object in the centre is the roof of the bomb bay, which I have pre-shaded with matt black before its thin coat of interior green, this gives the effect of a weathered finish as you can see from the interior walls of the fuselage.
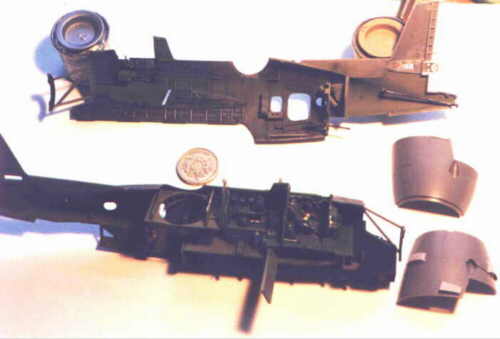
The next picture shows most of the internal components after painting and detailing and ready for assembly. Some of the etched brass parts can be seen including, the pilots seat belts, 2 ammunition boxes, (on fuselage wall forward of the crew entry door), chart holder (left cockpit side wall) and flare holder (right cockpit side wall). Also visible is the instrument panel complete with brass rudder pedals already painted and waiting for the instrument dial decals. All the parts have been given a thin wash of Burnt Umber water colour paint and have also been dry-brushed Silver in areas like cockpit floor behind rudder pedals, the fuselage frames on side walls and the sides of the bomb bay which are all high usage areas.
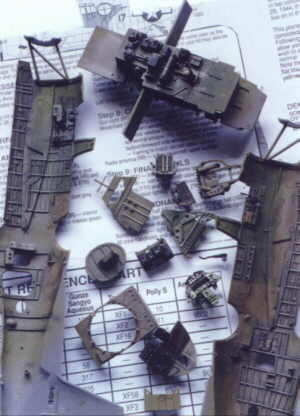
Now we see the internal components installed and the fuselage halves are ready for joining together (below). The coin in the middle is a British one Pound coin just to add a sense of scale, for readers outside the UK thats 22,5mm/ 0.88inch diameter. Also on the right side is the engine cowling panels with the cooling panels opened on the bottom or right hand side, these are sections of plastic removed and replaced by brass items shaped to fit.
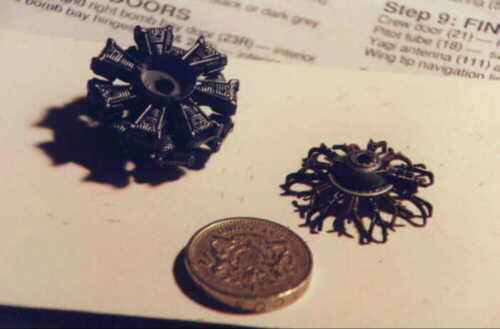
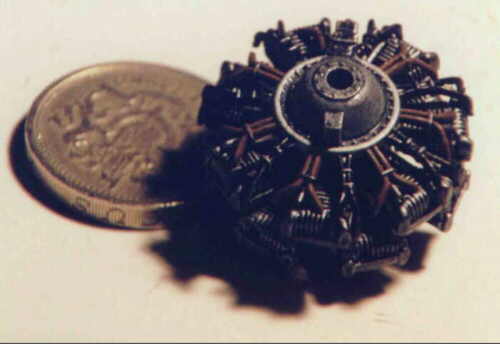
Here is the kit representation of the 1,700hp Wright R-2600 engine, the cylinders seemed to lack push-rods so these were added from stretched sprue. The engine was painted matt black and dry-brushed silver. The engine casing was painted grey with brown plug leads and fuel lines. Once again the casing was dry-brushed silver and given a thin black wash. The finished product can be seen in Pic 5.
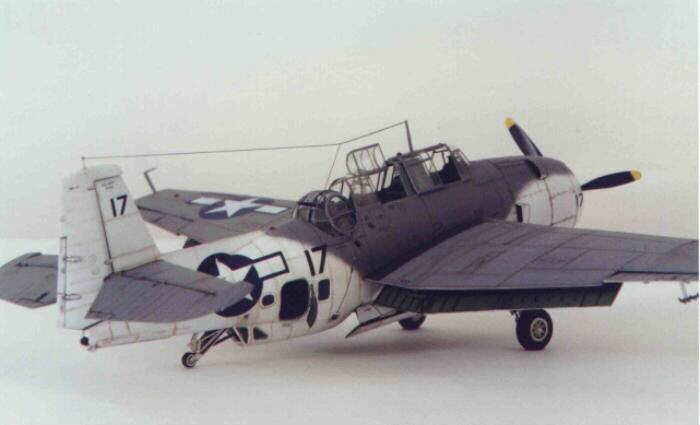
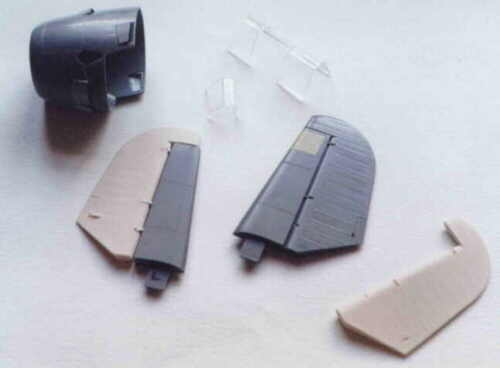
The following image shows the finished forward fuselage and engine cowlings with all the cooling "gills" opened, just behind that is the canopy parts which were opened carefully with a sharp scriber. Also is the before and after versions of the tailplanes, with the elevator removed on the left item and replaced with resin elevators and stock hinges which can be posed slightly lowered to add further authenticity.
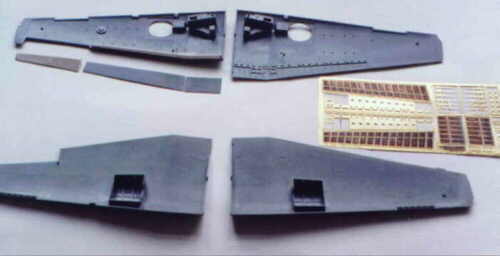
Next we can see how the wings were modified, the ailerons were replaced with resin items, the flaps were removed and a stock card rear spar was made from the cut-out template supplied on the side of the kit box, excellent idea. The moulded on flap detail (which itself is acceptable) was removed and replaced with the Etched Brass set from Eduard shown on the right.
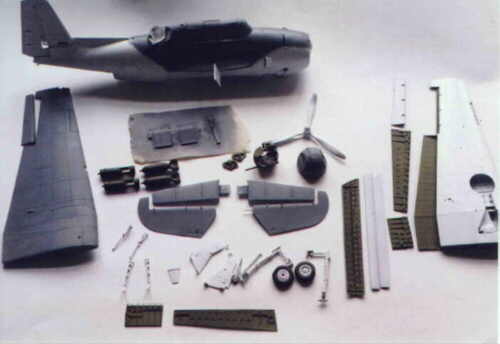
Here are all the assemblies together after painting and before final assembly. The propeller has yet to be painted black and yellow. The upper surfaces of the aircraft were pre-shaded with black before the thin and patchy grey top coat was added, this simulates the faded and washed surfaces with deteriorated quickly in the North Atlantic climate. The underside is also pre-shaded but to a lesser degree. The interior of the flaps, bomb bay doors and the rear spar area were air-brushed interior green and given a thin black wash to bring out relief. This wash was also added to the wheel bays and landing gear components.
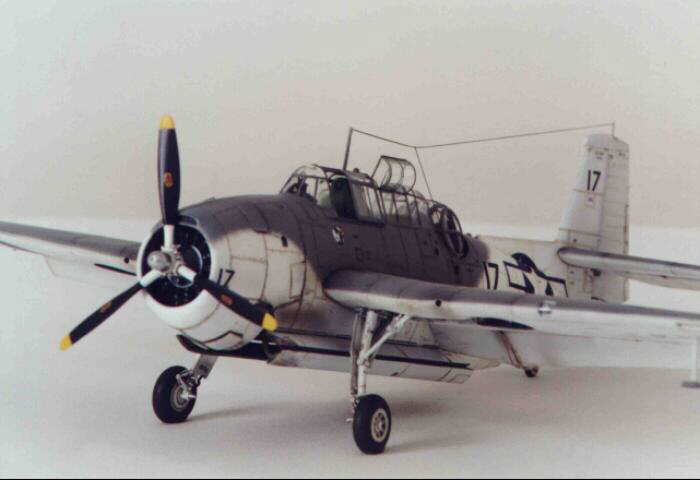
After final assembly and decaling the model was given a thin wash of burnt umber water colour paint and then various staining added by airbrushing with Tamiya Smoke acrylic. Oil stains were painted on around the engine cowlings, piston engines were notoriously oily. Cockpit edges, fuel filler caps and ammunition hatches were all dry-brushed Silver to simulate wear that quickly showed up on even the cleanest airframes. The model has been detailed using the Eduard Etched brass detail set, Eduard etched brass flap set, and Hi-Tech resin ailerons, elevators and weighted wheels.
Model, Description and Images Copyright ©
2000 by Neil Wynne
|