Home
| What's New |
Features |
Gallery |
Reviews |
Reference |
Forum |
Search
Home
| What's New |
Features |
Gallery |
Reviews |
Reference |
Forum |
Search
|
|
|
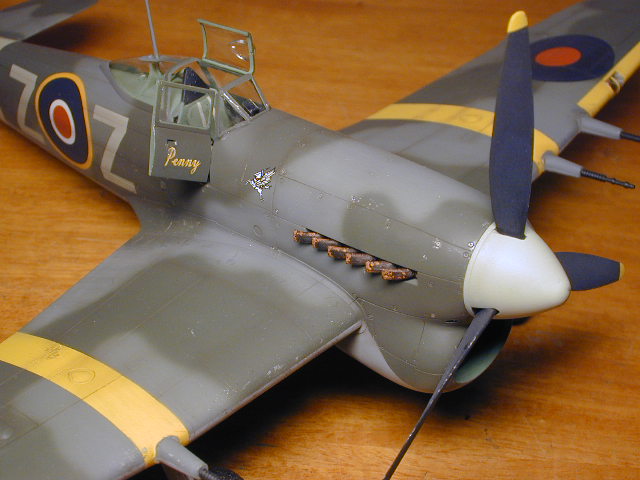
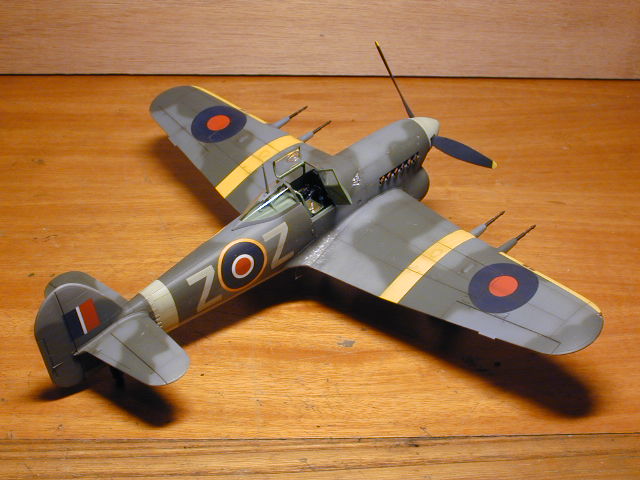
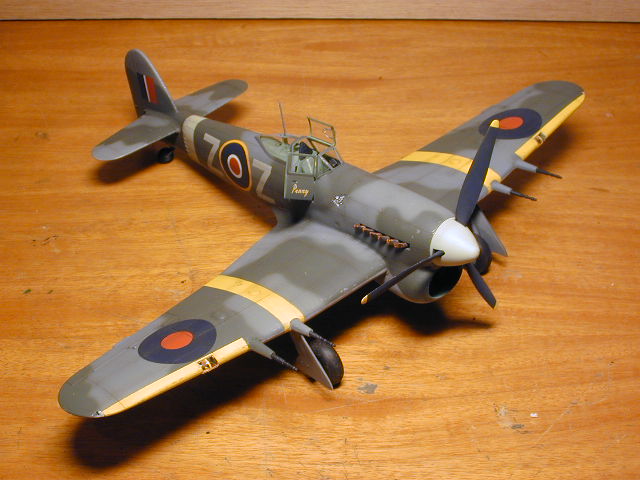
Hawker Typhoon by Julien Haccoun
The Hawker Typhoon was originally designed to be the successor to the Spitfire. However, it proved to be more appropriate as a fighter-bomber. The Typhoon was seriously handicapped by the lack of power of its Napier Sabre engine above 10,000 ft. This rugged aircraft nevertheless showed its worth at low altitude in the train and tank-busting role where its speed, stability and armament made the difference.
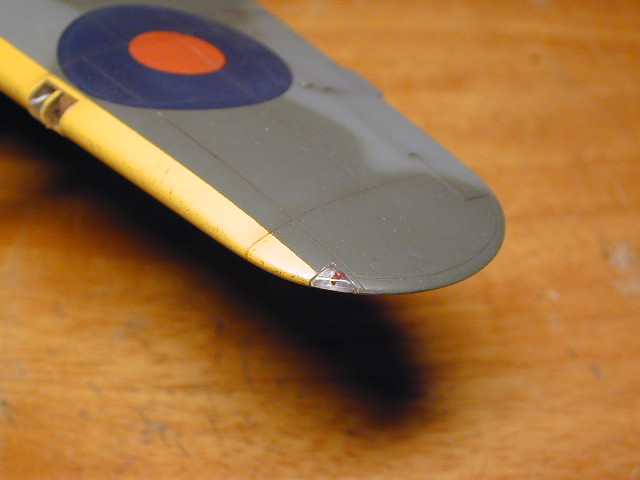
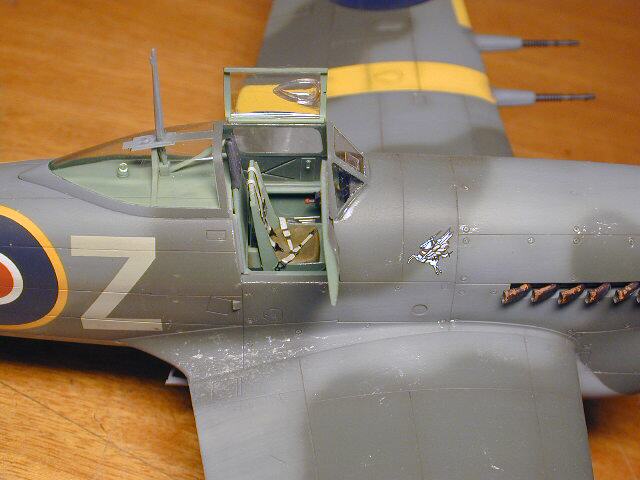
This is Hasegawa's 1/48 Car Door Typhoon Mk Ib, released in late 1998. The model is very nice. It is delicately detailed with very good surface treatment, especially on the wings. The characteristic shape of the thick kinked wing is well reproduced and Hasegawa even supplies clear parts for the navigation lights. This is a nice initiative that I wish all manufacturers would follow.
There are few problems during the construction phase. Two areas, though, need extra care - the cockpit insert parts and the radiator intake. The cockpit is quite well detailed, but I decided to add a couple of metal wires along the port side behind the tubular frame. I also built a new thinner seat using the original as a guide. I added a cushion and the seat belts (Eduard British Seat belts and buckles). After dry fitting I found that fit was less than perfect around the canopy, so I chose to add thin plastic strip to have a perfect seem, both on the top and sides of the fuselage. This required careful sanding especially on the deck behind the seat. I then had to rescribe all lost panel lines after my vigorous sanding!
I always look forward to painting my models. Since I find the British camouflage schemes too dull, I chose to highlight mine with colorful markings and heavy subtle weathering. I chose to represent "Z o Z", the personal mount of Duxford Wing Leader Denys Gilliam, with the help of Aeromaster decal sheet 48-372. It was also intended to overcome the drawbacks (thickness, etc...) of Hasegawa's decals. The paint scheme of Penny is non standard although in regular colors. I first airbrushed the yellow areas (Gunze H413 RLM 04) over a white coat. The camouflage pattern was then airbrushed freehand using Aeromaster Medium Sea Gray and Ocean Gray, and Gunze H309 FS 34079 Dark Green, and followed by a gloss coat. The clear parts and yellow ID bands were masked with Tamiya tape.
What I thought would be an easy task thanks to after market decals turned out to be an unhappy experience. I wanted to replace Hasegawa's decals that I thought to be thick with Aeromaster's supposedly thinner ones. The wing roundels were in fact thick as paper as were all the markings of the sheet... I tried Microset/sol and AeroSet/Sol II with no result: the decals wouldn't conform to the panel lines! So I ended up slicing them along the lines and then applying a fair amount of setting solutions. The result isn't perfect but could have been worse! Then came my favourite part - weathering. I first sprayed a flat coat (Aeromaster, my favourite), followed by a brown/black wash in all panel lines with a long fine brush, then wiped it with Qtips. The slightly rough texture of the flat coat retains an amount of pigment which results in a slightly darker and dirty finish. To further highlight the lines I airbrushed a highly thinned mix of brown & black. This slightly tones down the sharp washed panel lines while giving a shadow-like look from a distance. I completed the weathering by chipping paint using aluminium paint applied with a fine brush, toothpicks and Scotchbrite. A mist of clear flat sealed all this work.
I completed the model by adding all the fragile parts (antennae, gun muzzles, wheels, propeller...)
This model proved to be easy and straightforward to build with few problems apart from the fuselage plug and radiator intake. It was a nice "low tech" subject that I would recommend to any RAF freak as well as those who aren't afraid to add a big single engine aircraft that looks pretty much like a Bulldog to their collection!
Click the thumbnails to view the
images full-size
Model, Images and
Text Copyright
© 2000 by Julien Haccoun Back to HyperScale Main Page Back to Features Index |
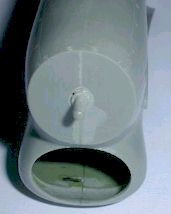
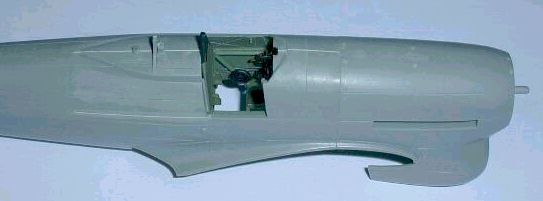 The
airframe is molded with a cockpit area insert in the fuselage. This was
the easiest way for Hasegawa to produce both the car door and the bubble
canopy versions at low cost, without having to make a whole new
fuselage.
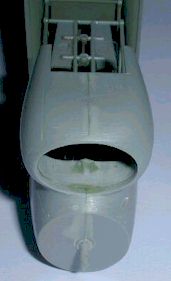
The
airframe is molded with a cockpit area insert in the fuselage. This was
the easiest way for Hasegawa to produce both the car door and the bubble
canopy versions at low cost, without having to make a whole new
fuselage.