![]()
Westland
Wyvern
Overcoming the
Fear of Vacforms
by Anthony Butters
|
Westland
Wyvern |
Anthony Butters was a friend and fellow member of IPMS NSW who passed away tragically young in 1997 after a short battle with Leukemia. As well as being a great human being, he was a talented modeller. This was Anthony's first attempt at the gentle art of vacform models. He wrote the following article while I was Editor of the IPMS NSW Magazine in 1996/97. He describes the preparation (both psychological and physical) and building of this lovely 1/48 scale Naval Fighter.
More of Anthony's models can be seen on Terry Ashley's PMMS site.
| B a c k g r o u n d |
Fear has a name, and for me the name was "Vac Form". But as everyone knows there comes a time in a person's life when you must confront your fears. For me, that time came when I saw the artwork on the box of Dynavector's Westland Wyvern.
I am developing a habit of wanting to build kits of aircraft about which I have absolutely no information. This must surely be a case for the X Files. Even though my library is quite large, and despite several attempts to find something in the shops or by pestering my friends, I was only able to find a few scrappy photos.
Although I could have written away to Yoevalton, the RN museum, enthusiasm got the best of me and I decided to get stuck in and take my chances.
| Dynavector's 1/48 Scale Wyvern |
The is a multi-media kit, with main components in vac form styrene sheets. The engraved panel lines on these parts are sharper than some injection kits I have seen. They impressed me greatly. Propellers, landing gear, wheels , launch rails, cockpit side panels, instrument panel and rockets are white metal. Finishing it all of was a resin spinner and front cowl. All parts are neatly packaged in a large flat box.
The instructions were certainly different - no numbered step by step hand holding here. However, there are good clear drawings of the assembled components and brief descriptions of what is what.
As this was my first vac form adventure, the one thing that was invaluable to me was an issue of Scale Model Aircraft which showed almost step by step the building and painting of a very nice example (Volume 17, Number 3, May 1995). It is not that this is a hard kit to put together. In fact it is quite the opposite. It is just nice to be shown some of the little problems that you might come across when you get to the nitty gritty.
Starting with cutting out all the major components from the sheet was a bit tense but once started, not that much of a challenge. Cautious sanding followed, and by the time the parts were out both myself and the study looked as though there had been a blizzard.
Gluing the parts together I used a mixture of super glue and normal plastic cement. I also used strips of plastic along the seems to add a little more strength. With no locating pins I had a premonition that just as it was finished a huge crack would appear running along the length of the spine.
The cockpit tub, finished with a small amount of added (fictitious) detail, fitted nicely and the wings were glued in place. At this stage I noticed my first mistake. I had sanded a little too much away from the underside of the wings and there was a slight gap between it and the fuselage. This required fitting of a plastic card backing which was then covered with putty and sanded smooth when dry.
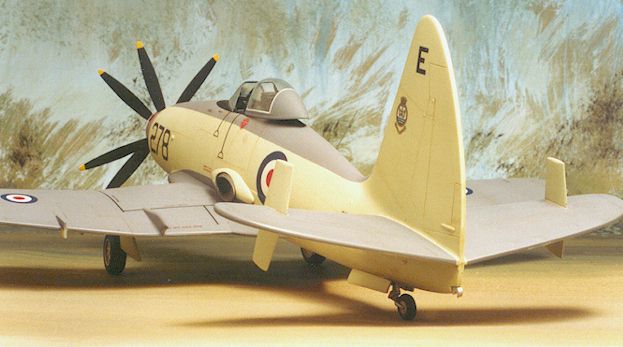
The only real concern I had with this kit was the two small white metal air inlets which conform to the front of the wing leading edges and fit snugly against the fuselage. These are very small and have an extremely fine edge. They were fitted with super glue and given a liberal coating of Gunze putty to help hide the join and give a nice moulded appearance. Once finished I was always careful to watch where I placed the kit, as once damaged they would be quite a handful to fix, without it being very noticeable.
| Painting and Finishing |
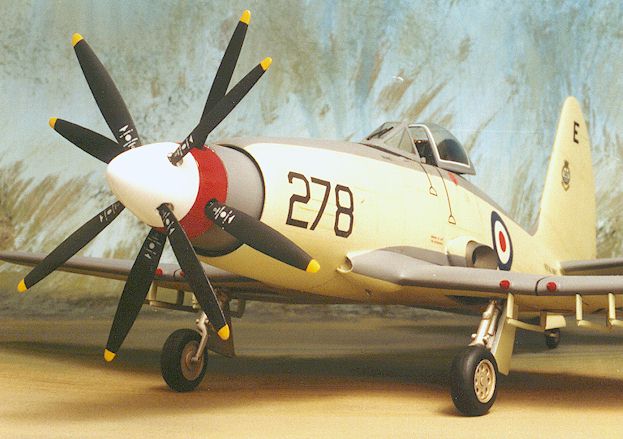
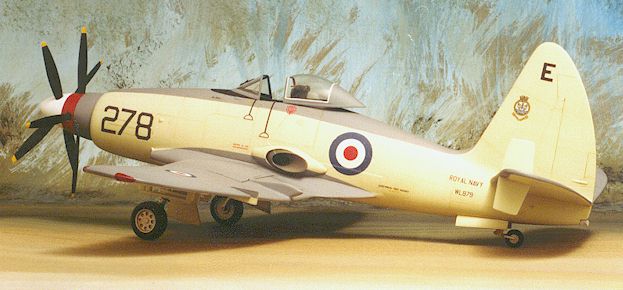
Painting was a combination of Dark Sea Grey and Sky as per the normal Royal Navy scheme of the fifties. The instructions recommended the use of Extra Dark Sea Grey, however in the Gunze range this is almost black and as such was far too heavy. The decal sheet is very nice with only the small registration problem mentioned earlier and gives three basic options.
Once I had managed to talk myself into not being happy with the first attempt at painting and decals. It was stripped back and the "Model Art" sheet purchased to give another three options. The final choice was for an aircraft of 813 Squadron based on board HMS Eagle during 1958. The reason for choosing this option was simple - I liked the nice big numbers that were placed on the very end of the nose.
The decals were then applied and given time to dry. Finally being finished off with a coat of clear gloss to blend them into the paint work. Again left to dry a light coat of flat varnish was applied to take the high gloss Finnish away, to something of a satin appearance.
To finish the project I applied small amounts of tinned oil paint to some of the panel lines. This bought out some of the fine detail and helped give a slightly weathered appearance.
| Conclusion |
Although it was a pleasure to build , the grief that I provided myself with meant that finishing this kit took approximately 3 months, with Christmas holidays also helping to blow the completion date into a new year. But when I placed it on the book case for the first time I managed that slightly silly, contented look that all modellers have when they have finished their latest project, and even now some months later it still sits at the front of my collection.
As an end note, I now have two new vacform kits sitting in my cupboard, and all I need to start them is a few more books and to save up for the patience to start cutting out the parts. THE FEAR HAS GONE !
March 1996.
Back to HyperScale Main Page
Back to Feature Articles Index