![]()
X-Wing
Fighter
by
Floyd S. Werner, Jr.
|
X-Wing
Fighter |
I n t r o d u c t i o n |
In 1977, when I was a teenager with hormones raging, I dated a beautiful girl who would later become my wife. Her job didn't have any effect on our relationship, but it didn’t hurt. She worked at the movie theater in town.
Well, let me tell you about one of the little benefits of working there. Family and "close friends" are allowed in for free. Imagine if you will a three week run of the original "Star Wars", two shows a night and all the popcorn you can eat served by a babe. Yes, I was in hog heaven.
Now the only other movie that affected me as much as "Star Wars" was a little known movie "Apocalypse Now". Well actually it wasn’t the movie but one scene. I could tell exactly when to come in so that I could witness the Air Cav do their thing then leave. Hum, look at the Air Cav now. Live the Legend (never thought I’d be that legend).
Anyway, back to the intro for this model. After seeing the great battle scenes featuring X-Wing and Tie Fighters I knew I had to build one. Well I did and it is still hangs in my bedroom to this day. After reading the great series of books on the Rogue Squadron by Michael Stackpole and Round Rock’s own Aaron Allston I was fascinated by Wedge Antilles. Wedge was the only other member of Rogue Squadron to survive attacks on both Death Stars. If you haven’t read the Rogue Squadron and like Sci-fi do it. Great series of books by a couple of really good authors. But with my impending deployment to Bosnia and the future release of "Star Wars Episode 1: The Phantom Menace" due out while I was deployed (something that I didn’t want to miss) I decided to celebrate with my favorite spaceship and paint it like Wedge’s. So with Rudy’s help one Saturday I bought all telescoping tubing that I needed to take with me.
M P C ' s K i t |
Fast forward one month, Location: Bosnia. Opening the box you are presented with three sprues of white styrene and one of clear. Now remember I told you that I built this kit in 1977 - by now the mold definitely shows it’s age. I would recommend anyone who wanted an X-wing now tries the 1/32nd one with the motor and voices. There are pit marks all over the model that have to be filled. Because I was going to build it in flight and hang it from my ceiling upon return (some kids just don’t grow up) I had to fill the holes on the bottom of the fuselage for the base. I actually filled one and left the other alone so that I could have it on my model desk here. You get the choice of a straight and level or a climbing position; I chose the climbing, as it is very dramatic.
C o n s t r u c t i o n |
Getting into the kit you will find out that the molds are way off especially when it comes to the cannons and landing gear. Since I was gear up no problem there, but those cannons just scream to be modified. I can’t remember the sizes but K&S tubing comes in the appropriate sizes. I was originally going to build the whole thing in tubing but quickly realized that I just didn’t have the facilities to do what I wanted. So I improvised.
I made the cannon out of tubing but left the kit’s deflector rings and the circle behind it intact. I just drilled a hole through the kit part and mated it up with the tube. It looked great and I was showing everybody.
The cannon bodies were next. The kit part around the front of the cannon breech was too thick and didn’t look good. Some tubing fixed it up and it made look closer to scale thickness. Assembly of the cannon and the tubing gave me great hope that this model would be better than the one I did in 1977!
Building the wings (S-foils) was next. They are built in halves like normal wings but the instructions are a little vague as to which one goes with which one - more on that later. I painted the inside of the wings a dark color (again RLM66) and drybrush with silver. This does two things - it aids in making the inside invisible and it is easier to access this area now than after the wing is assembled.
Don’t forget to paint the shield generators in the wings. I used Model Master Metalizer Magnesium and weathered them with pastels. This gets the S-foils ready to put together. Don’t forget to fill the holes in the lower wings where the pin goes to hold them together goes. Use the pin and let it protrude a little then cut it off from the inside. It may not be totally accurate but it saves time and adds a little to the wings. You can now assemble the pivot point in the wing. It has to be put in such a way that the wings will lock in the open position. Don’t forget to paint the pivot point prior to assembly.
 At this point
I’m getting excited. I have the wings together and this sleek starfighter is taking
shape. The fuselage is next. With the cockpit already installed the upper and lower
fuselage halves trap the S-foils between them. BE CAREFUL. I wasn’t and here is my
most glaring mistake. When you assemble the S-foils, the one with the landing gear doors
should be on the bottom. Mine isn't. I had already glued and superglued the fuselage and
the wings together so I was stuck. You really can’t tell the difference, but I know.
You have to glue the wings to the fuselage because they will just flop around the
centerline of the aircraft. So to maintain the proper alignment you have to glue it.
At this point
I’m getting excited. I have the wings together and this sleek starfighter is taking
shape. The fuselage is next. With the cockpit already installed the upper and lower
fuselage halves trap the S-foils between them. BE CAREFUL. I wasn’t and here is my
most glaring mistake. When you assemble the S-foils, the one with the landing gear doors
should be on the bottom. Mine isn't. I had already glued and superglued the fuselage and
the wings together so I was stuck. You really can’t tell the difference, but I know.
You have to glue the wings to the fuselage because they will just flop around the
centerline of the aircraft. So to maintain the proper alignment you have to glue it.
The assembly should be allowed plenty of time to set properly. While I was waiting I put the engines together. There are four of them. They are also molded poorly but you can work with them. Cleaning them up and painting them with MM Titanium with a dry brush of silver makes them stand out. I painted the exhaust portion in MM Burnt Metal. This looked a little stark at first but after pastels and washes the colors blend nicely. Don’t attach them yet, as they would make painting difficult.
Since the spaceship is flying I decided to smoke the canopy from the inside very dark. Tamiya smoke worked well but required lots of coats to get the look I was after. All that was required was to paint the cockpit interior RLM66 (you knew I had to get that German stuff in there somehow).
P a i n t i n g a n d M a r k i n g s |
Now came the painting. I preshaded with RLM66 as black would have been too stark a contrast against the white. After letting the paint dry for a day I sprayed white over the entire model - RLM 21 for those of you Luftwaffe buffs. Then came the fun part. To make Wedge’s X-wing required one rank stripe on the S-foils aft of the Rogue Squadron flash. During the movie there is a pre battle scene where there is an overhead shot of Wedge’s craft. You have to do some research to determine that that is Wedge’s. The best reference resource is collector cards. There are three of them in particular - one is of the Wedge flying through the remains of a Tie after saving Luke.
 When looked at the
photo closely you can make out the one stripe. Then there is a card for "Red 2
(Wedge)" from the front. Those two led me to the overhead shot card. So with some
unique references it was time to mask the stripes. It was tedious forming the stripes and
keeping them evenly spaced throughout the ship. Also there is red a solid stripe along
both sides of the fuselage. That is all there is to painting the X-wing. The rest is
weathering.
When looked at the
photo closely you can make out the one stripe. Then there is a card for "Red 2
(Wedge)" from the front. Those two led me to the overhead shot card. So with some
unique references it was time to mask the stripes. It was tedious forming the stripes and
keeping them evenly spaced throughout the ship. Also there is red a solid stripe along
both sides of the fuselage. That is all there is to painting the X-wing. The rest is
weathering.
This is where the model stopped looking like a toy and more like a spaceship. I first started weathering with burnt umber artist oils. While this was nice it wasn’t quite right. I left it alone for now. Next came lots of pastels. I used lots of them. Let me tell you there are more than one way to use pastels. You can sand them and use a brush to apply them but this only gives you a dusting. I needed dark swathes of color change. So I used Q-tip cotton swabs and pipe cleaners, depending on the area to be covered. The cotton swab covers larger areas. I don’t make powder. I just rub the swab on the pastel block and then on the model. If it is too dark then you can rub it off (well most of it). It started to look real good.
I painted a couple of coats of Future to seal the whole thing. Then I decided that I needed to make it dirtier. So with the gloss coat I applied even more pastels and some more wash to the seams. This added lots of depth and made the model look just like the movie I remembered from 1977. I finally liked it a lot. Attach the engines and then sealing everything with another coat of Future and then a coat of Polly-S Flat. After the first flat coat dried I decided that the front needed more weathering from traveling through hyperspace. So I drybrushed various shades of Model Master Metalizers onto the nose. Start dark and work lighter and in less area as you go until you are just on the tip of the nose. I know MM says it is for airbrush only but it drybrushes like a champ.
I know you're wondering about the R2 droid unit. Well just a quick coat of silver around the top and touched up with blue panels finishes him in quick order. Don’t forget the one red spot. FYI Wedge’s R2 is Whistler and I couldn’t remember from the books if he was blue or red. The R2 just sits in the back. I decided not to glue him in just in case I need to repaint at a later date.
A base finishes the model. My soldiers were very excited by the finished model and wanted to build from there.
C o n c l u s i o n |
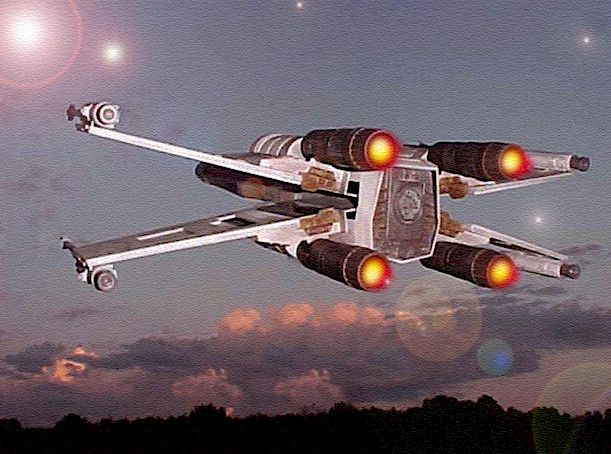
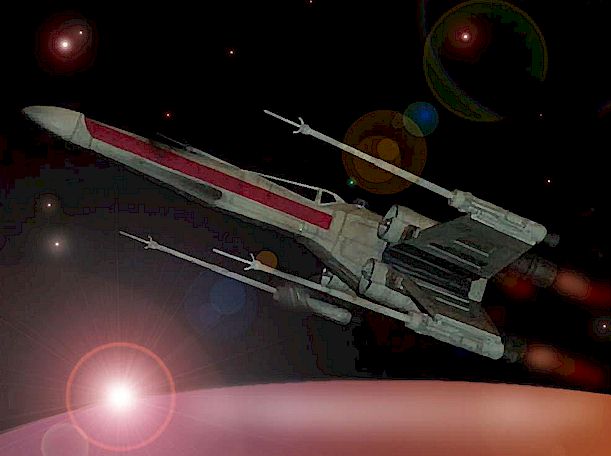
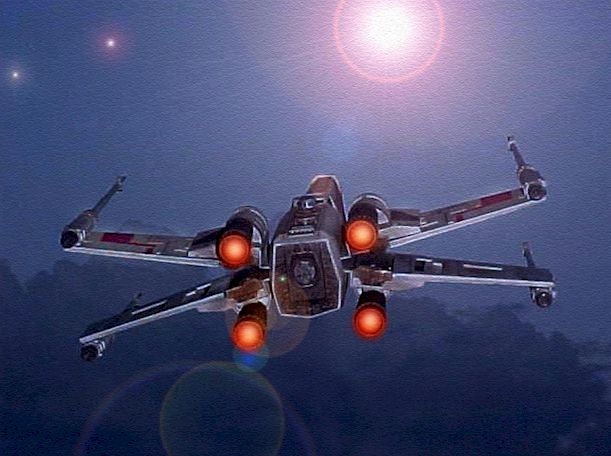
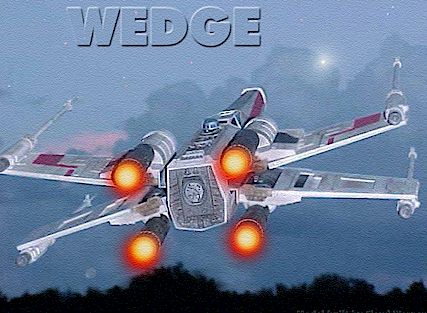
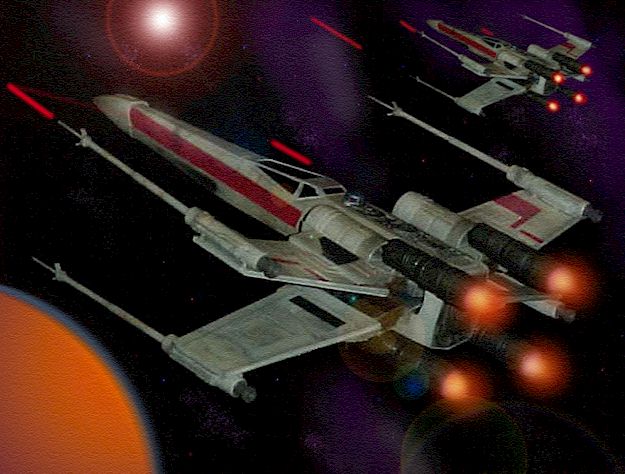
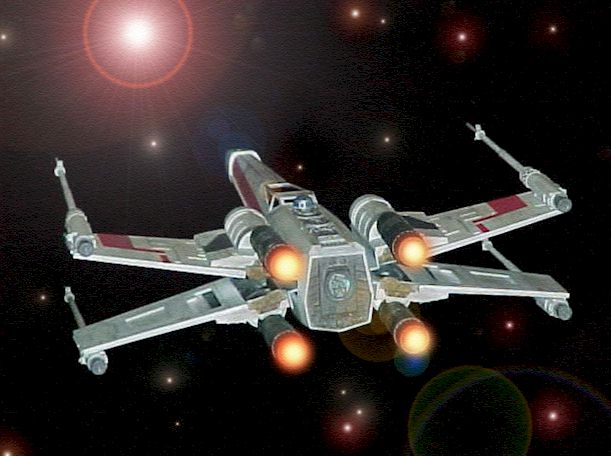
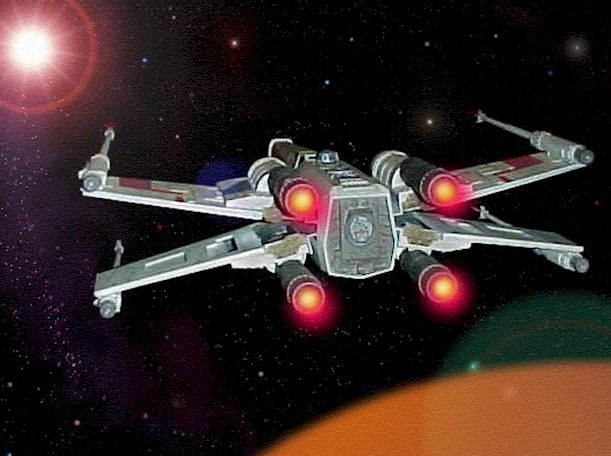
The photos were done with a digital camera. One of the civilians that works with me used the computer to erase the base and add the background. He is having as much fun with Photoshop as I had with the kit. It even inspired him to build the Snap-tite X-wing. What better form of flattery can there be? For those of you who were worried about me not seeing Episode I, don’t. Enough of us sent letters to George Lucas that he sent some copies for the movie theater here (actually a tent with a large plywood screen painted white) and we enjoyed the movie for a few days. I’ve seen it twice. There were some nice looking women that worked there, but it was free anyhow so there was no need to date or marry any of them. Not sure the wife would understand anyway.
May the Force be with you!
| A d d i t i o n a l I m a g e s |
Click on the thumbnail images below to view the image full sized. Use the "Back" arrow on your browser to return to this page.


Floyd S. Werner, Jr.
IPMS #26266
Back to HyperScale Main Page
Back to Features Page