 Home
| What's New |
Features |
Gallery |
Reviews |
Reference |
Forum |
Search
Home
| What's New |
Features |
Gallery |
Reviews |
Reference |
Forum |
Search
|
|
|
Heinkel
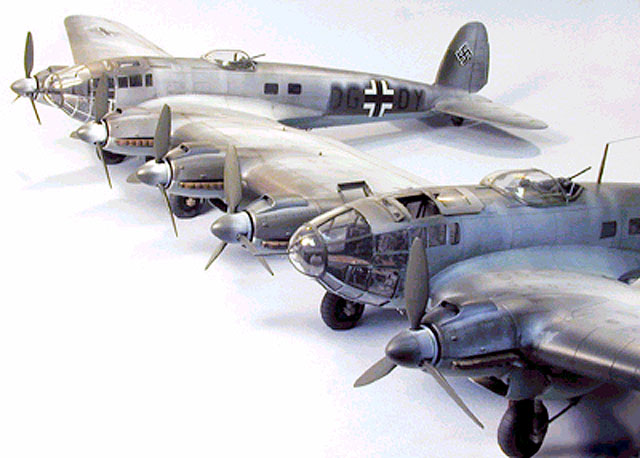
He 111Z Zwilling by John C. Valo
When Monogram released their 1/48th scale He-111, Luftwaffe modelers everywhere rejoiced. Little did they know what wheels were set in motion in my life though. What started off as a little joke between modelers about building a 1/48 scale Zwilling became a reality - and what's the use of having a Zwilling lying around without a Gigant? So...
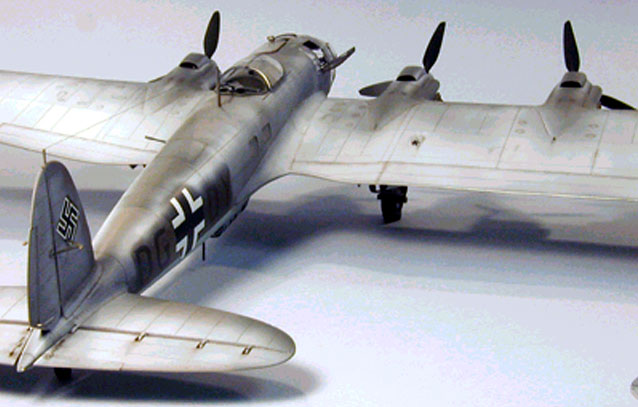
The Zwilling was not too problematic. I simply butchered three kits (one for the center engine) and made the center section from a carved basswood core, sheeted with styrene and scribed. I also vacuformed the nose caps so I could pose the guns somewhat differently, and opened the port canopy.
Resin wide-chord props and the barbeque grill exhausts were cast up for me by a modeling friend. Aside from that, the rest was straightforward. Getting the darned thing to sit on all six wheels at once was the hardest part!
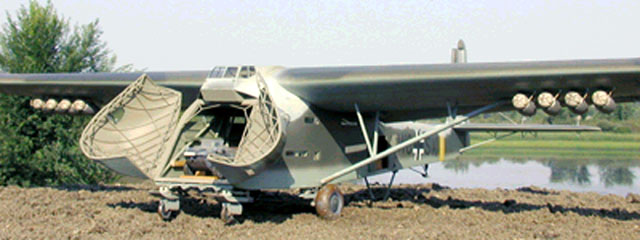
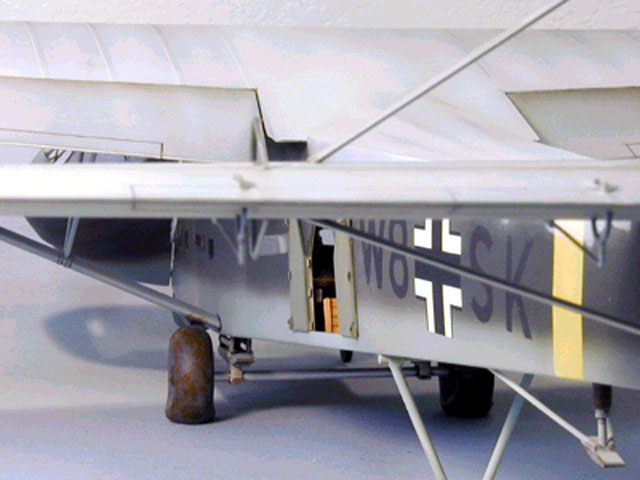
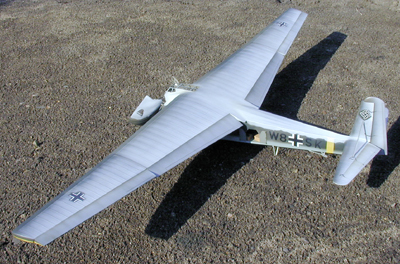
The Gigant was my first foray into the world of large-scale scratchbuilding. At 1/48th scale, the aircraft has a 45" wingspan, and is roughly two feet long. However, it's not horribly complex - just a big box with wings.
I wanted to have a fully detailed interior completely packed with cargo (including a Bandai Schwimmwagen someone found for me at a convention), so the fuselage was built literally as a box. After unsuccessfully trying to cut windows from clear stock to fit openings cut in white styrene, it finally dawned on me to make the fuselage sides completely out of clear PETG plastic sheet, and simply mask the windows.
The floor was made from scribed .040 styrene and the fluted upper fuselage aft of the wing was made from embossed .030 styrene sheet. The non-functional interior tubular structure was made from various diameters of styrene rod and tube. The cargo area roof is equipped with two tiny lightbulbs powered by a watch battery in the small crate just inside of the rear door. I built two sizes of crates from styrene and cast resin copies to fill the cargo area. Bits and pieces of HO scale railroad gizmos were sprinkled about for a nice chaotic appearance. In homage to my friend and master diorama modeler Steve Hustad, there is a tiny epoxy putty rat in the rear fuselage - complete with even tinier rat droppings! The nose doors were vacuformed over a carved basswood master, then detailed with styrene rod. There originally were two wires running from the fuselage to the nose doors as on the real aircraft, but proved impractical because of a slight measuring error.
I had intended to build a new model cabinet to fit the Gigant - figuring this would be the biggest model I'll probably ever build. In my greatest moment of carpentry incompetence, I miscalculated the depth by 1/2", so I had to break off the nose doors and reattach them slightly more open than they should be to fit. Take the model out; break off and reglue the doors - put the model back; break off and reglue the doors, ad infinitum. Suffice it to say, the wires are no more.
Incidentally, I wound up building two wings, because the epoxy didn't set properly on the first one - I wound up with a nearly four-foot long sticky, gelatinous mess! Such are the trials and tribulations of scratchbuilding...
Click the thumbnail to view the
image full size.
Model, Text and Images Copyright © 2000 by John
C. Valo
|


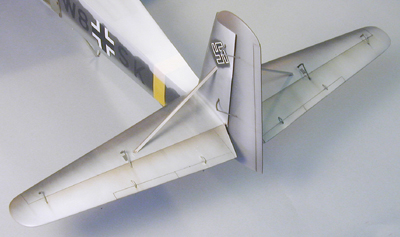 The
horizontal stabilizer was vacuformed over a wood master, and the vertical
tail is basswood coated with epoxy resin.
The
horizontal stabilizer was vacuformed over a wood master, and the vertical
tail is basswood coated with epoxy resin.
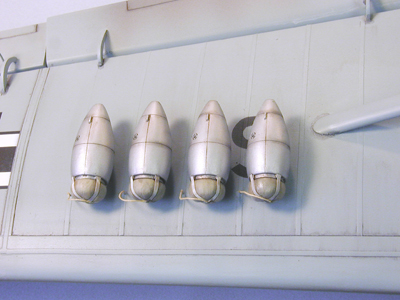 I
made a master for the Walther booster rockets and their parachutes, and
cast eight of them in resin. The attachment frames were made from styrene
rod in a simple jig to insure consistency.
I
made a master for the Walther booster rockets and their parachutes, and
cast eight of them in resin. The attachment frames were made from styrene
rod in a simple jig to insure consistency.
 Although
building the Gigant has caused many in my modeling peer group to raise
questions about my sanity, this model was a grand learning experience for
me. I think I built the entire thing at least twice, making mistakes and
correcting them.
Although
building the Gigant has caused many in my modeling peer group to raise
questions about my sanity, this model was a grand learning experience for
me. I think I built the entire thing at least twice, making mistakes and
correcting them.

