Home
| What's New |
Features |
Gallery |
Reviews |
Reference |
Forum |
Search
Home
| What's New |
Features |
Gallery |
Reviews |
Reference |
Forum |
Search
|
|
|
"Fake
MiG" by David W. Aungst
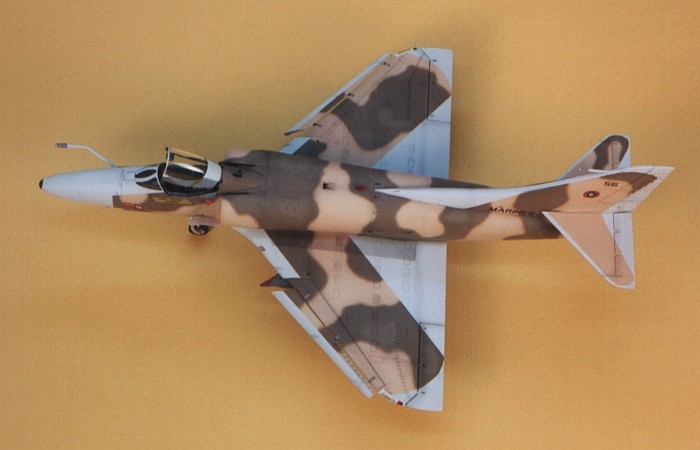
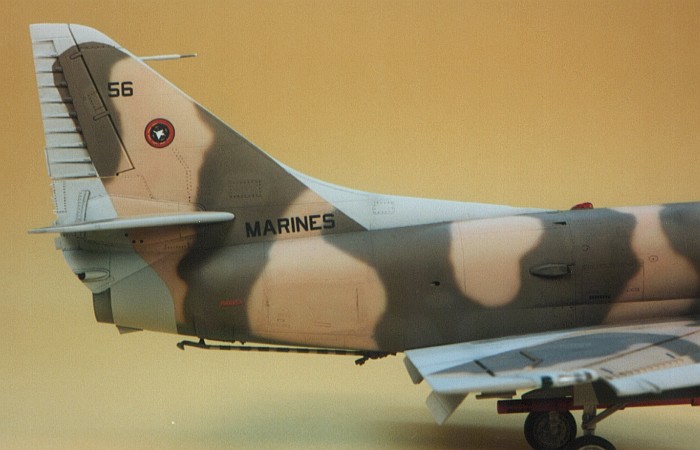
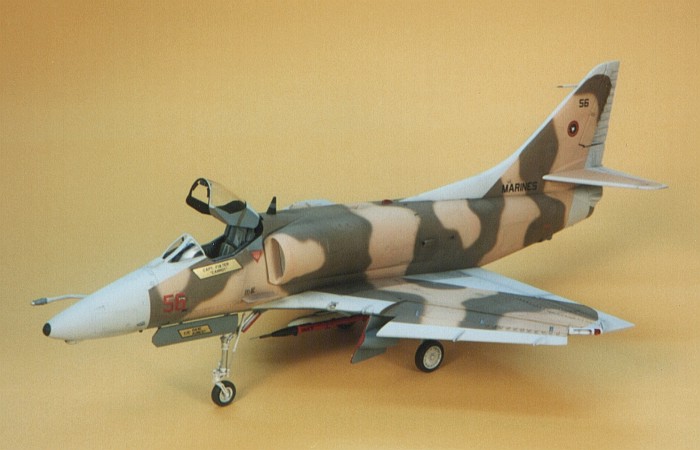
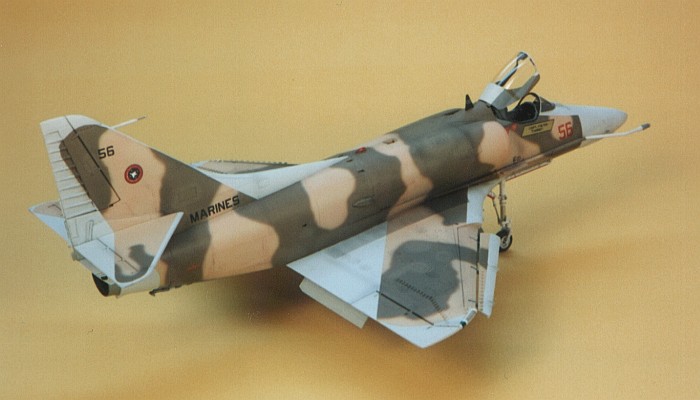
The camouflage applied to an aircraft is usually intended to conceal, either in the air or on the ground. The subject of this article has taken the concept in a different direction by using camouflage to disguise itself as a different aircraft. You will find a stylized outline of a MiG 17 carefully worked into the camouflage on this Skyhawk. The attempt to disguise an A-4 as a MiG 17 is a valid one. For the given time period, the Skyhawk was primarily tasked with simulating MiG 17s in adversarial training. I have never heard how effective the camouflage was at making the Scooter look like a MiG in flight. Being a short-lived camouflage scheme, I can only assume it was not as convincing in flight as they hoped, and the camouflage was removed after its evaluation. On the ground, it was a very interesting aircraft to see.
This aircraft has always been on my "hit list" of models I wanted to build. I actually started a Monogram Skyhawk kit at one point with the intention of building this aircraft. I got bogged down on details and eventually re-boxed the kit to wait for another time. With the release of the Hasegawa A-4 Skyhawk, I now have a well engineered, easy kit to build of the Skyhawk. It was only a matter of time before I built a Hasegawa kit in these markings.
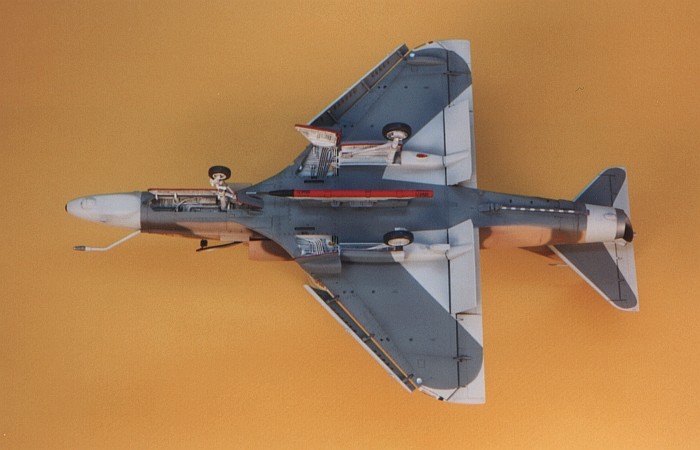
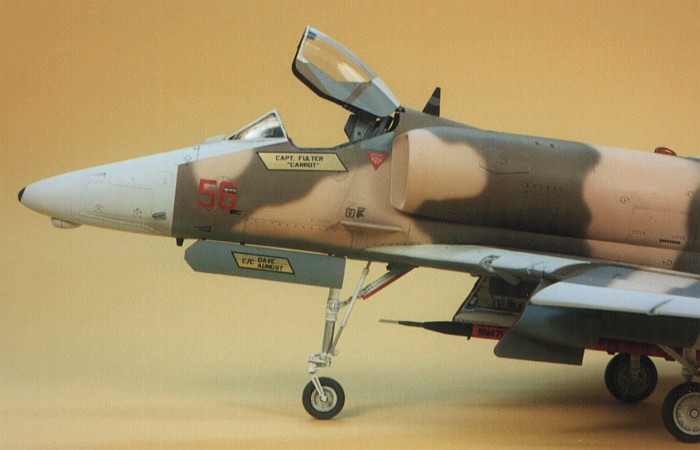
I am not going to go into a long review of the Hasegawa Skyhawk kit here. See my previous posting, Diamondbacks Skyhawk, for a full review of the Hasegawa Skyhawk kit. I do, however, have one notable update to the previous review. I mentioned in the earlier posting that A-4Es do not have wing spoilers. After finding several pictures of A-4Es with raised wing spoilers, I asked a retired US Marine friend (that worked over 20 years on Skyhawks) about this detail. He informed me that most all A-4Es were retrofitted with the wing spoilers at pretty much the same time as they were retrofitted with the avionics hump. This means the Hasegawa molded detail on the lower wing flap that provides the wing spoiler actuator is correct for A-4E airframes following the retrofit of the avionics hump. This actuator detail should only be removed on early A-4E airframes, prior to when they had the avionics hump installed. Aggressor airframes, like the one in this posting, likely were "humped" Skyhawks in previous lives that had the hump removed in aggressor service. They would have retained the wing spoilers, though.
The point to this model was its camouflage, so I wasted no time on detailing the kit any further. I did change the kit using the pieces already in the box, though. To correctly model this aggressor Skyhawk, I actually used several of the pieces the kit instructs you to ignore. Being able to identify the pieces for what they were, I merely opened a couple flashed over holes in the correct airframe locations and used the alternate pieces. The things provided in the kit that applied to this aircraft are as follows.
As discussed above, the point of this project was the unique camouflage. This A-4E from Topgun was one of two Skyhawks to get this "MiG Outline" camouflage. The other Skyhawk was a TA-4J that flew with VA-127. Of the two aircraft, I tend to prefer the TA-4J better. But, all I have to work with (right now) is the A-4E kit. As all the needed parts were already in the box, I decided to build the A-4E version of this camouflage.
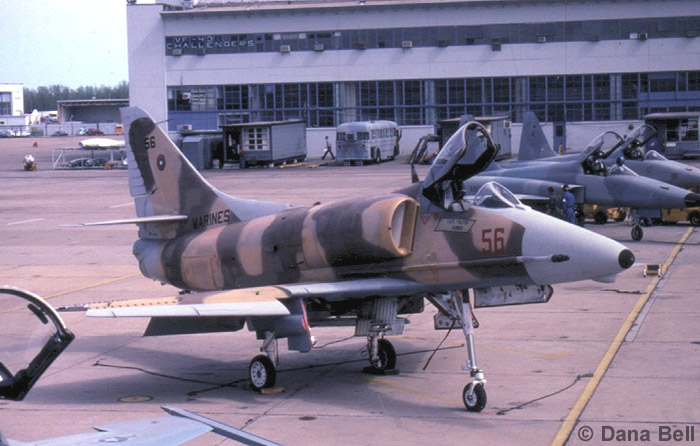
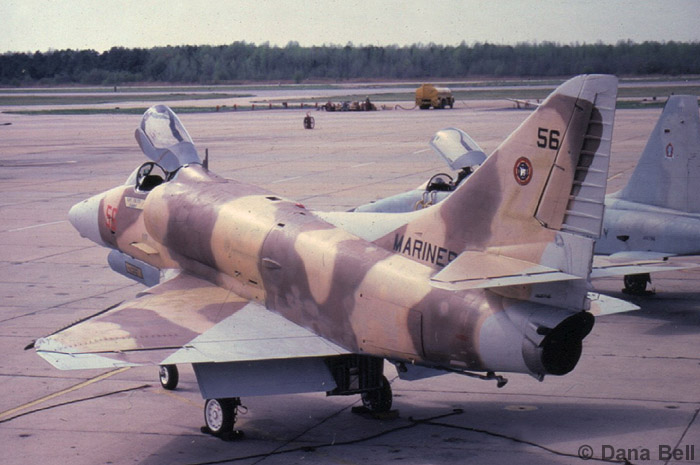
I had been collecting pictures of the two "MiG scheme" Skyhawks for years, preparing for building a model of one of them. The final, conclusive documentation for the A-4E version came from another model kit (of all places). The alternate markings in the 1/72nd scale Fujimi A-4E/F Aggressor Skyhawk are for this aircraft. The instruction sheet from the Fujimi kit provided a full four-view painting diagram showing the complete camouflage. Armed with this instruction sheet (and a hand-full of pictures) I was ready to build. I used all Testors Model Master enamel paints on the model. The camouflage of the MiG outline is painted Tan Special (F.S.20400) and Field Drab (F.S.30118). The underside MiG outline is painted Graish Blue (F.S.35237). The rest of the light colored areas of the Skyhawk are painted in Light Gray (F.S.36495). To the left is a link to a camouflage diagram I created for this aircraft.
Just as I completed painting the model (the first time), a friend on the Internet forwarded me nine more color pictures of the aircraft showing even better detail than any other pictures I had found in books. I ended up doing some close scrutiny of these pictures to update the camouflage diagram for the aircraft. Then I re-masked and painted the model a second time to correct the inaccuracies from the first painting. On studying pictures of the actual aircraft, I found that the beaten look of the paint was partially due to quite a bit of touch-up painting done to the aircraft. The touch-ups were not in perfectly matching paints, hence the camouflage started to take on a splotchy appearance. I decided to capture this effect, I needed to reproduce the same touch-ups on the model. So, I mixed up some slightly off shades of the original colors I used to paint the model and made the needed spot-color touch-ups on the model. The fresh tan paint was a bit darker and richer than the original tan color. The brown touch-ups were a bit lighter than the original color. I took care to keep close tabs on where I applied the touch-ups to they agreed with what I saw in the pictures of the actual aircraft. The camouflage diagram I created and included above shows the spot colors in it.
The image to the right shows my original artwork for the decals (reduced in small size to save space). I stole a couple Topgun badge decals from a SuperScale aggressor decal sheet. Happily, the aircraft had no positive/negative markings that would have complicated the markings. The following are some note worthy points to make regarding the painting and markings of the real aircraft. Some of these notes are already stated on the camouflage diagram.
For weathering, I used my typical style of thinned down enamel paint washes and air brush shading. I finished the weathering with some dry brushing to pop out the surface details. For a more complete discussion of what I do to weather my models, see my posting on "Weathering Aircraft".
The floodgates are opening! This is one of many strange aggressor Skyhawks that have appeared over the years. I expect (and hope) to see many more being built in the upcoming months. I know this is far from being my last one. I would like to dedicate a special "thank you" to Dana Bell for giving me permission to use some of his pictures to illustrate this posting.
Click the
thumbnails below to view images full-sized.
Text and Images Copyright © 2001 by David
W. Aungst
| |||||||||||||||||||||||||


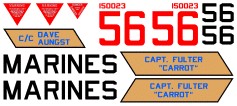 For decals, no after-market companies make decals of this aircraft (that I am
aware of). So, I created my own using MS Paint on my PC. I then printed the
markings on my ALPS MD-5000 printer to obtain the decals. See my article on
Printing Custom Decals for more details.
For decals, no after-market companies make decals of this aircraft (that I am
aware of). So, I created my own using MS Paint on my PC. I then printed the
markings on my ALPS MD-5000 printer to obtain the decals. See my article on
Printing Custom Decals for more details.