|
Blohm und Voss Bv P.194
by Caz Dalton
|
|
|
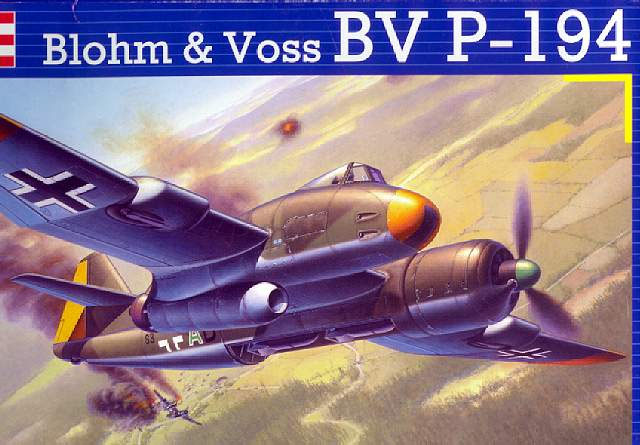
Blohm und Voss Bv
P.194 |

Revell's
1/72 scale Blohm und Voss Bv P.194 is
available online at Squadron.com
In short, what history? Yet another of those German drawing board
aircraft, the Blohm & Voss factory designed this one in 1944 as a
single-seat multi-role aircraft. It never got off the drawing board,
although it was almost completed. It was to have been equipped with
bombs of various sizes. The design offered a high ground speed and good
climbing performances. Standard armament was to have been two 151
machine guns and two heavy cannon.
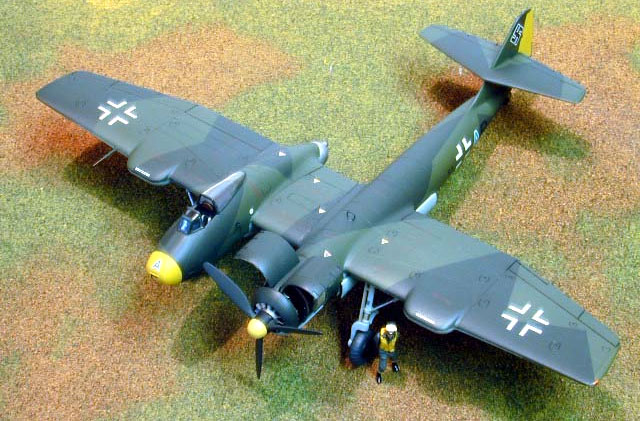
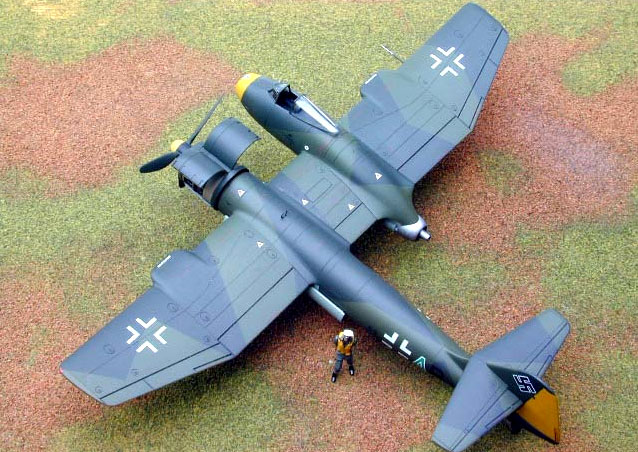
The configuration of the powerful BMW 801 radial in the asymmetrical
fuselage and the Jumo turbojet engine under the cockpit nacelle
represented a bold design for the time. Performance was to have
surpassed the Dornier Do-335.
In a sense the P-194 was a Me-262 nacelle and engine, with a Ju-188
fuselage, wings, and tail mated with the engine of a Fw-190.
This is Revell-Germany's 1/72 scale Bv P.194, kit number 04335
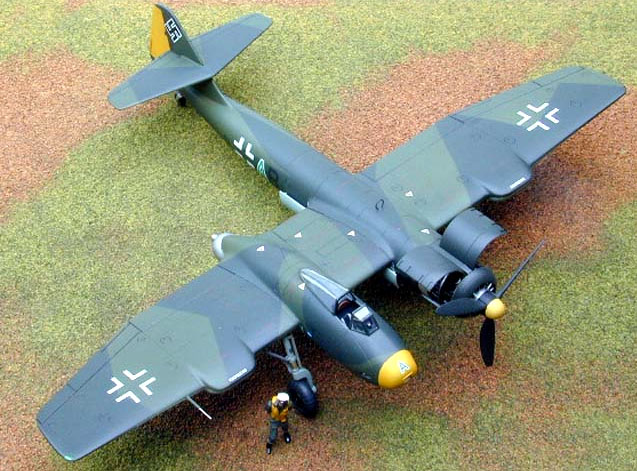
The Cockpit
Typical of the Revell-Germany series of "Luft '46" models, this contains
a very good representation of a late 1940's German cockpit, generic of
course. I painted the cockpit RLM 66 using Polly Scale acrylic.
Seat cushions were painted Olive Green and belts done with decal painted
Dirty White. Instrument gauges were done with white punched Waldron
disks and instruments represented using Reheat Models Instrument Decals.
Side console boxes and switches on the cockpit tub were hand painted.
A couple of Reheat Models Control Placard and Data Placard Decals were
utilized in the cockpit. I cut off the Revi gunsight and replaced it
with a scratch built item using clear and standard sheet styrene.
Wheels and Bomb Bay
All interior bomb bay and wheel wells were painted RLM 02, with the main
gear door interiors and bomb bay door interiors being painted likewise.
Bombs were painted flat black and set aside until final assembly.
The main wheels were painted black also, with the tires being painted
Grimy Black by brush and given a light earth wash. The rear wheel was
painted RML 02, tire Grimy Black, and oleo RLM 24 Red. The main struts
were painted RLM 65 as per instructions. Oleos were done with bare-metal
foil strips.
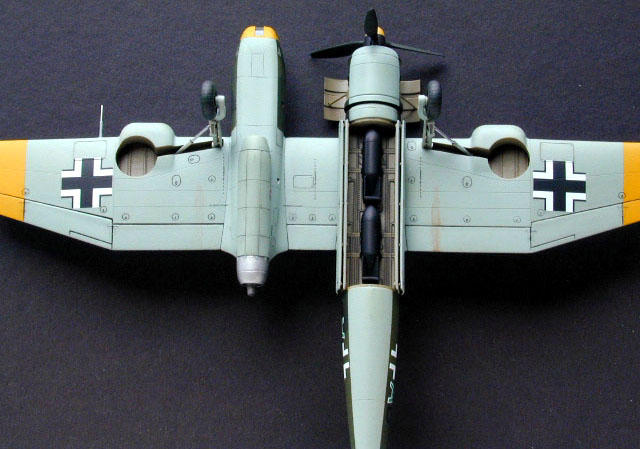
A couple of Reheat Data Placards were used on the struts. Retraction
rods were paint RLM 65 also, with the oleos painted Chrome Silver.
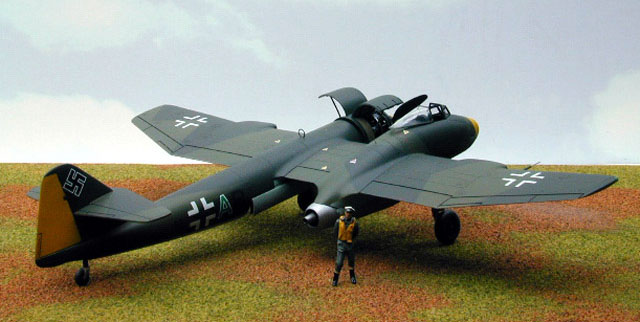
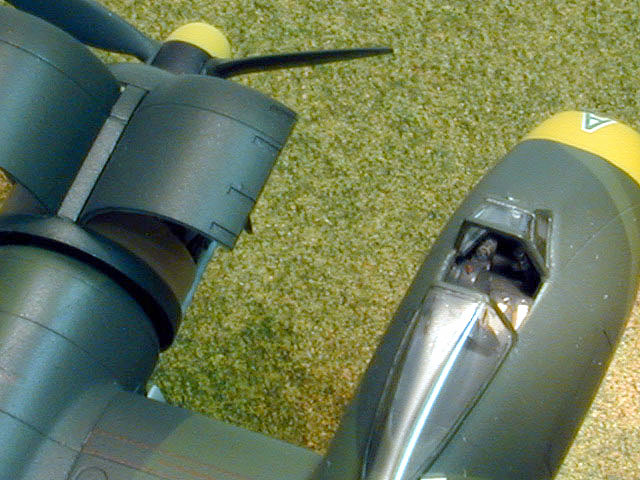
Engines
There's not much to the Jumo turbojet engine, just some turbine blades
molded deep within the intake and a separate exhaust piece. I painted
the intake turbine blades silver and gave them a very thin black wash.
The separate jet exhaust was painted Polly Scale Graphite, and then
buffed with a little SNJ powder.
By contrast, the BMW 801 is a beautiful looking piece. The BMW radial
pieces were painted Engine Gray and the cylinders painted Oxidized
Aluminum. After a clear gloss coat, the cylinders were given a black
wash. The front row exhaust wash was painted Burnt Iron. Interiors to
all engine covers were painted RLM 02 and given a light black wash.
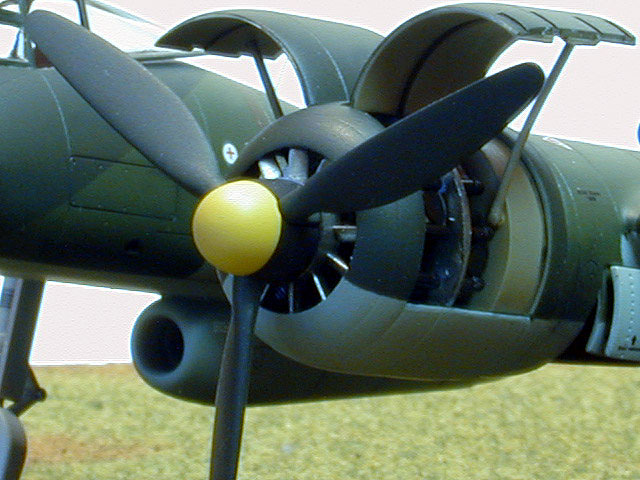
The exhaust is molded beautifully onto the rear engine-mounting piece.
This area was first painted RLM 02 and the exhausts painted Burnt Iron.
All were accented with a 0.005-inch tech pen and black ink. A Reheat
Data Placard was used on the front bank of cylinder's gear case. The
oil-cooling fan was painted Graphite and buffed with a little SNJ
powder.
Prop was painted RLM 70 Black-Green and set aside. I used Polly Scale
Yellow primer on the spinner and Black Trim Film Decal for the rear. I
didn't like the kit's engine access support rods and preferred to make
my own from styrene rod.
Exterior
I built this per instructions, but added the ubiquitous D/F loop antenna
was scratch-built with copper wire and a simple whip antenna done with
stainless steel wire. I thought of doing it with aerial wiring, but
figured that being a "Luft '46" hypothetical aircraft, the Luftwaffe
would be using radio equipment similar to the Allies, which had little
or no wiring. Only the Soviets hung on to aerial wires into the jet age.
I added some gun barrels from insulin hypo pieces, but otherwise left
the kit as be.
I went straight by the instructions here, using the RLM splinter
scheme of RLM 70/71/65. I had to substitute the RLM 71 Dark Green with
RLM 80 Olive Green, as my RLM 71 had turned into a pile of goo.
The model was primed in RLM 65 and areas masked to paint the nacelle
nose, under wing tips, and rudder RLM 04 Yellow. All was masked and the
uppers painted the RLM 80 Olive. The instructions were blown up to scale
and templates made to cut from masking tape to cover the Olive Green.
All upper then received a spray of RLM 70 Black-Green.
All masking was removed save the clear parts and the model was given two
prep coats of Model Master Clear Gloss Acrylic. Decals from the kit were
used and although better than past Revell-AG decals, they still refuse
to lie in recesses well and have no reaction to solvent. I had to get
the two tail swastikas from a set of Hasegawa swastikas I have. There is
a full range of stencils and decaling took a full two sessions.
After the decals had dried, the model received a sealant coat of Clear
Gloss and all recessed controls and access panels were inked with a
0.005-in tech pen and India ink. Exhaust stains from the radial was ever
so slightly given a light brushing of black powder pastel before giving
the model a finish coat of Clear Flat and applying Future to the
exterior clear pieces. Wing navigation lights were painted Bright Silver
and then Clear Red and Clear Green.
Pilot
The pilot is one of the wonderful 1/72 Preiser series of Luftwaffe
figures.
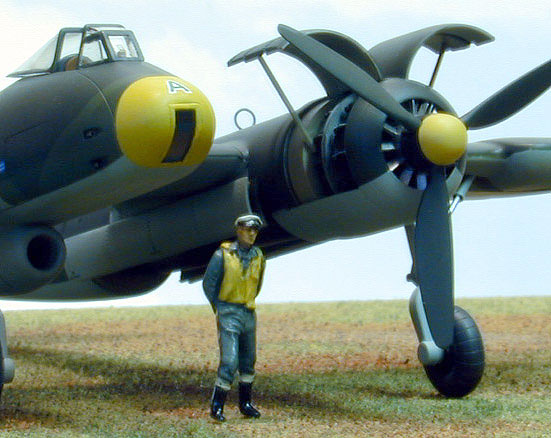
I primed the figure in gray and hand painted using acrylics.
Shadowing and highlights were done with inks and pastels.
This was an absolute fun kit. Everything fit supremely well, the kit
went together very fast, but painting took up a good time. The options
for finishes are as open as the weather, so any scheme is possible and
by far no one is limited to the model's instructions, which I did. The
only fault I find is not with the kit, but that Revell-AG engineers can
give us modelers a kit this good, when it could have done a real
airplane that is so missing from the 1/72 scene; a real good P/F-80 or
F-86 series.
Click the thumbnails below
to view larger images:
Model, Text and Images Copyright © 2001 by
Caz Dalton
Page Created 30 October, 2001
Last Updated 04 June, 2007
Back to HyperScale
Main Page
Back to Features Index |
 Home
| What's New |
Features |
Gallery |
Reviews |
Reference |
Forum |
Search
Home
| What's New |
Features |
Gallery |
Reviews |
Reference |
Forum |
Search