|
DeHaviland
C-7 Caribou
by
Mark Mallinson
|
|
|
DeHaviland C-7
Caribou 457th Tactical Airlift Command Tra Bong, Vietnam, 1972
|

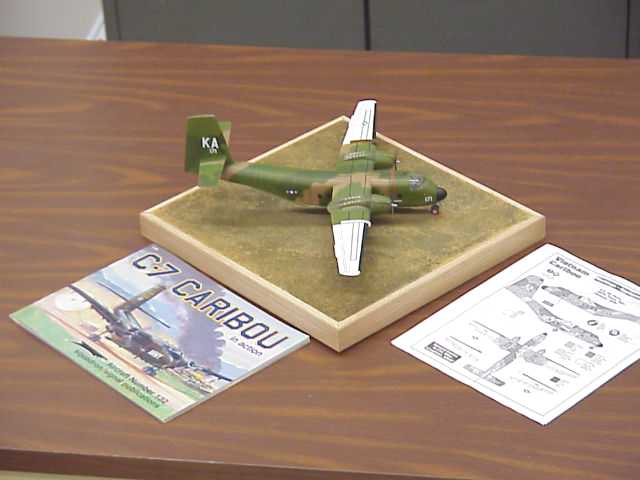
Hobbycraft's 1/72 scale
C-7 Caribou is
available online from
Squadron
The model depicted here is a 1/72nd scale Hobbycraft C-7 Caribou. After
finishing Tamiya’s 1/48 Lancaster, I went through a long “modeler’s block”
where I accomplished little. To get out of this rut, I decided to do a model
that would be neither accurate, technically challenging nor one of my usual
scales. So started this easy kit that I’d use as a ‘skills building’
project. With this little plane, I had opportunity to practice my inept dry
brushing, clumsy photo-etch and sloppy and unconvincing washing techniques.
To this end, I purchased the Edward 1/72nd C47 Dakota photo-etch set, which I
figured was close enough (they’re both twin engined flying trucks, right?).
With Squadron’s C-7 Caribou In Action booklet and some .jpg’s from the US
AirForce’s Caribou/Otter Association web page, I had some fairly good period
photos of this great Canadian aircraft that still flies with some airforces.
The cockpit interior was the main recipient of the Eduard photo-etch. Not
being concerned with accuracy, I just played with the stuff by adding seat
belts, boxes, erroneous instrument panels and some floor panels. These provided
some practice in manipulating the metal and with dry-brushing the worn areas,
though not representative of the actual aircraft.
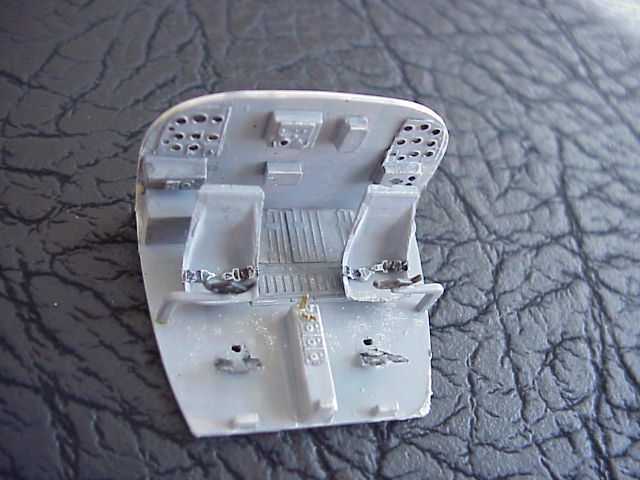
Most of the kit instrument panel detail was painted while looking through a
10X monocle. The black instrument dials were picked out with a moistened Berol
PrismaColor white pencil. The final step was to seal each dial with tiny drops
of Testors Clear Parts Cement.
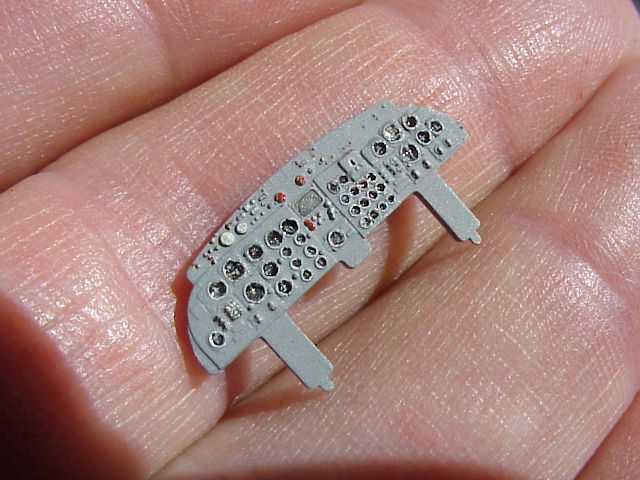
The modelers out there who routinely work in this scale have earned my
undying respect, for manipulating these near-microscopic details proved
difficult for my mediocre vision.
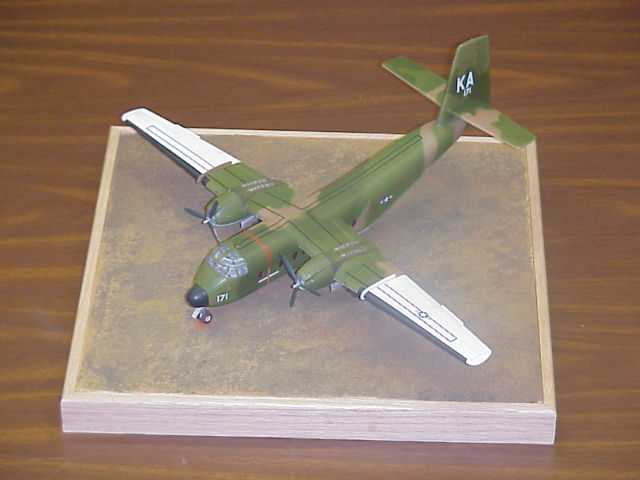
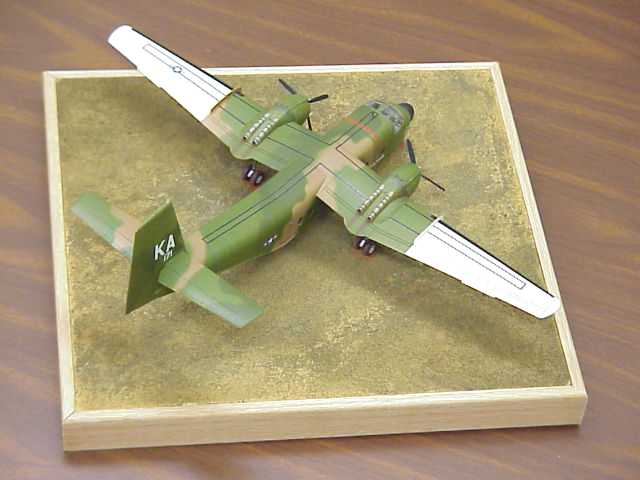
The South East Asia US Airforce camouflage chosen for this aircraft was taken
from the kit instruction sheet and Squadron In Action photos. The instruction’s
paint scheme plans were blown up to the scale of the kit and paper masks were
cut out. These were taped to the fuselage and inner wing area in a series of
successively darker shades of Model Master enamels (tan/medium green/dark
green). Chips on heavily worn areas were created using a PrismaColor silver
pencil while oil leaks of thinned black enamel were applied to the engine and
brushed in the airflow direction using a fan brush. The two radial engines were
carefully painted, washed and dry-brushed, only to find them almost disappear
deep within their nacelles.
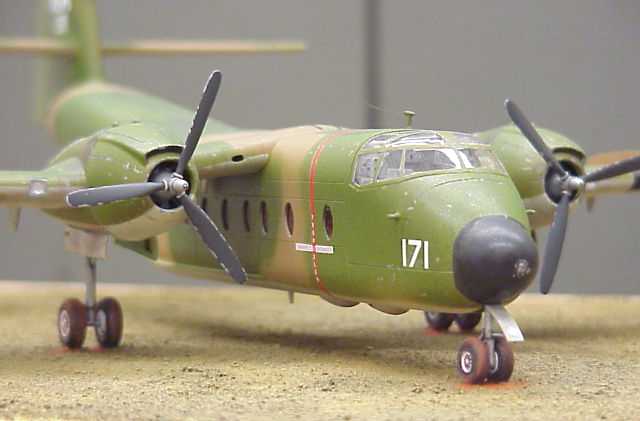
After stuffing the nose with lead fishing weights, I found the aircraft was
still quite tail heavy. To support this craft, I took an old ¾” thick piece
of plywood and tried to contour the topside with some gypsum wallboard compound.
When it had cured, I sealed it with a thick coat of Future. I wasn’t terribly
impressed with the subtle finish of my dirt airstrip, so I threw the question
out to the folks on the Discussion Board. A couple good answers led me to dilute
some white glue with water and filter some fine dirt. Several uneven coats of
this made for a much better looking strip. Photos of Vietnam showed the familiar
red iron oxide clay I’ve seen during trips to Alabama, Kauai and Canada’s
Prince Edward Island. The whole thing was painted with Polyscale Rust acrylic
and some old Testors Radome Tan to lighten things here and there.
In the unlikely event I’d ever do another one of these, I would build a
diorama depicting the cover of Squadron’s in Action booklet: the US Army’s
“Snake Eater 2” dropping a load of ammunition into a remote base under fire
in Vietnam.
There’s plenty of room to cut out and deploy the cargo bay doors and detail
the interior. Some 1/72nd scale photo-etch PropBlur’s, a scratch-built cargo
pallet with a vac-formed parachute and there you have it.
Model, Text and Images Copyright ©
2001 by Mark Mallinson
Page Created 16 July, 2001
Last Updated 04 June, 2007
Back to HyperScale
Main Page
Back to Features
Index
|
 Home
| What's New |
Features |
Gallery |
Reviews |
Reference |
Forum |
Search
Home
| What's New |
Features |
Gallery |
Reviews |
Reference |
Forum |
Search