|
F-117 Nighthawk
by
Kaan Gok
|
 |
|
F-117 Nighthawk |

Academy's
1/48 scale F-117 is available online from Squadron.com
(but you should probably get
Tamiya's much better Nighthawk kit from Squadron
instead!)
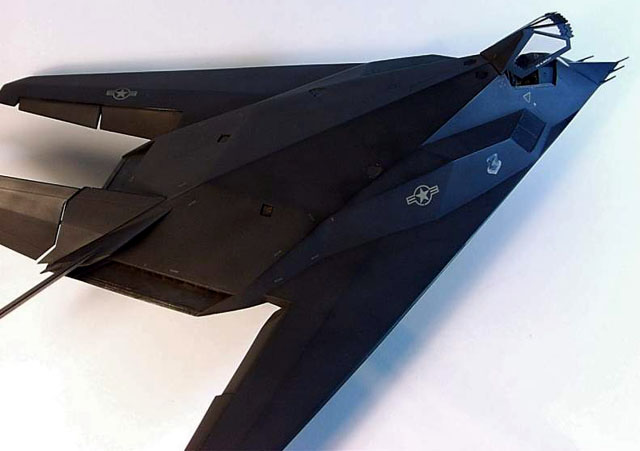
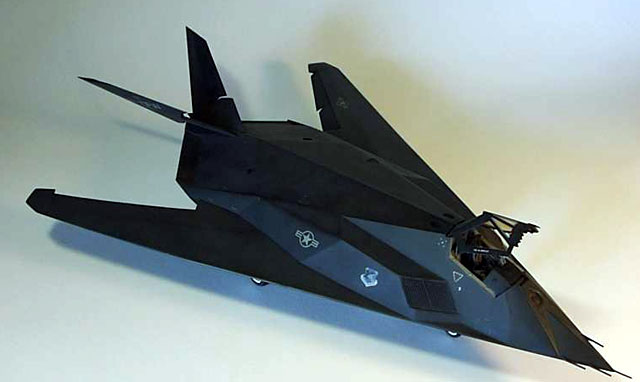
This is Academy's 1/48 scale F-117 Nighthawk kit. Many people
say that it is an ugly plane, but I think the opposite. I think
that it looks very "cool".
I guess that most of HyperScale's visitors know the plane, so
I'll get right to the kit review part.
Altough the kit is cheaper than the Tamiya offering, it's not
very good, and I can't describe it as a "state of the art" kit.
There are some areas which are wrong, and some areas which are
not well detailed.
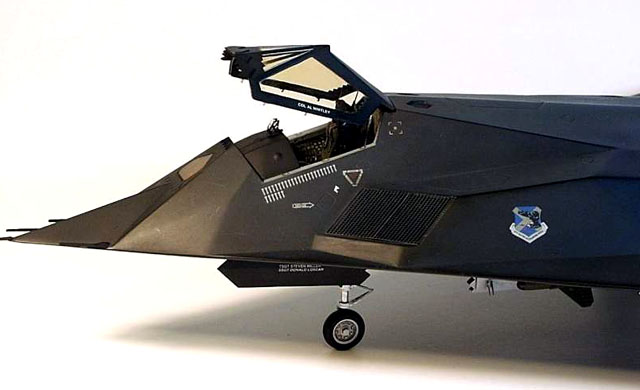
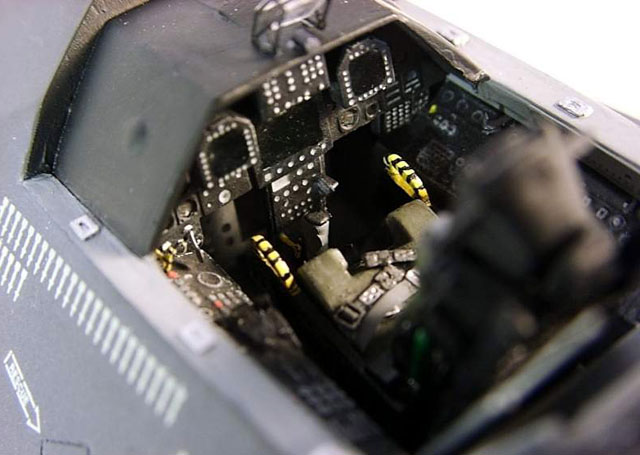
I used the Eduard photoetched detail set to add some more
detail.
In the end, I ended up with a kit which has some obvious
errors, but looks detailed to somebody who is not a Nighthawk
expert.
Kit Errors
It is worth talking about the kit errors first.
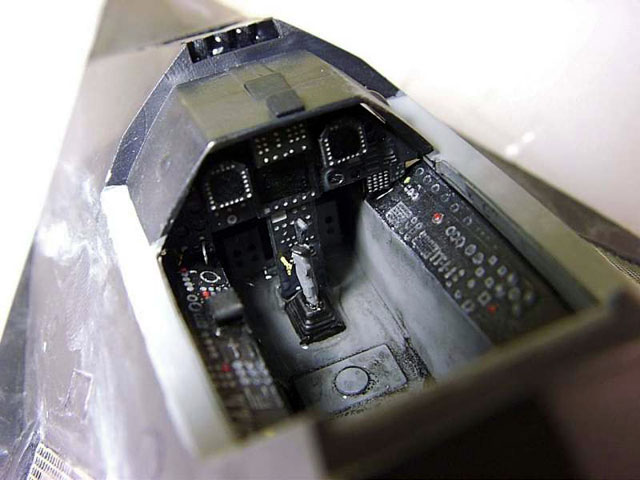
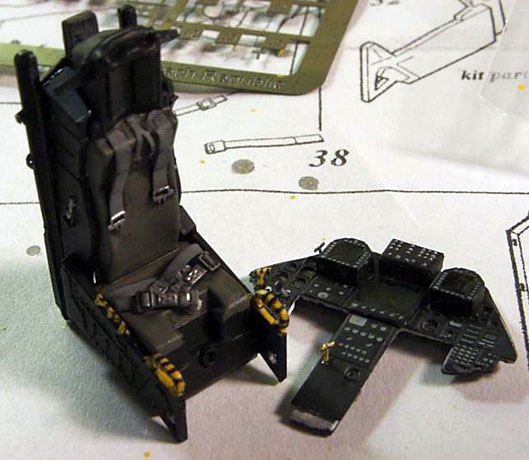
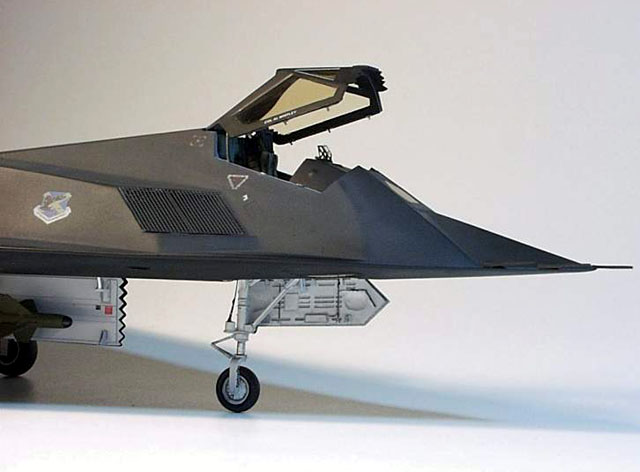
The side handles of the ejection seats are wrong, I replaced
them with Academy's F-15E kit seat handles. The F-15 kit is very
useful you see, you can use its ordnance for your Revell/Monogram
F-15E kit, too. There should be no ejection handle on the front
of the seat, ignore this. The front control panel is entirely
Eduard, kit panels are incorrect, I fear. There is no option to
open the canopy, you must scratchbuild the hydraulic actuators.
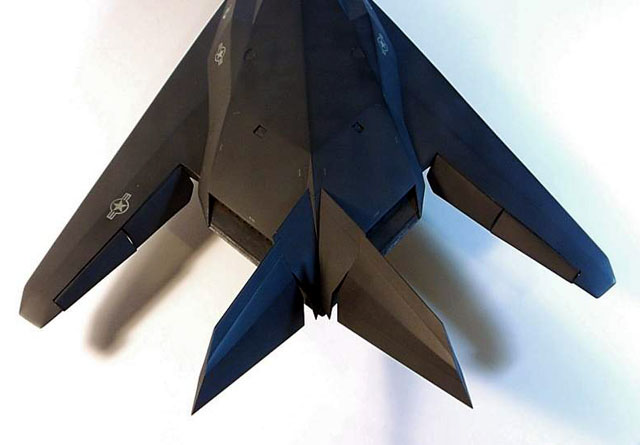
There are two faceted bumps at the underside of the real
thing (where the wings meet the fuselage), but these bumps are
missing on the kit. There is no option to drop the control
surfaces, I cut and repositioned them manually. Be aware of some
fit problems if decide to do that, especially at the inboard
side.
There should be a diagonal facet line on the flaps, going from
front/inside to back/outside on the entire flap surface, this is
missing in the kit, and it's not easy to add that, so I left it
as-is.
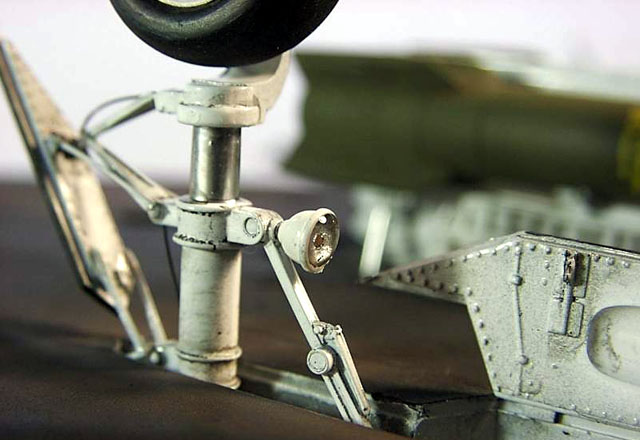
The cylindirical hydraulic box on the front landing gear is
missing, I scratchbuilt it using sprue and plastic strip.
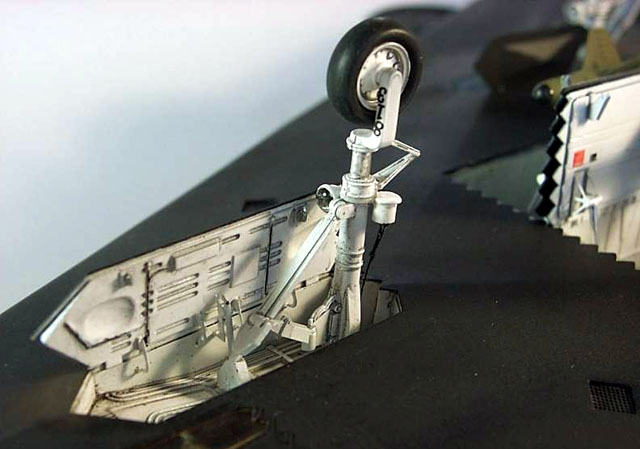
Speaking of the landing gears, the back landing gears have
some accuracy errors, if you use the Eduard set, most of these
errors are corrected. Check your references for the corrections.
The front doors of the main landing gear are usually closed on
the ground like the F-15 doors, but Academy's doors can't be
glued that way. I have found at least one picture showing them
open, so this is not an error I guess.
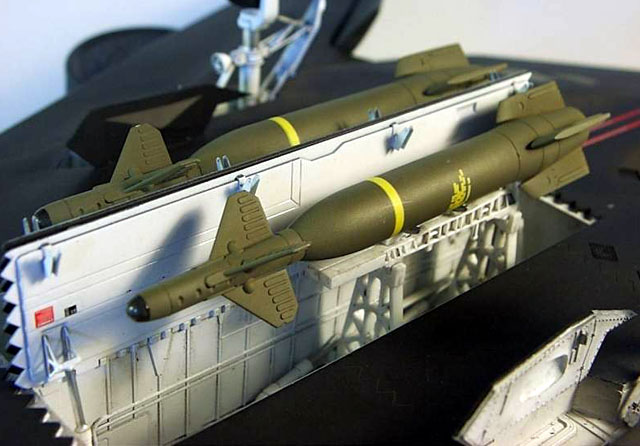
The GBU-27 laser guided bombs look very cool, but I couldn't
check the inside details of the weapons bay, because I didn't
find any pictures of it on the internet and I didn't have a
Walkaround book at hand.
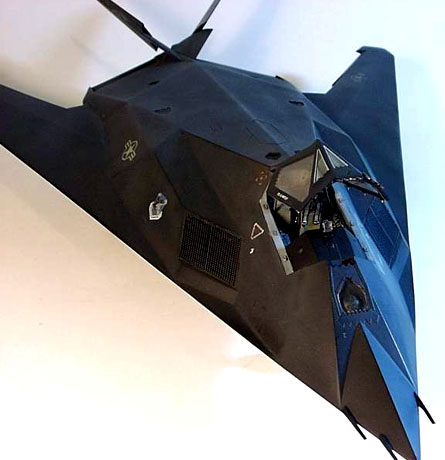
And another annoying aspect was that the canopy on my kit had a
mold anomaly at the left side, a line which goes all the way
down. It couldn't be polished away, because it is not on the
surface ! I tried the cut the glass parts of the canopy and
scratchbuild them from acetate sheets attached to the canopy
frame, but I was too lazy, and ended up with a cracked canopy.
So I bought another kit just for its canopy. Guess what - the
second kit has this line too! I decided not to try my luck
again, so I left it as is.
Kit Modifications
Additional kit modifications are as follows:
The clear parts are molded in orange-clear plastic. Altough this
is quite acceptable for the canopy, it has a side effect. You
will have orange landing lights and orange FLIR/DLIR screens. I
drilled out the landing lights, painted inside with Testors
chrome silver and I gradually added a drop of Humbrol gloss cote
onto it. Humbrol glossclote shrinks when it dries, but after 3-4
applications and drying times, you will have a very nice looking
landing light. The result seems quite convincing to me, and I
will do this for my next models, too. Don't try to do it with
Humbrol clearfix, it will have air bubbles when it dries. (I
learned that the hard way, but I had replacement lights in hand,
more on this later...). I didn't try it with an acrylic gloss,
but I think that it will do. Humbrol's glosscote is very very
good for this job, because it dries crystal clear, and it has a
very high surface tension, so you can have a nice concave
surface.
The FLIR/DLIR (Forward looking infrared radar/Downwards
looking infrared radar) screens are a very fine metallic mesh
with RAM (Radar Absorbent Material) coated on them, they are
nearly transparent for optical and infrared wavelengths, and
they absorb radar waves. They have some orange tint in them,
too, but Academy's clear parts are way too thick to simulate
this effect. I sanded them about 1/4 of their original
thickness, then polished them.
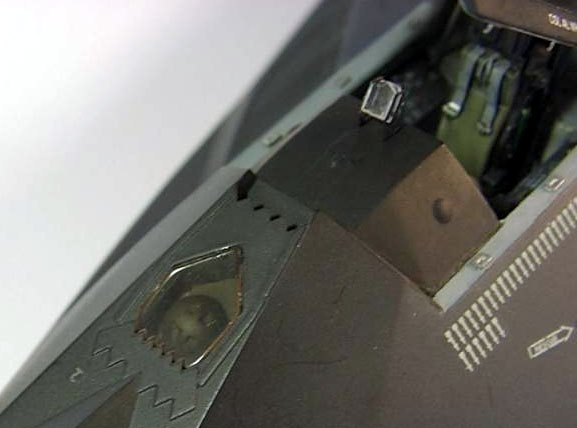
I added the rubber seal on the canopy and the brake/electrical
lines on the landing gears using monofilament fishing lines. You
can find them in various thickness. My advice is to buy one of
every thickness! They are very cheap and very useful.
The painting and weathering of the kit was a challenge for
me.
I first painted the entire model black first using Testors'
visions acrylic black. I then airbrushed dark gray mixed with
black (in other words a very very dark gray) and thinned approx
1:5 paint:thinner ratio onto facet lines and edges. The paint is
very diluted, this enables you to gradually build up the colors
on various areas. After that, I mixed some gloss clear to the
mixture and sprayed some areas, which look gloss on the pictures
I have. The final part was spraying medium grey thinned with
1:10 ratio on all the model to give a scale color effect. This
decreased the shine on the gloss sprayed areas, but it looked
better anyway.
Some of the pictures show antennas, some do not show them. The
navigation lights are visible sometimes, too. All antennas on
the F-117 are retractable, and the lights rotate and go to the
inside of the surface, when the plane goes to combat. I left
them off, this saved me some time :). If you want to build the
plane in combat configuration, leave the radar reflectors off (
Two small parts on the sides of the fuselage), but you should
fill their holes on the surface if you decide to do it.
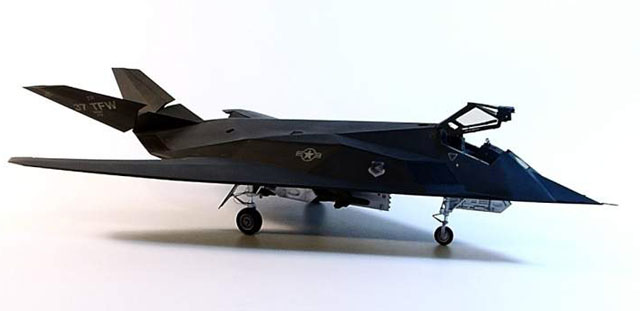
Two decal options are offered. I decided to build Col. Al
Whitley's plane "Toxic Avenger". It doesn't make much difference
though, because both planes are overall black. The decals went
on well, but the unit markings, which look like very light gray/white
on the pictures are printed like medium-dark gull gray color. I
choose not to spend more money for this kit and used the kit
decals.
The kit looks good when finished, especially if you don't know
much about the Nighthawk. It's not as accurate as the Tamiya
kit, and it was more expensive than the Tamiya kit for me
unfortunately. If I decide to build another F-117, I will try
the Tamiya kit (which needs to be fixed, too, because it has
visible panel lines which are coated with RAM material on the
real plane.).
If you are not concerned about the accuracy, this is the kit
to build, because you can find it about the half or 1/3 price of
the Tamiya kit.
Click the
thumbnails below to view larger images:
Images Copyright © 2001 by
Kaan Gok
Page Created 23 October, 2001
Last Updated
04 June, 2007
Back to
HyperScale Main Page
Back to
Features Index |
 Home
| What's New |
Features |
Gallery |
Reviews |
Reference |
Forum |
Search
Home
| What's New |
Features |
Gallery |
Reviews |
Reference |
Forum |
Search