Home
| What's New |
Features |
Gallery |
Reviews |
Reference |
Forum |
Search
Home
| What's New |
Features |
Gallery |
Reviews |
Reference |
Forum |
Search
|
|
|
Aeronavale Nighthawk by Valentin E. Bueno
It was a hot and humid day in The Pacific Hobbyist hobby shop. I was espousing the merits of Tamiya's new line of 1/72 scale models and fantasizing about the possibility of Tamiya CADing down their quarter-scale Nighthawk into 1/72 scale. The view was reached that Tamiya would be wise to mold the wing and fuselage halves as a single piece, unlike that dastardly Hasegawa who molded their new Nighthawk with separate wings. How can any incompetent modeler such as myself get a nice straight leading edge on the wings and fuselage with that kind of molding decision? I blurted out that the only thing that the Hasegawa kit was good for was to make a folded wing Navy Nighthawk. What an idea! Someone further added that it would look neat in French Aeronavale markings. And thus the French Aeronavale Nighthawk was born. Be wary of what you say around me, I just might build it!
What's wrong with the kit? The Hasegawa kit is the most accurate F-117 in 1/72 scale now available. The biggest problem I had with the Hasegawa kit was the separate wings. The Italeri kit had the upper wings and fuselage molded as one piece that allowed me to get a nice straight leading edge from the tip of the nose to the wing tips. This is an important line to get straight as it helps keep the real Stealth fighter from reflecting radar echoes back towards the enemy radar. The separate wings on the Hasegawa kit puts a kink in the leading edge that I could not eliminate. It looked as if the kit was molded to fit in the standard Hasegawa box. I emptied the contents of a Hasegawa F-16 box and the F-117 parts fitted perfectly. C'mon Hasegawa, don't let the marketing "geniuses" control the mold makers and tooling designers!
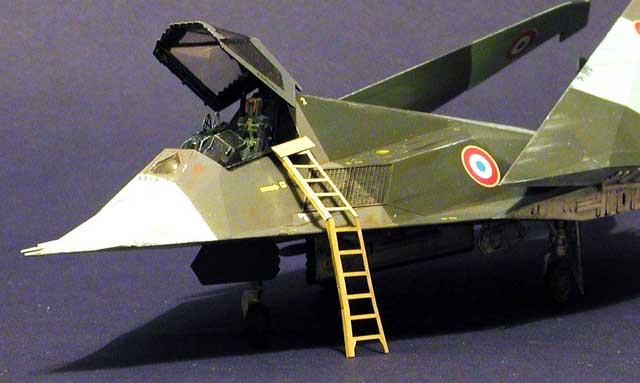
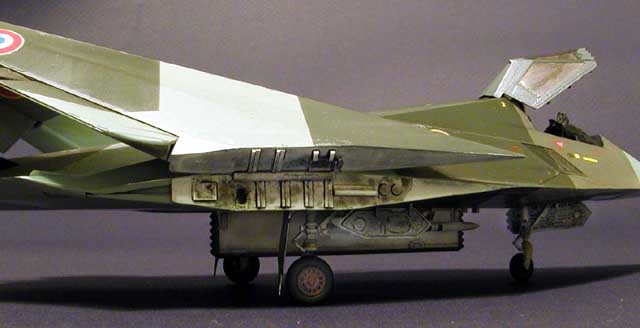
To make matters worse, the fit of the lower fuselage/wings halves to the upper halves was terrible. For a while I thought I was building a 1960's-vintage Airfix kit! After lots of superglue and a few sanded fingertips, the seams were for the most part gone. Had Tamiya released this kit, the fit would almost certainly have been flawless (hint, hint Tamiya-san). The other nit-pick I had with the original release of the F-117 kit was the lack of a weapons bay. The doors were molded separately and there were raised locating ridges around the opening of the weapons bay, but no weapons bay. Hasegawa has since re-released the kit that includes the weapons bay and weapons molded in white plastic. The detail in the new parts looks very decent and I can see a lot of Nighthawks out there will be built with super detailed weapons bays. I used an Airwaves F-117 photo-etched detail set on this kit. The Eduard set will probably be released after I get the kit done!
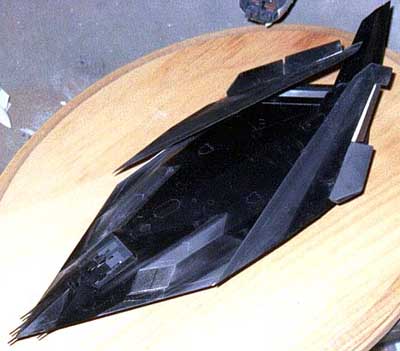
The first order of business was to separate the flaps from the wings and the rudder from the fins. The flaps and the rudder are offset in every photo I have ever seen of the Nighthawk at rest. I took my trusty Trimaster scribing tool and scored the flap/rudder line until I had gone all the way through. The edges were cleaned up with files and sandpaper, and the flaps assembled. The front of the flaps was created from thick slabs of sheet plastic. These were superglued on and filed into a nice round shape then set aside until needed
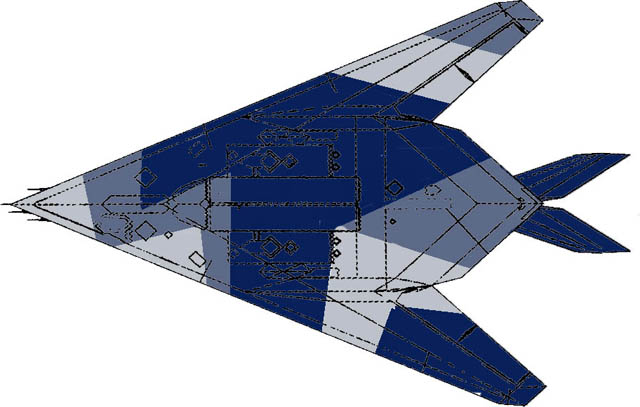
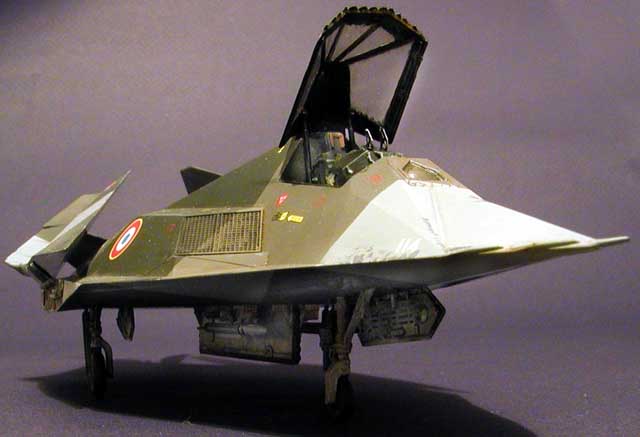
How would a French Aeronavale Nighthawk be painted? My research showed that French Aeronavale aircraft are cuurently painted rather dull overall single bluish-gray color. I didn't really want my F-117 to wear this scheme.
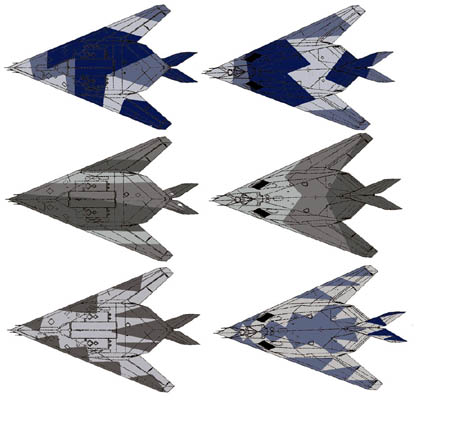
I tried out several different splinter schemes using a scan of the instructions and Photoshop to add color. I decided to put on a grayish/blue/black block scheme. I used Luftwaffe colors for the splinter colors. Model Master Acryl RLM 65 was used for the base color, RLM 75 and RLM 66 for the splinter colors. It's a fantasy project, so who's gonna nit-pick? The model was sprayed overall with the RLM 65 and allowed to dry one day. The next evening, the blue areas were masked off with Tamiya tape and the gray areas sprayed. Being the impatient bugger that I am, I waited only a few minutes before I masked off the gray and sprayed on the black. I lifted off the tape immediately and viola, splinter camouflaged F-117. The decals came from old Wingmasters/Microscale/Hasegawa/Sword sets that I had lying around. I added the Aeronavale roundels to all six positions on the wings and fuselage. The stenciling came from various sources, whatever had a word that wasn't in black or gray. Mostly yellow stenciling cover the aircraft. The model was sealed with a coat of Johnson’s Future Floor Wax mixed with a drop of Tamiya Flat base.
I weathered the finish rather heavily. I gave the entire model a wash of Burnt Umber oil paint. Durotine. Streaks were added to various points along the airframe using ground up chalk pastels. Gray colors on the black areas and black on the light blue and gray areas. The wing folds were given a heavy wash of Tamiya thinner and black chalk pastel. This really dirtied up this area of the model. Paint chips were added using the Berol Silver pencil as well as Titanium Metalizer paint. I realize the aircraft was covered with RAM material, but it looked neat with the silver and dark titanium colors showing through the paint.
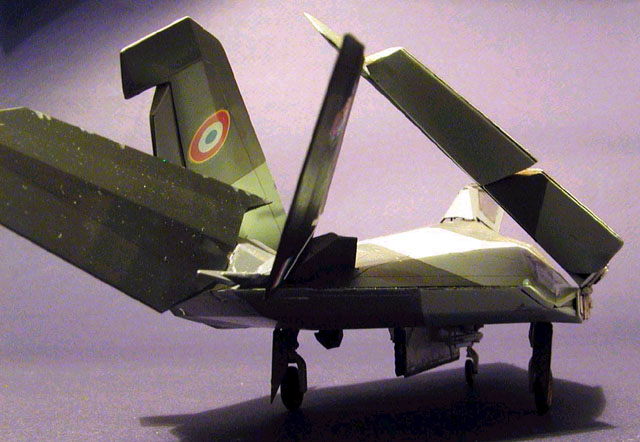
Before adding the rudders and wings, the weapons bay was finished up. The swing arms for the missiles were added and a pair of Mica missiles added. The missiles came from the Rafale kit and painted as indicated in the instructions. The bay doors were added in the open position and washed with Tamiya Smoke Paint. The canopy was added in the open position with canopy locks added from the Airwaves set. The rudders were glued on at an angle and the wings added last. Connecting rods for the lowered flaps were placed between the lowered flaps and the fuselage wingroot. Miscellaneous wires and bolts heads were added to the join following a folded S-3A wing as an example. Support struts holding the folded wings were added to give the folded wings some strength during transport.
The base came from a Verlinden carton base of a flight deck. This was glued to an oil finished wooden plaque from Wellers Hobbycraft. The model was glued to this and an Airwaves boarding ladder glued in place near the cockpit. A nameplate was printed off of my computer at work (shhhhhh) and attached to the base. This was a fun and easy conversion for a modern jet. How many other land jets have made the transition to an Aeronavale jet?
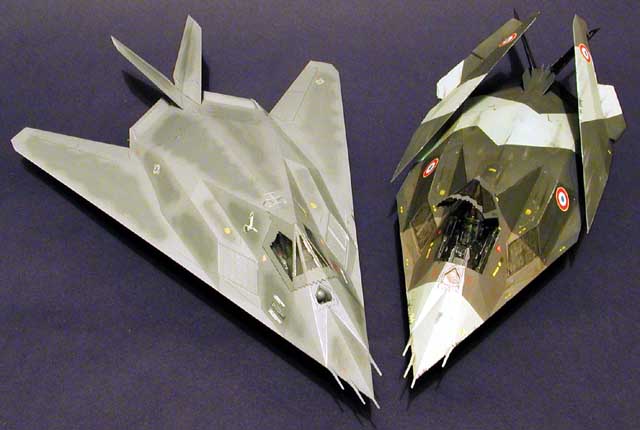
Can you spot which one was used?
F-117A on the left, F-117N on the right.
Model, Text and Images Copyright © 2000 by Valentin
E. Bueno
|
 The
wings were glued together and the attachment tabs were shaved off.
The
wings were glued together and the attachment tabs were shaved off.