|
F-15DJ
by
Juan Solorzano
|
|
|
F-15DJ |

HyperScale is proudly sponsored by Squadron.com
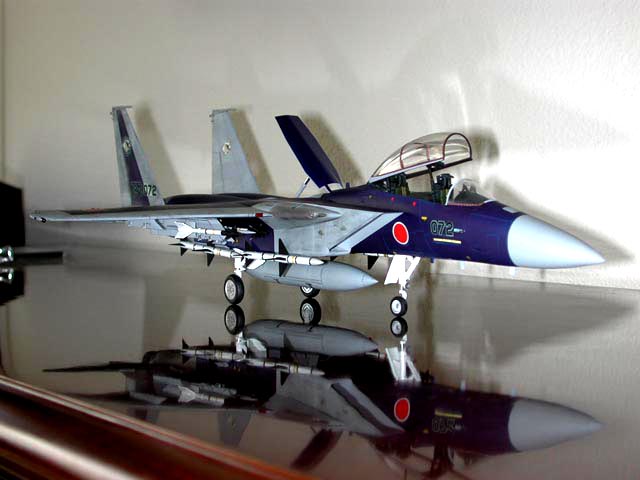
Here is my Hasegawa 1/48
scale F-15DJ Eagle “Aggressor”. The Japan Air Defense Self-Defense
Force’s dedicated aggressor force is the Hiko Kyodotai, which flies
F-15s from Nyutabaru, on the southernmost island of Kyushu. This unit
swapped the T-2 for the F-15. The Hiko Kyodotai operates F-15DJs in the
aggressor training role. It shares its Nyutabaru base with 202 Kikotai
(F-15C/DJ) and 301 Kikotai (F-4EJ Kai).
I started with the
cockpit, which went together quite well with the exception of the seats.
Since the seats provided didn’t have any harnesses, I used some shoulder
belts, survival kit straps and ejection handles from a True Detail
Modern American Jet Models photo etched set. I just dry-brushed the
cockpit a bit since most of the photos I have seen of F-15s cockpits
show little or no weathering. I then dry-brushed the two ejection seats
using Model Master aircraft gray over Gunze Sangyo flat black. Other
than that, the kit was built straight out of the box.
Here are some pictures of
the finished cockpit.
Click the thumbnails below to view larger images:
[../photogallery/photo28088/real.htm]
The rest of the
construction went well. The biggest problem I had was the assembly of
the front and rear fuselage. It took me a while to align them. I tried
to make the joint as smooth as possible as it is hard to fill and sand
the seam you may leave if you have the intakes already glued, which was
the case. I achieved a smooth joint and only needed a swipe of Mr.
Surfacer 500. I sanded the Mr Surfacer with wet sandpaper 400 grit
before it was fully dry. This permitted me to fill the fine gap without
destroying surface detail.
I had to remove two of the
antennas from the bottom of the front fuselage because they are not
present in an F-15DJ.
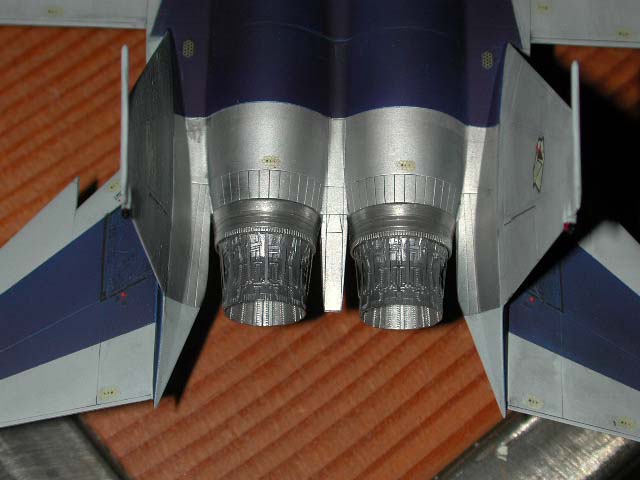
Hasegawa provides photo
etched parts for the variable area afterburner nozzles. These are the
same used in their F-15E. The assembly instructions for this are not
very clear, so I opted for some pictures of the real thing to get an
idea how the nozzles look like. Once they are assembled, they really
look great and are much better than the original afterburner nozzles
provided for the F-15C/D. I delayed gluing the nozzles to the main body
until the end.
After the main body was
assembled, I was ready to paint. In this step I had to choose one of the
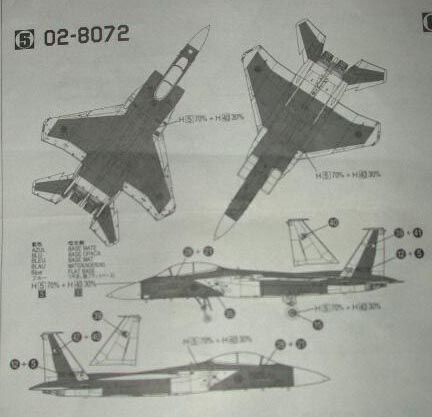
six camouflage schemes the kit offers.
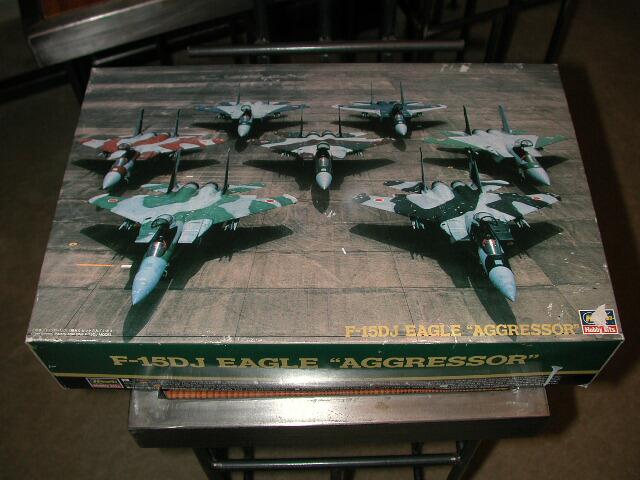
All the schemes are great
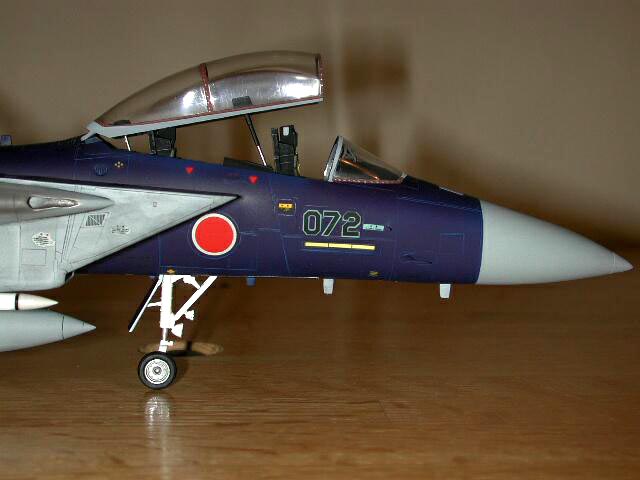
but in the end I decided to use the one I liked the most. I chose the
aircraft with 02-8072 markings.
I first applied Model
Master FS36375 as an overall base color. After the first coat was
applied, I checked the entire model surface for possible seams. I found
two, which were quickly filled with Mr. Surfacer 500 and sanded over
again with 600, 4000, and 6000 grit sandpapers. Two more thin coats of
the same color were then applied.
After the base color was
fully dry, I started masking the sections of the kit not destined to
wear the FS36375 color. It was a time consuming task but I finally did
mask everything. I then applied the dark color. The instructions
recommend a mix of Gunze H5 Gloss Blue and H40 Flat Base. I decided not
to use the flat base as I was going to apply a clear gloss prior to the
decal application anyway. I gave the model three thin coats of blue and
I let it dry overnight. I then removed the masking tape from the kit
and, to my bad fortune, some of the gray surfaces were oversprayed with
blue.
I then masked the blue
surfaces where the base color had to be applied again. Here is when the
problem comes. I used Tamiya masking to do this. I have always used
this masking tape without having any problem. But in this case didn’t
work. When I removed the masking, it left horrible marks on the blue
paint that I couldn’t remove with anything. Unable to remove those
marks, I decided to sand those spots using 4000, 6000 and 8000 grit
touch pads and reapplied the blue again. I don’t know what I did
wrong. Maybe the blue color wasn’t dry enough or acrylic paint over
enamel didn’t work well this time. I have applied acrylic over enamel
or enamel over acrylic without any problem. I will appreciate any
suggestion about this. Finally the kit was gloss coated and I let it
dry for one day before applying the decals.
Once the gloss coat had
dried, the decals were applied. The kit comes with two sets of decals,
one for the F-15D/DJ and one for the F-15DJ aggressor group.
The clear carrier film of
the F-15D/DJ was a bit yellowed with age but fortunately I only used
some decals of this set. The rest of the decals were applied from the
aggressor set. Everything went quite well until I started applying the
big decals from the aggressor group set. After dipping the decals in
warm water, as usual I tried to loosen them from the base paper and then
a problem appeared. Every time I wanted to slide off base paper, the
decals shattered.
After many failed
attempts, I tried to place the decals on proper position on model. Some
decals, especially the numbers were totally shattered that it was
impossible to fix them so I opted for using decals from the same sheet
that were in better condition since they differ only for one or two
numbers. Again, it was a time consuming task, but in the end I could
overcome this problem. Then I applied a decal setting solution called
Solvaset. This is the first time I use this product and really works
well. It helped me a lot with the shattered decals. The Solvaset was
applied after all the water and trapped air bubbles were removed. The
decals snuggled down into every crevice. Decals were left overnight. The
decals and finished model were sealed with Gunze flat varnish.

I left the model for three
or four days until it was thoroughly dry. Panel lines were highlighted
with a mix of chalk pastels and dark gray watercolor artist paint to
make the model look old and realistic.
The last step was to glue
all the remaining components: tanks, pylons, undercarriage, airbrake
panel, and missiles, afterburner nozzles and canopy, which went together
well.
The kit comes with four
AIM-9J Sidewinder and four AIM-7F Sparrow missiles.
Click the thumbnails below to view larger images:
[../photogallery/photo20229/real.htm]
Model, Text and Images Copyright © 2001 by
Juan Solorzano
Page Created 14 September, 2001
Last Updated 04 June, 2007
Back to HyperScale
Main Page
Back to Features Index |
 Home
| What's New |
Features |
Gallery |
Reviews |
Reference |
Forum |
Search
Home
| What's New |
Features |
Gallery |
Reviews |
Reference |
Forum |
Search