|
F-15E Strike Eagle
by
Jonathan Chuck
|
|
|
F-15E Strike Eagle |

Revell-Monogram's 1/48 scale Strike Eagle is
available
online at Squadron.com
My friend told me I should write a review
to go along with my pictures of the latest release of the 1/48 scale
Revell-Monogram Promodeler F-15E. I replied "What's there to write? The
kit goes together well and the basic kit has already been written
about".
That's pretty much the story in a nutshell
when describing this kit, which was released last year.
The latest boxing has a different decal
sheet and a full set of weapons that all you modelers have been
screaming for.
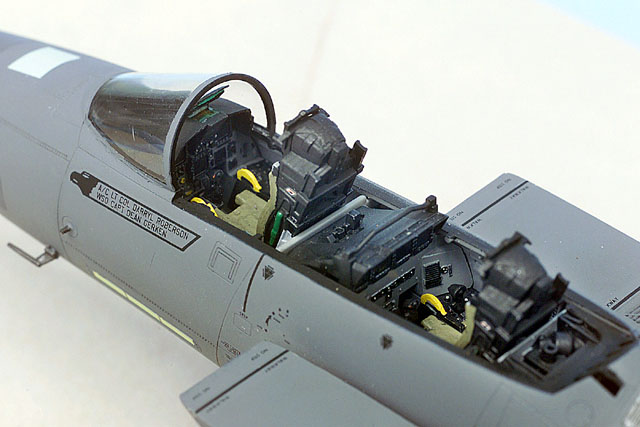
Despite my initial remark, I did find a few
things to write about. I built the kit almost out of the box. There were
no major problems in the construction.
Modelers will, however find a very small
gap when test fitting the starboard (right) top wingtip. All of the
reviews I've read suggested filling the gap, but I found a much easier
way of dealing with this. Just lay a piece of sandpaper on your table
top and swipe the outside edge of the lower right wing 2-4 times taking
off about .25mm off the edge. Be very careful not to take off too much
or else you'll end up having to fill a gap below the wing.
I made a few "5 minute" modifications
during the construction.
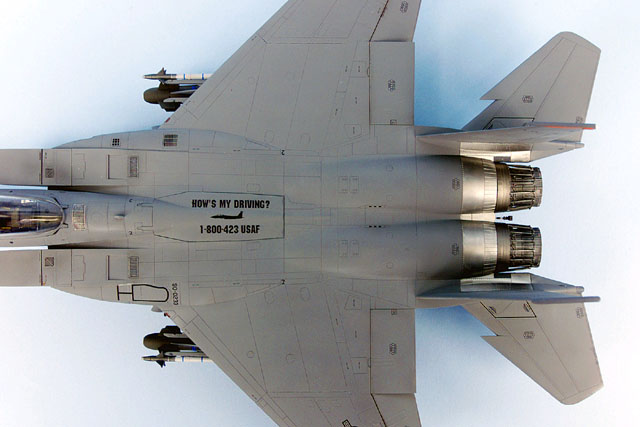
Dropping the ailerons is an idea that I
borrowed from Uncle Rick. All you have to do is score the aileron hinge
half way and the outer edge all the way through with an Xacto knife.
From there you can just bend the aileron down to simulate the hydrolics
being bled out when the plane is on the ground. The flaps on the inside
are usually locked up so don't bother dropping them.
I didn't like the "flat tires" that came
with the kit so I fixed them. This was done by gluing each tire half
upside down leaving half a tire tip gap on the top and bottom that's
easy to fill and shape with putty. Car putty worked great for me in this
case. The eight individual holes on the "hub cap" looked a little too
diamond shaped when compared to photos of the real thing so I rounded
them out easily with a pin vise. The front tire was sanded slightly flat
as well.
None of these modifications are hard and
they shouldn't take long, however it would be nice if someone made a
resin replacement (hint, hint).
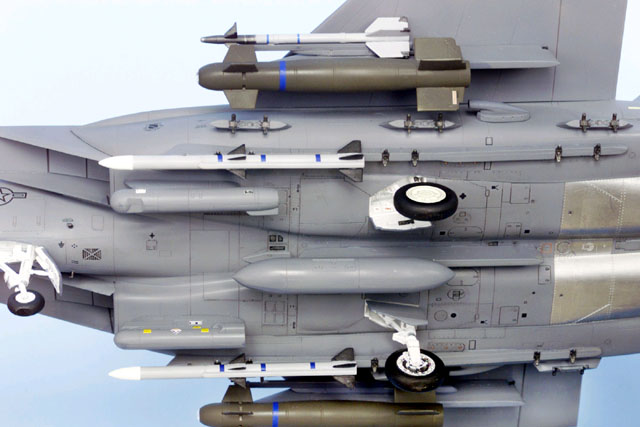
Now for the weapons. In addition to the two
gas tanks and four AIM-9 Sidewinder missiles that came with the original
release, the kit comes with two GBU-15 glide bombs (2000 lbs.), data
link pod, two AIM-120 AMRAAM missiles and four GBU-10 laser guided bombs
(also 2000 lbs.) that are not shown in my pics. All are nicely done and
accurate. Curiously though, some of the rear fin tips on the GBU-15s are
correctly "clipped" on the edge and some are not. Oh well - I just lined
up a correct one with an incorrect one and clipped off that 90 degree
tip with a nail clipper. If this entire job takes you more than 5
minutes, you're doing something wrong.
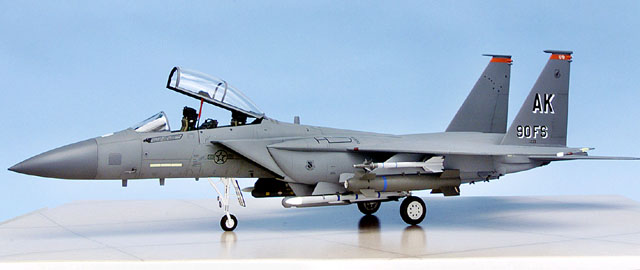
Painting and decaling was easy. I used
Xtracolor FS 36118 Gunship Grey (British paint, British spelling)
because the glossy finish made it easier to decal. If I had to do it
over again I would probably use the Tamiya spay paint because their
shade of Gunship is darker and matches the real F-15E better.
I used an aftermarket decal sheet by
Fighter Decals (yeah!) instead of the kit ones because I wanted to do an
Alaskan Strike Eagle.
For the weapons, I dug up some blue striped
decals to make training rounds.
So there it is. For the price I'm sure all
of you agree it's a great kit. There's a Velinden update kit for all of
you who want to open all the bays, but get ready to pay more for that
then you paid for the kit!
Model, Text and Images Copyright © 2001 by
Jonathan Chuck
Page Created 16 September, 2001
Last Updated 04 June, 2007
Back to HyperScale
Main Page
Back to Features Index |
 Home
| What's New |
Features |
Gallery |
Reviews |
Reference |
Forum |
Search
Home
| What's New |
Features |
Gallery |
Reviews |
Reference |
Forum |
Search