|
F-5E Tiger
by Henry Juarez
|
|
F-5E Tiger |

HyperScale is proudly sponsored by Squadron.com
This is Revell's 1/32 scale F-5E Tiger II with
shark nose.

The kit is old and still retains the old style
of raised panel lines. The detail is somewhat basic but manageable.
When I first took on this project, I knew that
the kit would look better with engraved panel lines. However, the potentially
arduous task of sanding off all the raised panel lines prompted some concerns,
as I had never re-scribed an entire kit before.
After searching the web for line drawings of
the aircraft, I began sanding the model with 320 grit sandpaper. Once the model
was smooth, I began to draw the panel lines using a straight edge and masking
tape as a guide. Then, taking a pin vise with a sewing needle, I began to
carefully scribe into the kit, making light passes at first then using a little
more authority as I went on. After the panels were scribed deep enough and wide
enough, to my satisfaction, I sanded the model with 400 and subsequently 600
grit wet sandpaper.
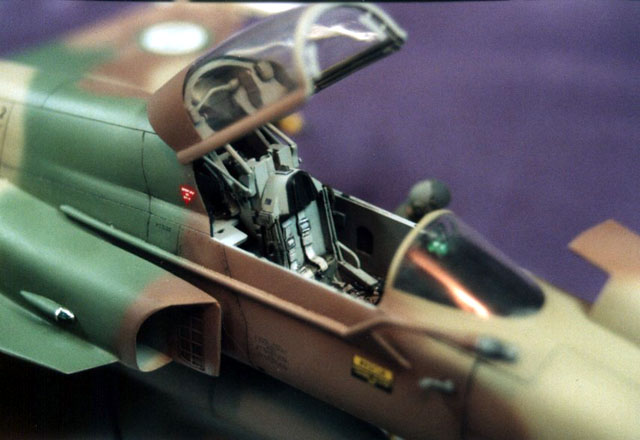
I now focused my attention on the cockpit. The
instrument panel is well done with nice raised detail, but I wanted to
incorporate a photoetched look to the dials. I decided to sand the back of the
instrument panel until the panel was nearly paper thin and the instrument dials
began to wear away. Next, I measured the diameter of each dial by running the
Waldron punch and die rods through them to get the right diameter for the
instrument faces which were punched out individually. I traced a thin piece of
plastic stock, .005, around the instrument panel for the backing. I placed this
backing behind the instrument panel and painted the panel grey with the bezels
black. Once this was done, I placed each dial face into panel.
The sidewalls were measured, traced and
scratch built with .010 plastic stock. Various plastic rods, wires and stock
were used to make the cockpit look busy.
The seat was replaced with a TAC Scale
Dynamics resin seat, painted and weathered. Behind the pilot's seat is a deck
with several avionics boxes. These were all removed and new ones added with
plastic and wires. The aft starboard exhaust vents were removed and replaced
with .005 strips of plastic.
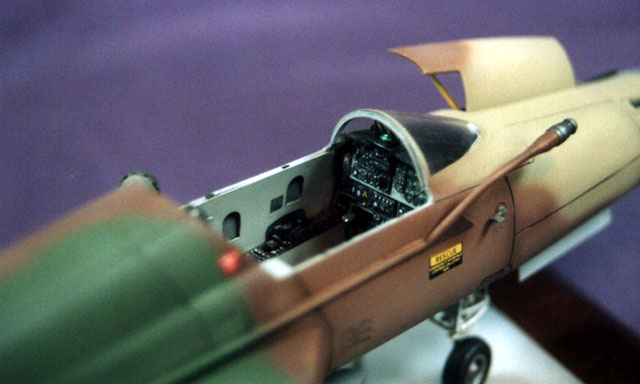
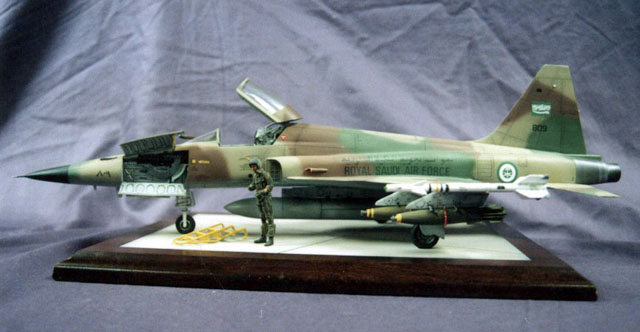
Since I wanted to depict a Royal Saudi Air
Force bird, I needed to attach a refueling probe to the starboard side. This was
simply done by taking a brass rod and bending it to conform to the proper
angles. The refueling receptacle was taken from a 1/32 scale Tornado.
The aircraft was painted using Model Masters
enamel paints thinned with mineral spirits. The cockpit was painted Dark Gull
Gray with Black instrument faces and consoles.
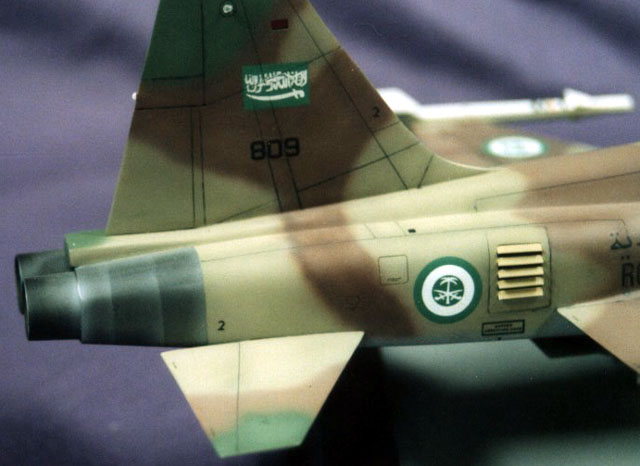
The aircraft upper surface was painted in
Sand, Brown and Forest Green. The underside was painted in Dark Ghost Gray.
Several shades of Metalizer Steel, Gunmetal and Engine Exhaust were used for the
tail pipes.
Once the model was painted, several coats of
Future was applied and allowed to dry for two days. A thin wash of flat black
enamel was then applied over the panels lines and allowed to dry for several
minutes. A damp soft cloth with mineral spirits was used to wipe off the excess.
The decals were from a 1/32 scale Tornado from
TigerWings. However, when I attempted to apply the RSAF logo along the fuselage
they disintegrated, rendering them useless after already having applied the
roundels and national insignias on the wings and the fin.
Here's were I tried my hand at making my own
decals on an ink jet printer. The results are less than I expected and left me
disappointed. They were too translucent.
Overall, I enjoyed the challenge of
re-scribing and scratch building. It gave me the confidence to try anything. I
wish, with the advent of 1/32 scale kits on the rise, some manufacturer will
take the time to consider an aftermarket resin cockpit set and photoetch set for
this kit.
I'm planning on an Adversary /Aggressor scheme
next. I hope by then someone has a nice resin set for it.
Article, Model and Images Copyright © 2001 by
Henry Juarez
Page Created 31 July, 2001
Last updated 04 June, 2007
Back to HyperScale Main Page
Back to Features Page
|
 Home
| What's New |
Features |
Gallery |
Reviews |
Reference |
Forum |
Search
Home
| What's New |
Features |
Gallery |
Reviews |
Reference |
Forum |
Search