|
Grumman
F6F-3 Hellcat
by
Stefano Schembri
|
|
|
Grumman
F6F-3 Hellcat
|

available online from Squadron.com
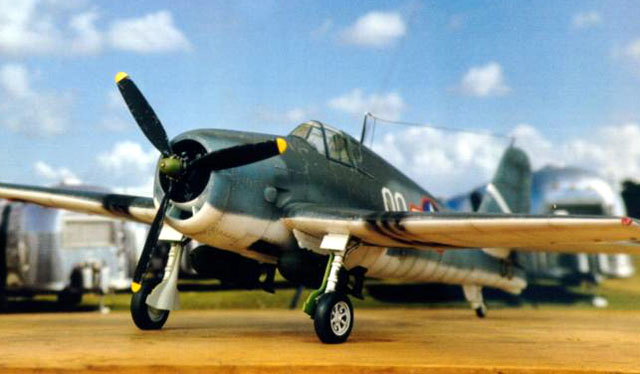
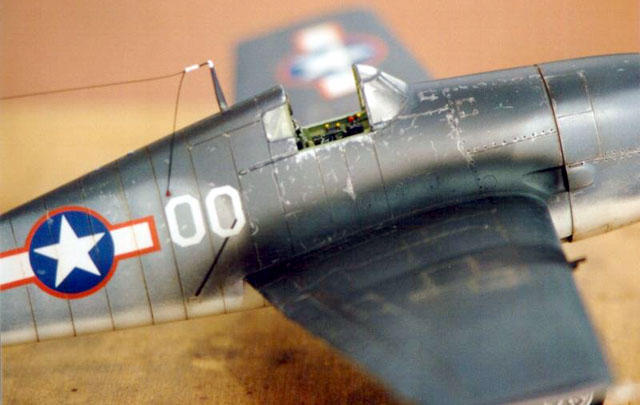
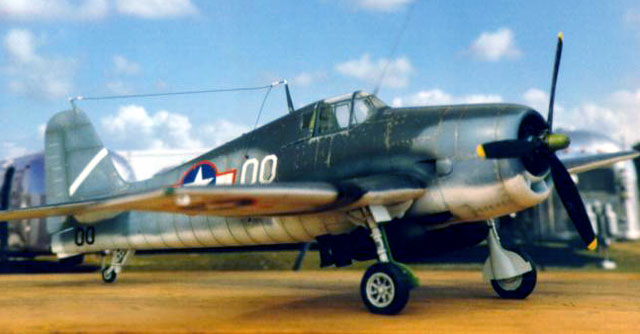
This is the Otaki 1/48 F6F-3 Hellcat. It is not the only kit of the
Hellcat I own, but it is surely the least expensive. I purchased it
for less than $6.00.
Nevertheless the overall quality is very good and I was surprised
when first looked at those nicely engraved panel lines. I therefore
decided it was worth investing in Eduard's etched brass sheet and I
also made a resin copy of the Aires set which is waiting to be
installed in the Hasegawa kit.
Construction started in the cockpit, using the Aires copy for side
panels and Eduard parts for seat, seat belts, instrument panel and
pedals. All throttles and levers were scratchbuilt using brass stripes
and a drop of vinyl glue for the knob; a couple of rails were added to
the cockpit floor, the seat supports were scratchbuilt using styrene,
steel wire and thin lead foil; a new hydraulic pump lever took the
place of the kit's part, too thick. The gunsight was improved drilling
a hole in the top surface and filling it with a drop of clear varnish
to simulate the bulged glass. Everything was sprayed interior green
except the control panels, satin black with a dark grey drybrush.
After a meticulous handpainting of the details, the cockpit was ready
to be glued to the left half fuselage.
Next came the engine. Here I decided to keep the original Otaki
parts as scratchbuilding a new one would be not worth: once painted
and weathered the engine looks fine.
An inexpensive improvement was a set of exhaust pipes, three for
each side, which Otaki has omitted. I cut six small lenghts from a
brass tube and glued in place with vinyl glue. I often use vinyl glue,
its long curing time is ideal for those sub-assemblies where you need
to check alignments when the parts are in position; I use a rapid type…
well, it's rapid in comparison to normal types, it will cure in half
an hour but you can handle the parts in five minutes.
So the fuselage halves were ready to be assembled, the join was
really good and almost no filler was needed! Is it really a kit of the
seventies? Just a touch here and there with Gunze's Mr.Surfacer 500
and a couple of hours spent wet-sanding and polishing the joins and
voilà, done.
The wheel wells are well detailed and only need some tubes and a
good wash-drybrush process to bring out their best. The machine guns
were cut from the top wing halves and replaced with new parts made
from brass tube, you can't imagine how this simple job can improve the
final look of the machine.
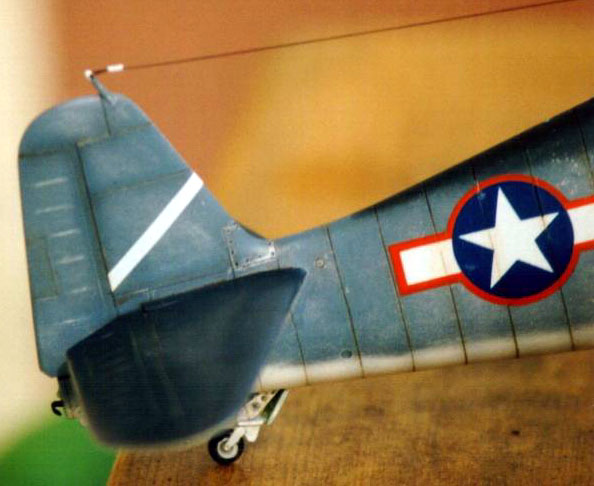
The landing gear received some details from the Eduard sheet and
others were scratchbuilt using lead foil and copper wire, then
everything was painted satin white and weathered with oils. The wheel
doors were thinned for more realism. The wheels are not a masterpiece,
so I tried to give them a little interest "flattening" them
with an iron. The navigation lights were scratchbuilt using clear
plastic glued in place then carefully sanded and polished. A light
coat with transparent red and green will be the final touch.
The wing to fuselage join was also good, no filler required. The
canopy was the worst part of the kit (together with the decals as I
describe later) and after all that work on the interiors I wanted to
keep it open, so I decided to cut it in three pieces, a simple but
riskful job that must be accomplished as slow as you can. Once cut,
the canopy was polished, masked, sprayed interior green and glued to
the fuselage (vinyl glue again). Its inner surface were masked and the
moveable part fixed in place with some masking tape. Again, Gunze's
Mr.Surfacer helped to hide the join.
The first layer of paint on my models is often a matt white or
light grey enamel. I find that this allows further layers to grip
better and also highlights all those otherwise unnoticeable little
surface defects.
After a careful further sanding of the joints, all the surfaces
were covered with two layers of Tamiya matt white. When this was
completely dry I sanded the model with steel wool, working very
lightly in order to obtain a very smooth and almost polished surface.
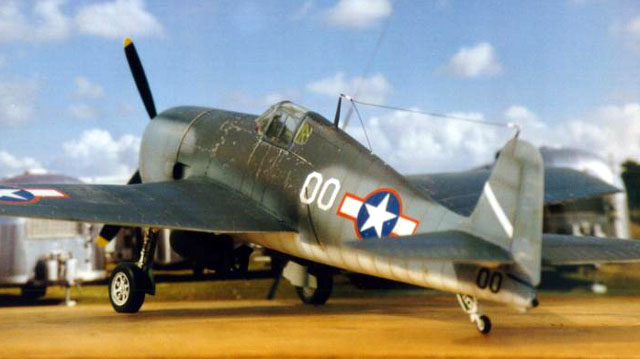
Next came the pre-shading: a medium grey for the undersurfaces and
black for the rest, as medium grey would disappear under the dark blue
of the camouflage. Then the last, very thin layer of matt white was
sprayed on the undersurfaces. When completely dry, the plane received
its three-tone livery using blu-tack, masking tape and Aeromaster
acrylics. To obtain a faded appearance the colors were lightened with
about 20% Tamiya white and that worked well.
I can't find things like "Future wax" or similar here in
Italy, but I still wonder what will happen when those waxed airplanes
will pass their fifth birthday. Who knows? I sprayed two layers of
Aeromaster clear gloss to create a suitable ground for the decals,
then all the airplane was treated with a polishing ceram to obtain a
further smooth surface.
The decals are the worst part of the kit, and if you have an Otaki
Hellcat think about investing a few dollars in a decent aftermarket
sheet. They look nice and even after twenty years they are perfect,
but once you put them on the model they won't follow all the panel
lines. When wetted with decal-specific fluids, the film become
instable and started warping, but nevertheless didn't conform well and
after three-four cycles of decal liquid some bubbles were still there.
Maybe it's only my case, but next time I won't even try to put those
decals on (I have two other Otaki kits in the stack).
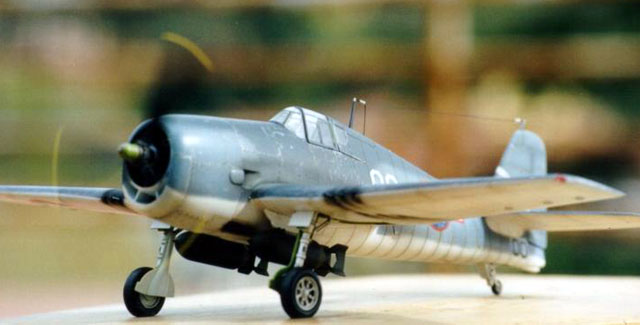
The plane was covered with two layers of Aeromaster flat clear
mixed with a drop of gloss clear, followed by a wash of the panel
lines with burnt sienna oil paint; a Berol Karismacolor helped me to
create a "worn" appearance of the parts where mechanics and
pilots put their hands and feet; a similar treatment was given to the
propeller blades and other surfaces, always working with light hand.
Then I sprayed the exhaust and gun stains with black-brown,
touching up the exhaust stains with grey. At this stage you can really
ruin your work if you don't work very carefully and lightly, so don't
make the same mistake as mine and keep a light touch when making gun
stains!
With the plane decaled and sealed in the final matt finish you
always think that in a few minutes you can complete your work, but the
last, little details always represent long and sometimes tedious work.
Pitot tube, antenna mast and its cable, arresting hook, all these
little details often need to be scratchbuilt, hand painted and
carefully assembled, and you can bet your hand will hit the pitot
while you are gluing the antenna wire!
My next project will no doubt be the Hasegawa Hellcat which is on
the top of the box stack. I guess building it will be easier but less
challenging.
Click the thumbnails
below to view the images full-sized.
Use your browser's back arrow to return to this page.

Model, Images and Text Copyright © 2001 by
Stefano Schembri
Page Created 28 June, 2001
Last Updated 04 June, 2007
Back to HyperScale Main
Page
Back to Features
Index
|
 Home
| What's New |
Features |
Gallery |
Reviews |
Reference |
Forum |
Search
Home
| What's New |
Features |
Gallery |
Reviews |
Reference |
Forum |
Search