|
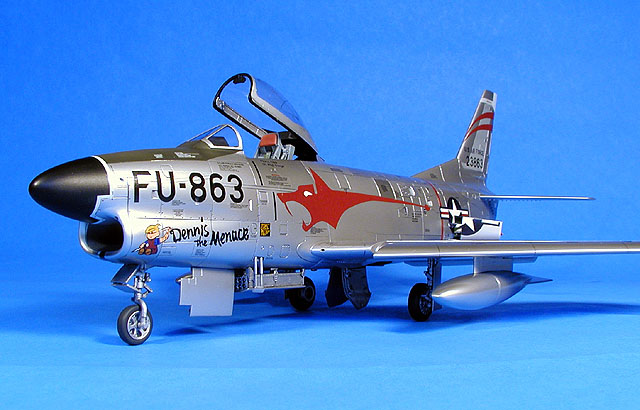
F-86D Sabre Dog
ProModeler's Kit finished
with Alclad II
by
Gregg Cooper
|
|
|
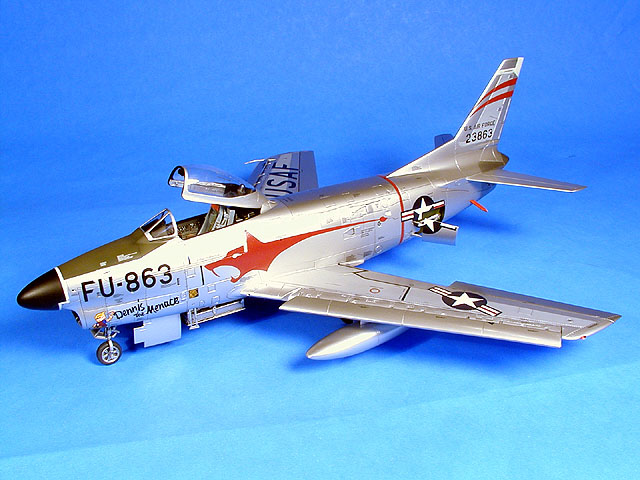
North
American F-86D Sabre Dog |

ProModeler's
1/48 scale F-86D Sabre Dog is available online from
Squadron.com
I have so far somehow managed to avoid doing a natural metal finish on a
model.
To be honest, I just did not want to spend the tons of
time required to prepare a model for that kind of finish. However, Pro Modeler’s new
1/48 scale Sabre Dog was just too irresistible, so I finally decided I
should give it a try.
Alclad II seemed to offer some interesting alternatives to other
conventional “metalizers”.
For example, it is recommended to apply Alclad 2 over a primer
surface, and after a super quick drying time, it may be masked with
tape for other painting effects such as anti-glare panels. All of
these qualities convinced me to try it out on the ‘Dog.
I have to admit, this kit is one of the nicest models I have ever
worked on. Other than reducing the rudder trim tab to the normal
configuration and adding harness belts made from tape, the model was
built straight out of the box.
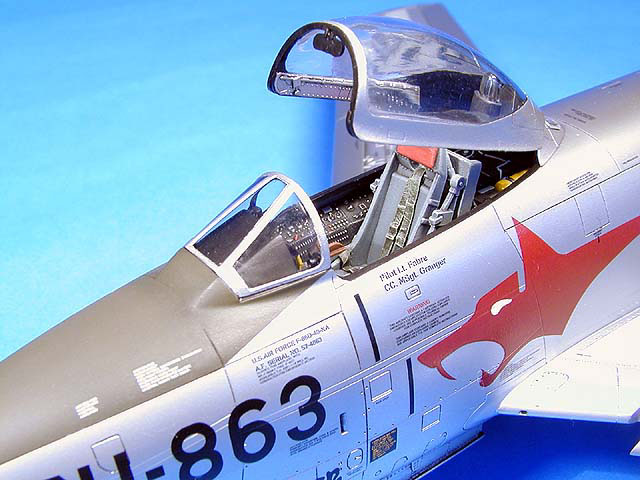
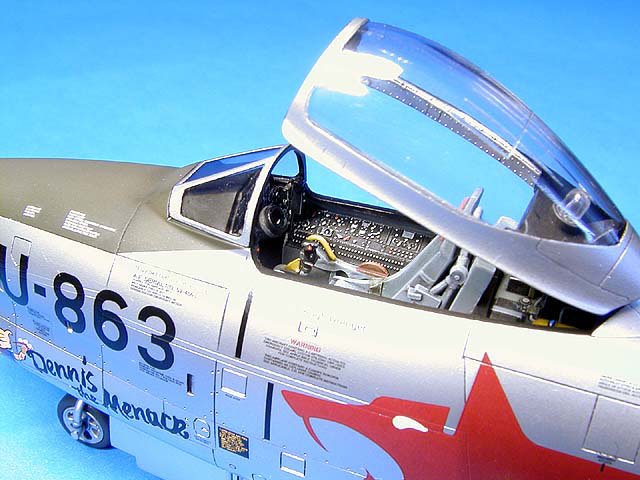
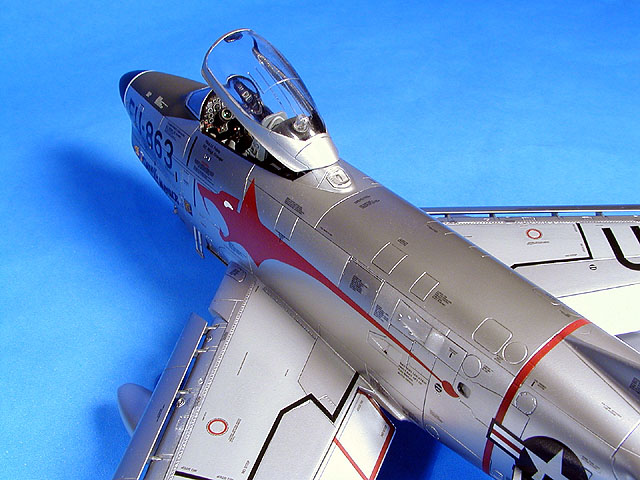
The first thing I noticed was the very fine surface detail, combined
with some traditional Monogram-style wheel wells and speed brake
interiors. The cockpit is VERY complete except for a missing front
bulkhead.
I prefer more depth to the harness belts, so I decided to cover the
molded on belts with Tamiya masking tape.
Remarkably, there are NO ejector pin marks on any visible surface of
this model. Outstanding! The fit of the major airframe parts is really
something to see. Someone reported that the rear wing to fuselage join
was a problem, but my kit practically assembled itself. The only
filler I used on this model was some CA to fill the panel line on the
separate nose cap that did not belong there.
The whole model was primed with Mr. Surfacer, and I was ready for
Alclad 2.
I used the drop tanks as guinea pigs for the Alclad. The instructions
for Alclad state that it should be airbrushed at 10 p.s.i., and misted
on from a couple of inches away, building the silver very gradually in
two or three coats.
THEY ARE NOT KIDDING! Being an “experienced” modeler, capable
of wielding my airbrush with the greatest of ease, I proceeded to rely
upon my superior skills and apply the Alclad just like any other
paint. I ended up with some very skillfully crazed drop tanks, and a
stupid look on my face. Sand, polish, prime, and try again. The second
attempt was sprayed on at 10 p.s.i., but I still had a tendency to
apply the Alclad “wet”, and ended up with crazed tanks again. Sand,
Polish, prime, and try again. This time I misted the Alclad on and
built it up slowly. Result: perfect finish!
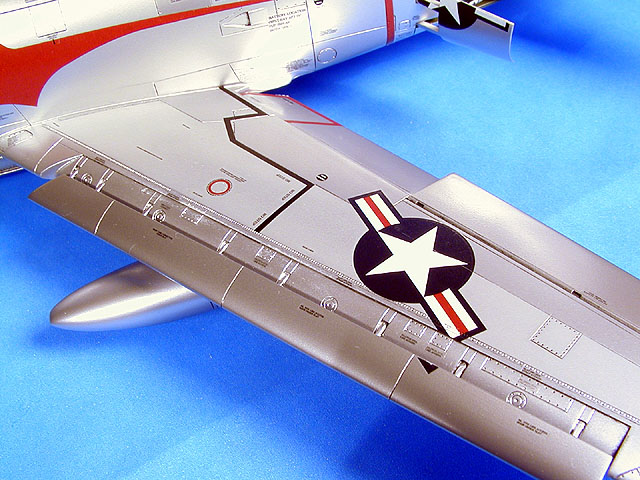
Once this method is mastered, application of the Alclad goes extremely
quick. I spent two hours applying White Aluminum, Duraluminum, and
Dark Aluminum to various panels. To simulate the anodized aluminum
center section of the wing, I added a little Model Master Light Gull
Gray to Alclad White Aluminum. Tamiya tape was used to mask the
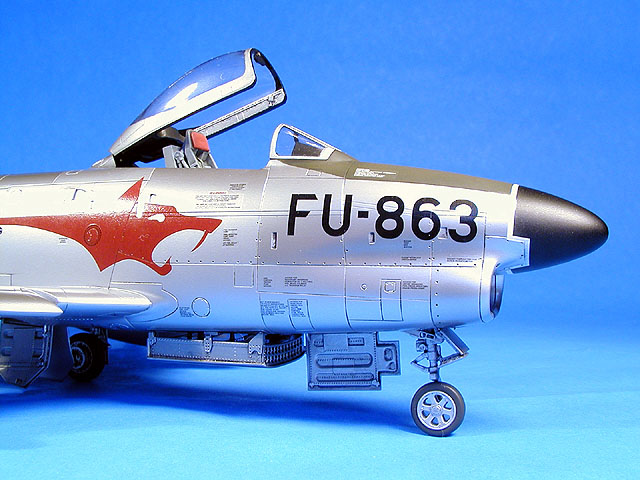
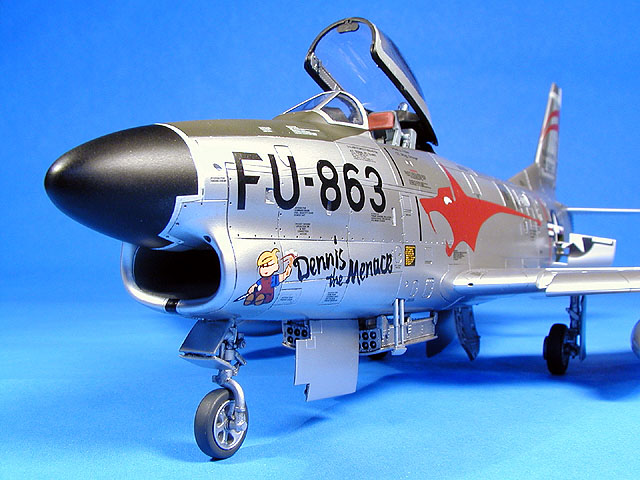
various panels after only a few minutes of drying time. I masked and
painted the anti-glare panel, radome, speed brake wells and wheel
wells with Tamiya acrylics. The anti-glare panel received a thin coat
of Testors Metalizer sealer to prep it for some decal work there. I
had to apply these decals first, then Testors Dullcote before decaling
the rest of the model to avoid masking around the decals.
I think that quality wise, the kit decals are the best I have ever
used. With Gunze’s Mr. Mark Softer, they snuggled down extremely well
after a few minutes. When fully set, these decals disappear against
the metal finish.
The red trim on the decal sheet is a little too dark, but I still like
the look of the finished model.
I used an oil wash to highlight the panel lines. The tinted Alclad
that I used to simulate the anodized center of the wing reacted
somewhat to the oil wash and lost a little bit of it’s luster during
the clean-up. I spent some time thinking about a solution to this
problem. During breakfast the next morning, I found the answer in an
unusual place. My son requested “hash brown” potatoes for breakfast,
so out came the frying pan, potatoes, and vegetable oil. AHA! I rubbed
a dab of vegetable oil on the wing and presto! Instant blend and
shine. It worked so well, that I applied it to the entire model except
the anti-glare panel. I used a TINY bit and thoroughly rubbed it out
with a soft cloth. Only a slight residue remained. Nice.
This model was a great change of pace for me, and Alclad 2 seems
almost too easy to use. Any trepidation I ever had about natural metal
finishes has vanished. Anybody for Cripes A’ Mighty III?
Model, Images and Text Copyright © 2001 by
Gregg Cooper
Page Created 18 October, 2001
Last Updated
04 June, 2007
Back to HyperScale Main
Page
Back to Features
Index
|
 Home
| What's New |
Features |
Gallery |
Reviews |
Reference |
Forum |
Search
Home
| What's New |
Features |
Gallery |
Reviews |
Reference |
Forum |
Search