|
North
American F-86D
"Sabre Dog"
by Josh Bowling
|
|
|
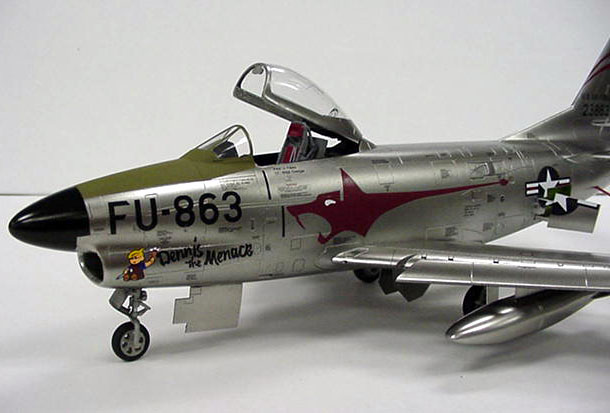
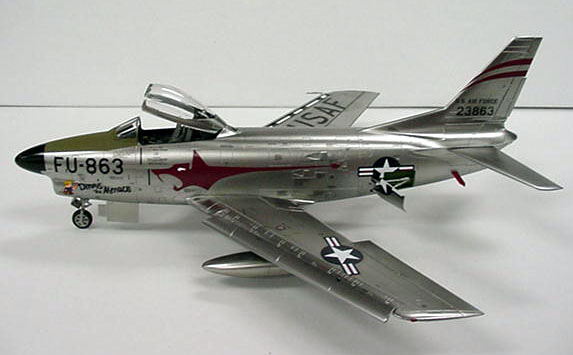
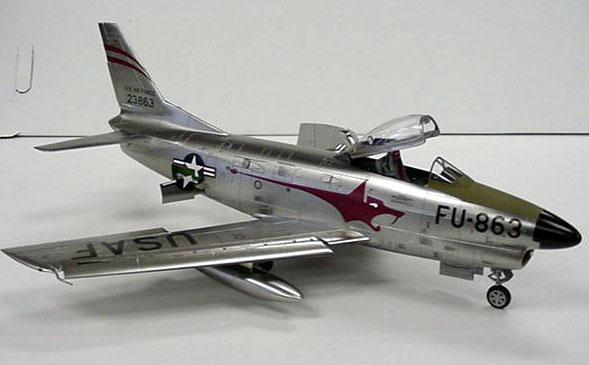
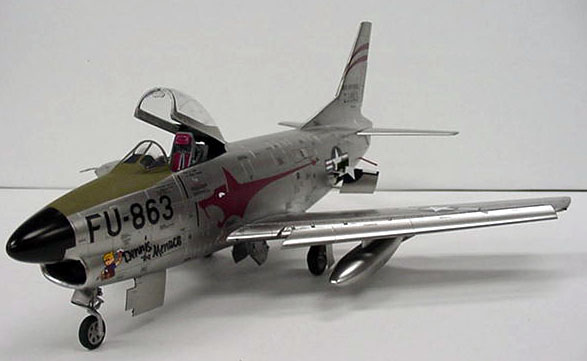
F-86D Sabre Dog |

Revell-Monogram's 1/48 scale F-86D Sabre Dog available from
Squadron.com
I recently finished the Revell-Monogram F-86D.
Wow! What a nice kit. This was a first for me in several areas.
It’s been ages since I built a Monogram 1/48 scale jet, I had never
used acrylic paints through my airbrush, and I’d never used Alclad
lacquers for natural metal finishes. Thanks for the hints Bondo
Phil!
The Sabre Dog comes
beautifully molded in light gray styrene, with petite engraved
panel-lines, and excellent surface detail. The sprue trees are bagged
in pairs, allowing some parts to rub together, but no damage was done
to any of the smaller parts in my kit.
I did notice one of the upper
wings was warped in my kit, however it wasn’t a problem as the wing
straightened out nicely upon construction.
This kit almost literally
falls together. It is engineered to fit, and required absolutely no
filler. I build with gap-filling superglue, and I did nothing to the
seams beyond sanding and re-scribing details. Particular attention
should be paid to the cockpit. Although the kit parts are quite nice,
I’m almost sure that Black Box or Aires or another company will
produce an aftermarket cockpit set for this kit. The instrument panel
is a bit fiddly; make sure to test-fit the small side panels before
gluing. I installed the small side panels after installing the
cockpit in the fuselage and gluing the fuselage halves together. This
allows a more precise alignment of the smaller parts. Joining the
fuselage halves turned out to be the largest problem with this kit.
There are several parts and assemblies that need to be glued into the
fuselage before the halves are finally sealed. Make sure to test-fit
all of these parts several times, so when the glue is wet, you can
make the fuselage halves fit, line up and look good.
A word should be said about
the kit-supplied intake. It’s adequate, but again, I wouldn’t be
surprised if someone did a “Seamless Suckers” type replacement for the
kit pieces. It’s very narrow, and not easily sanded or filled. Good
luck here.
Once the fuselage halves are
together, it’s time to put the wings on. I usually take a few days to
do this, a day to worry about the fit, another day to get up the
courage to glue the pieces, and a final day to actually screw up the
operation! With this kit, it really wasn’t a problem. You glue the
top wings to the single bottom wing, and then glue that assembly onto
the fuselage…Just that simple! Once again, fit was excellent if not a
little too tight.
The rest of the kit assembly
went without incident, and as I said, I did nothing more than sand and
re-scribe the seams.
When it came time to paint, I
was a little hesitant. I’ve never used acrylic paints through my
airbrush, and wasn’t looking forward to spraying Tamiya Gloss Black
acrylic on this model. The gloss black acrylic is called for in the
Alclad instructions and although it seems a bit goofy, the end result
is fantastic. Well, what a pleasant surprise when the gloss black
went down without a hitch, and dried in a record twenty minutes! I
just might have to invest in a few more of these! I thinned the gloss
black 50% with Tamiya thinner, and it sprayed just fine. I applied
three light coats, which built up to a very glossy finish. I kept
thinking the aircraft was still wet, when it had been dry for the last
half-hour! Once the acrylic dries, you can spray the Alclad on the
model. Just to be safe, I gave the gloss black a day to cure. During
this time, I scraped and painted the landing gear, wheels, tires, and
small parts that would be added to the kit after painting.
I sprayed the Alclad straight
through the airbrush, using a narrow spray pattern; I coated the whole
model twice. The result is outstanding, I couldn’t be happier. The
paint was dry in 15 minutes, and doesn’t require buffing. It goes
down that shiny, and stays that way. Just beautiful! Once I got up
from where I had fainted, I touched the surface, expecting to see
fingerprints, lifted paint, etc. None of that. I masked off the area
for the anti-glare panel, and sprayed that with Model Master Enamel
Olive Drab. I expected the natural metal finish to pull off when I
peeled back the scotch tape masking…none of that either. I masked and
re-painted the radome with Tamiya Gloss Black Acrylic, no NMF pulled
up under those masks, and I mask with Scotch tape! I was beginning to
like this Alclad stuff! I tried a little experiment, I took a long
piece of Scotch tape, laid it along the spine of the aircraft,
burnished it down, so that every inch of tape was stuck to that
finish. I ripped the tape up as fast and as hard as I could…no finish
came up with the tape, outstanding! It should be noted that all the
paints I used over the NMF had no trouble adhering to the surface.
I applied the kit decals
straight over the Alclad, perhaps next time I’ll seal them in with a
coat of Future, as the carrier film shows on several decals. Perhaps
it’s the decals, or the person applying them. One thing to be wary
of, for some reason Alclad doesn’t like Solvaset. I found a few
places where the Solvaset actually ate into the Alclad finish, so be
careful when using decal softeners.
After painting and decaling, I
attached the canopy, landing gear, speed brakes, and external fuel
tanks. I chose to model my Saber with the rocket sled retracted. I
like the clean look of the aircraft without the rocket sled deployed.
Overall, this kit is
outstanding. Great fit, excellent detail, and an interesting
subject. I’m sure we’ll see many upgrade sets and aftermarket decals
for this one. I highly suggest this kit to anyone with moderate
building experience.

I also highly suggest
purchasing and using Alclad. It’s simple, quick, and provides a great
finish. It comes in several different shades so you can choose how
shiny you want your subject to be, and what shade of metal you
prefer.
Thanks to Dave Heno at Hobby
Island Houston, TX for providing the kit and the Alclad, and John
Greiner for taking the pictures.
Model and Text Copyright © 2001 by
Josh Bowling
Images Copyright © 2001 by John Greiner
Page Created 04 August, 2001
Last Updated
04 June, 2007
Back to HyperScale Main
Page
Back to Features
Index
|
 Home
| What's New |
Features |
Gallery |
Reviews |
Reference |
Forum |
Search
Home
| What's New |
Features |
Gallery |
Reviews |
Reference |
Forum |
Search