|
Focke-Wulf
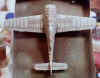
Fw 190A-3
by
Larry Cherniak
|
|
|
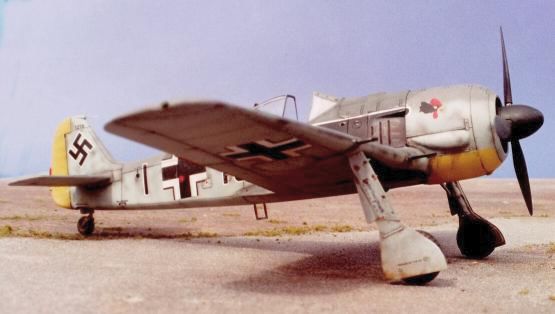
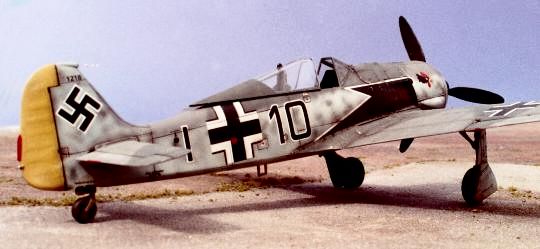
Focke Wulf
Fw190A-3
III./JG2 "Richtofen"
|

Tamiya's 1/48 scale Focke-Wulf Fw 190A-3
is available online from Squadron
Ever have one of those projects where everything goes RIGHT?
In some ways it is easier to write about correcting bad kits, or detailing
out a reasonable one: everyone likes a story, and you have more of a chance to
reveal the "drama" of a model building project when there is something
to tell.
With the Tamiya Fw190A-3 kit built out-of-box, there is not a whole lot to
tell. Dull reading perhaps, but also the single "biggest bang" for the
time spent of anything I've built. Building this kit is truly like eating candy:
you get big rewards real fast, and risk spoiling your appetite for more
nutritious fare (i.e. anything you have to work for).
The beauty of a kit you don't have to struggle with is that you can quickly
proceed to the fun stuff (for me at least) - painting and weathering.
Interesting camo schemes and markings for 'A-3's are somewhat limited compared
to later marks: they basically served with only JG2 and JG26 on the French coast
in early '42 in standard RLM 74/75/76 camo (although I found one green JG54 bird
and a few even survived the war in training units, picking up interesting paint
on the way). It would be a simple matter of putting on a new antenna mast and
cooling gills and building any of a hundred 'A-4's, but limiting myself to
"contest-grade OOB" meant sticking to the 'A-3. In the end I decided
on a typical JG2 machine, with decals mostly from the kit with a few from
Aeromaster.
 I
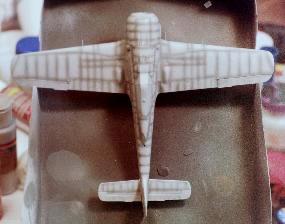
preshaded the kit with dark gray after priming with Gunze Mr. Surfacer 1000. As
you can see in the photos, I added "information" to the project by
putting lines not only along molded detail but also along pencilled-in rivet
lines. I
preshaded the kit with dark gray after priming with Gunze Mr. Surfacer 1000. As
you can see in the photos, I added "information" to the project by
putting lines not only along molded detail but also along pencilled-in rivet
lines.
Camouflage was sprayed on freehand using straight ModelMaster enamels
(Judging the results, I think I will add a little black-green to the RLM74 next
time to get the proper contrast between the grays). This was tricky, as I had to
keep them a bit translucent over the preshading. You might just be able to make
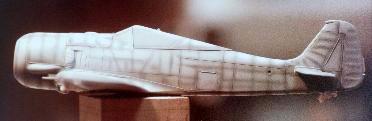
out in the upper wing photo how I added stringers at this point
(simul-shading?). I was careful to leave the effect a bit heavy-handed at this
stage, and sure enough later varnishing, decals, and weathering dropped the
effect down to "just right".
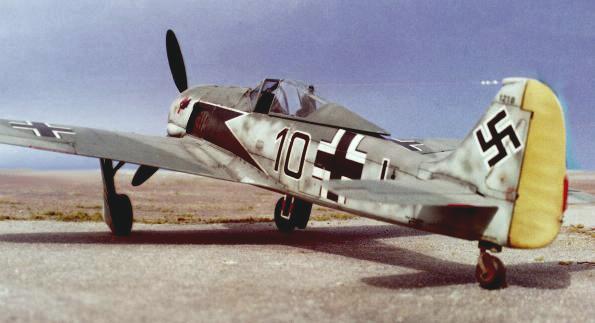
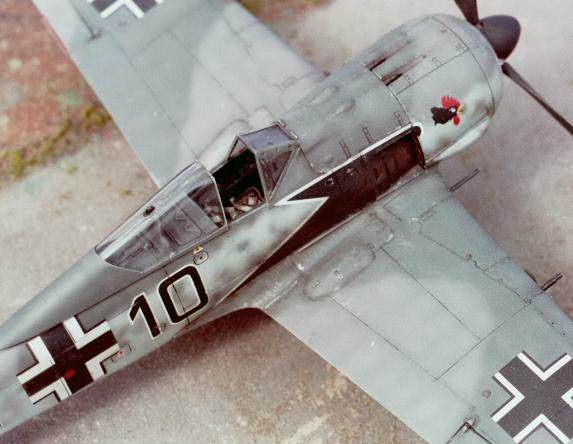
A Future glosscoat, decals (the exhaust panel was painted gloss black and the
decal trimmed around it just after application), and ModelMaster Acryl flatcoat
followed. I then weathered with earthtone oil washes in the panel lines
(primarily raw umber plus ultramarine blue), silver Prismacolor pencil
scratches, a few silver plus raw umber plus flat white paint chips, and some
pastels. Exhaust staining was airbrushed flat varnish plus a drop of light tan,
followed by pastels.
By the way, the pitot tube which should be on the starboard wing was included
in the kit but broke off before the pictures were taken. Photos are 100 speed
35mm, Fuji film, taken with a Canon Rebel EOS 35-85mm zoom camera, mostly on the
wider angle settings for increased perspective effect, taken outdoors at f16-22.
I had them processed to CD, then cropped, retouched, and color corrected them in
PaintShopPro.
If this kit is not perfect, it is as close (within the limitations of the
medium and current style) as any I have built. Sure, they should have opened the
landing gear inner doors and maybe the sit of the gear is not quite right.
But I won't pick nits- this kit was a true pleasure to build and is very
accurate in outline and detail. From the purchasing of the kit to putting it on
the shelf was a 10-day sprint and I enjoyed every minute of it.
Click on the thumbnails to
enlarge.
Use your browser's "Back" arrow key to return to this page.
Model, Text and Images Copyright ©
2001 by Larry Cherniak
Page Created 16 July, 2001
Last Updated 04 June, 2007
Back to HyperScale
Main Page
Back to Features Index
|
 Home
| What's New |
Features |
Gallery |
Reviews |
Reference |
Forum |
Search
Home
| What's New |
Features |
Gallery |
Reviews |
Reference |
Forum |
Search