|
Focke-Wulf Fw 190A-6
by
Roy Long
|
|
|
Focke-Wulf Fw 190A-6 |

Tamiya's 1/48
scale Fw 190F-8 is available
online at Squadron.com
In late 1943 a Luftwaffe unit was formed to conduct operational testing
of "Sturm" tactics against the growing numbers of USAAF daylight bombing
missions. The unit was designated Sturmstaffel 1. It was comprised
entirely of volunteers equipped with Fw190A-6s and later Fw190A-7/R8s.
The Sturmjäger tactics proved to be
successful enough to form Sturmstaffeln within JG3, JG4, JG5 and JG300.
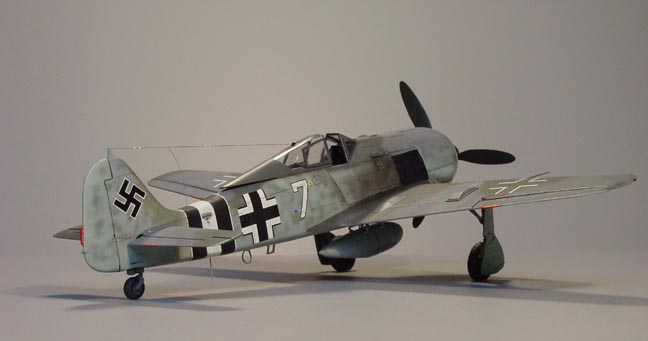
Many of Sturmstaffel 1's pilots went on to form the nucleus of
III(Sturm)/JG4 and took the distinctive black/white/black tail bands
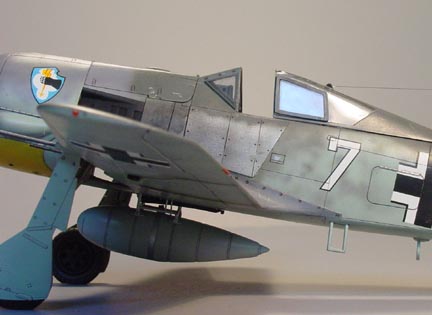
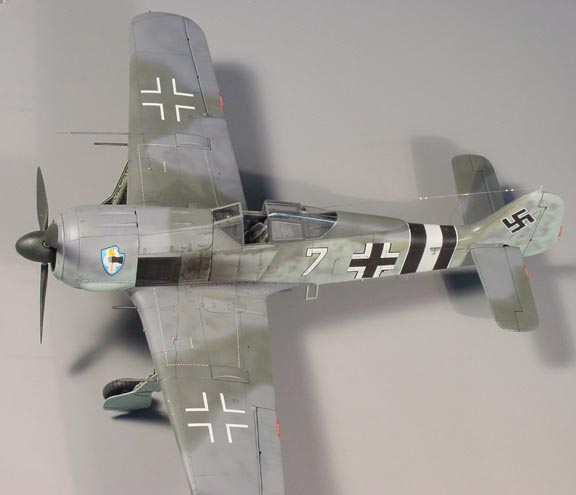
with them. This model depicts one of the Fw190A-6s assigned to
Sturmstaffel 1, flown by Irwin Bacsila.
I used the Tamiya Fw-190F-8 as the basis for this conversion. Cutting
Edge Details' Fw 190A-4/-5/-6/-7/-8 Conversion Set provided the parts
for the A6. A CMK "Rammjäger" Set was used for the cockpit and some of
the Sturmjäger specific details. (Note: the term "Rammjäger" and its coännotations
are not well accepted nor well liked by the former Luftwaffe pilot
community, I only use it here as that is what CMK have titled their
set.) The markings are from the outstanding EagleCals #7, "Sturmjäger
part 1-Sturmstaffel 1 As".
Construction and Fw190A-6
Conversion
This is actually the first Tamiya Fw190A I've built and it did build
up as reported. It was strange not to have to correct warped wings,
fuselage, etc. The Cutting Edge set contains a whole bunch of parts
which include early and late outboard armament covers, early and late
ailerons, "flat" nose gun cover and the associated narrow gun trough
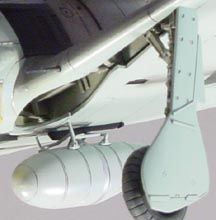
insert and the smaller inboard main gear covers and linkages. The
instructions were nicely done and showed which parts were needed for
each variant as well as which panel lines needed to be added or filled
in for each variant. Construction started by determining what parts of
the CE set I would need and what panel lines would need attention to
turn an F-8 into an A-6. I parts I used were the "flat" nose gun cover
and the associated narrow gun trough insert and late outboard armament
covers. Additional modifications included repositioning the pitot tube
to the mid wing position, adding one small panel and filling in two.
I started as usual with the cockpit. The CMK set is quite comprehensive
and contains most of what one would need to convert the Tamiya Fw190F-8
to A-8/R8 standards. Contents include a full cockpit and seat in resin
with photo-etch instrument panels and acetate dials, parts for the
outboard MK 103 30mm resin comprising of inserts for exposed cannon and
their covers and the wing leading edge barrel fairings, inserts and
covers for the nose mounted MG ammo boxes, resin frames and acetate
"glass" panels for the canopy mounted armored "blinkers", photoetch
fuselage armor panels and as a final nice touch, decals for two
Fw190A-8/R8s.
 Initially
I was not planning to use the CMK cockpit, but I found that it had a
spare instrument panel for the A-6. The cockpit parts were cleaned up
and painted RLM 66, then given a wash of dark brown. When the wash
dried, the parts were drybrushed and flat coated with Testors Dullcote.
The cockpit was assembled and mounted in the fuselage. Initially
I was not planning to use the CMK cockpit, but I found that it had a
spare instrument panel for the A-6. The cockpit parts were cleaned up
and painted RLM 66, then given a wash of dark brown. When the wash
dried, the parts were drybrushed and flat coated with Testors Dullcote.
The cockpit was assembled and mounted in the fuselage.
The construction of the fuselage was straightforward until I attempted
to add the CE nose gun cover and its associated narrow trough. I don'
know whether it was self inflicted or the CE parts but after the removal
of the kit parts I encountered some gaps which were filled with gap
filling superglue, sanded out and the panel lines rescribed.
The construction of the wings was equally straightforward with the
exception of the new outer wing gun panels. My guess is the CE set was
patterned after the panels of the DML kit, which have a slightly
different shape. I cut the panels out of the lower wing following the
panel lines and when I fit the new covers in there were some gaps to
deal with, out came the super glue, sanding sticks and the scriber and
after a little work, every thing was OK again.
The rest of the main construction went with out a hitch and I was
ready for the real fun stuff.
This particular Fw 190 was one of the very first to be fitted with the
equipment that would be later designated "R8" on Fw 190-A7 and -A8s. It
had full wind screen and canopy armor as well as applique armor on the
fuselage. I started out with the windscreen that by this time had been
mounted to the fuselage. I made a rubbing of the triangular side panels
with a soft pencil and thin paper to make a template. The lines from the
rubbing were cleaned up and the template was used to cut the add on
panels from a sheet of .20 clear styrene. The panels were then masked
off and were painted RLM 66 to represent the wooden frames that held
them in place on the original planes. They were set aside until the
model was almost completely finished and were fixed in place with a drop
of Future.
 The
frames for the canopy panels were provided in resin in the CMK set, as
were acetate "glass" panels. I found that the outline of the acetate
sheets did not match the resin frames. To compensate for this, I traced
the inside of the frame on paper and transferred that to another piece
of clear styrene to my delight, after they were cleaned up it was a near
perfect fit the first time around, I wouldn't have to cut any more clear
styrene. The
frames for the canopy panels were provided in resin in the CMK set, as
were acetate "glass" panels. I found that the outline of the acetate
sheets did not match the resin frames. To compensate for this, I traced
the inside of the frame on paper and transferred that to another piece
of clear styrene to my delight, after they were cleaned up it was a near
perfect fit the first time around, I wouldn't have to cut any more clear
styrene.
The frames were painted RLM 66 and the "glass was glued in with
thinned "Micro Krystal Klear". These were set aside unit later as I had
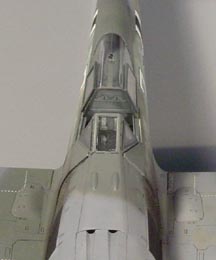
to tackle two of the many interesting points of "White 7". As its later
brethren would be, "White 7" had some modifications to decrease its
weight the first being the removal of the nose mounted machine guns, the
second was the removal of the pilot's head armor. This is a fairly
simple modification, as it only required the addition of a piece of
brass rod to simulate the cross brace remaining in the canopy.
The second of the two points of interest in the canopy area was
"White 7" was one of several Fw190A-6s in SS1 that was fitted with a
reduced drag canopy. This canopy differed from a "standard" flat canopy
near the front of the canopy in front of the antenna tensioning
mechanism. The reduced drag canopy had a smoother profile in comparison
to the standard that had a bit of a "hump" in that area. To replicate
the reduced drag canopy I sanded the area nearly flat and then polished
it out. Any lost detail was restored with paint when I masked and
painted the frame (I wasn't about to rescribe the frame line to match
the rest of the canopy). I didn’t like the rounded corners on the CMK
supplied brass fuselage armor so I used it as a template to cut new ones
from .10 styrene. I had them ready to be glued onto the model and
something prompted me to check the pictures in the SS 1 book and I
noticed that instead of the later 3-piece arrangement, the first A-6s
equipped with them had a four piece arrangement. So I used the CMK
supplied brass as a template again and made the four pieces. These were
then glued to the fuselage with little dabs of superglue, working from
the top so I could ensure they would conform to the curvature of the
fuselage.
When this had dried, It was time for my favorite part, painting.
First, the gearbays, cockpit opening and engine opening were masked off.
I then sprayed the fuselage add on armor with a mix of Testors Steel
and Burnt Metal Metalizer and masked them off with Parafilm (more on
this later). I started the paint job by spraying the panel lines flat
black for "reverse shading".
I also took the opportunity to try some thing I had wanted to try
out. I had notice that many of the pictures of SS 1's 190s had a scruffy
appearance possibly because they were mostly hand-me-downs from other
Gruppen. In an attempt to replicate this, I sprayed random scribbles and
blotches in medium gray and white, focusing more on the upper surfaces.
I then airbrushed several very light coats of Model master RLM 76 on the
undersides and fuselage sides and then sprayed RLM 74 and 75 in the same
manner on the upper surfaces.
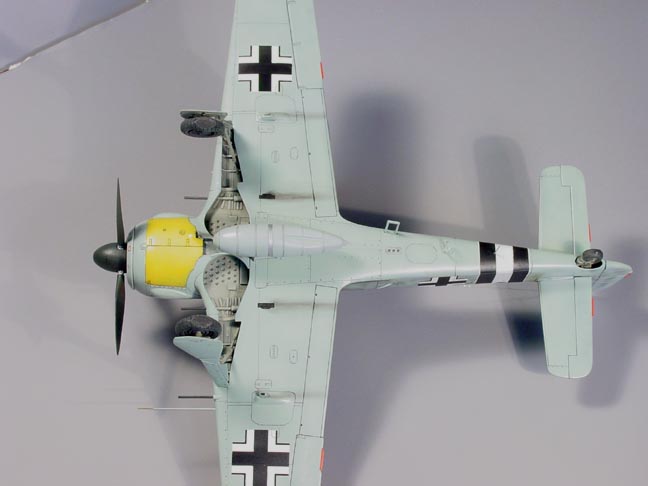
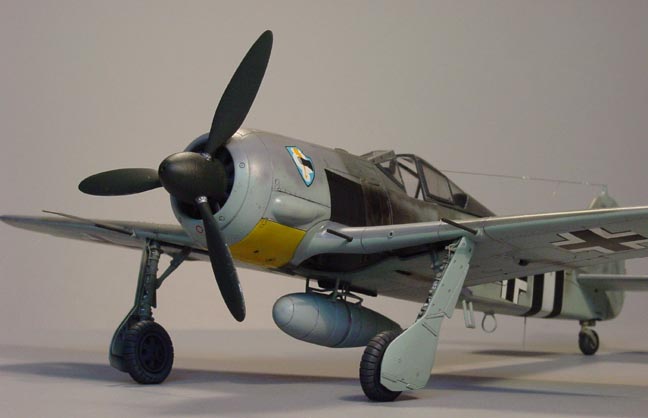
The RLM 74 and 75 were then thinned even more for the mottling. I then
masked off the under side of the cowling and sprayed it with RLM 04
Gelb. The fuselage band was masked off and sprayed whit and then masked
again for the black. The thin black "outline" bands came from the decal
sheet. After the paint had dried for a while the model was clear-coated
with Future. When it dried I started my second favorite part, decals.
The EagleCals were as usual for them, very well done and they went on
with out a hitch. Once they were dry I filled the panel lines with
artists ink heavily thinned with a non-toxic airbrush cleaning solution
and then sprayed a few thin coats of Aeromaster Enamel Satin Clear mixed
with a drop or two of Testors Clear Flat. When that had dried I went
back to the fuselage armor panels and removed the Parafilm masks. I is
believed that the panels may have been provided either primed in RLM 02
or in unfinished steel with a thin coat of RLM 76 for SS 1s crews to
mount and paint them, either way the panels have a distinct shade to
them. I opted for the unfinished steel. I then masked the area around
them so I could spray a very thin coat of RLM 76 over them. At this
point all the addition small details were added such as the wing tip
lights, antenna aerials canopy and landing gear.

I continued with the scruffy theme into the weathering by airbrushing
the areas the crew would have walked on with Testors Clear Flat. Pastels
and staining with artists' ink thinned with a non-toxic airbrush
cleaning solution completed the weathering.
-
"Sturmstaffel 1: Reich Defense 1943-44
the War Diary", Erich Mombeek
-
"Sturmjäger Band 2", Erich Mombeek
-
"Focke Wulf Jagdflugzeug Fw 190A Fw 190
"Dora" Ta 152 H", Peter Rodeike
-
Niel Page's "IV (S)/JG3 Site" at http://ourworld.compuserve.com/homepages/neilpage/homepage.html
Model, Text and Images Copyright © 2001 by
Roy Long
Page Created 13 September, 2001
Last Updated 04 June, 2007
Back to HyperScale
Main Page
Back to Features Index |
 Home
| What's New |
Features |
Gallery |
Reviews |
Reference |
Forum |
Search
Home
| What's New |
Features |
Gallery |
Reviews |
Reference |
Forum |
Search