Home
| What's New |
Features |
Gallery |
Reviews |
Reference |
Forum |
Search
Home
| What's New |
Features |
Gallery |
Reviews |
Reference |
Forum |
Search
|
|
|
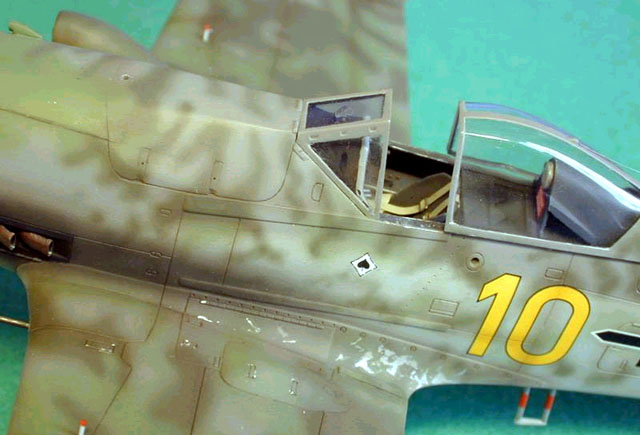
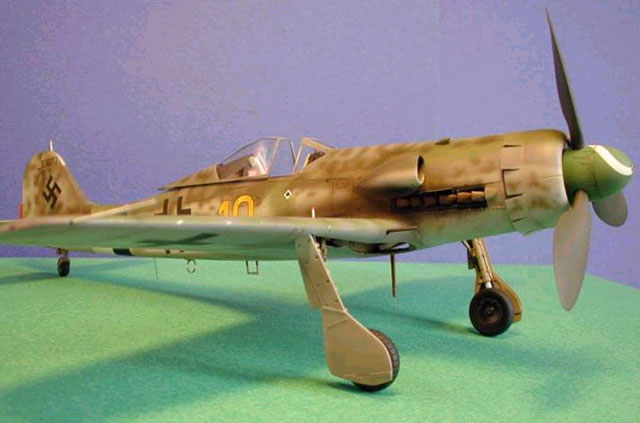
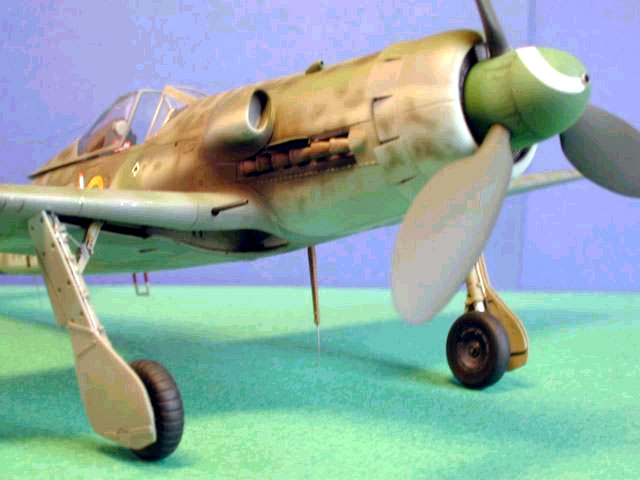
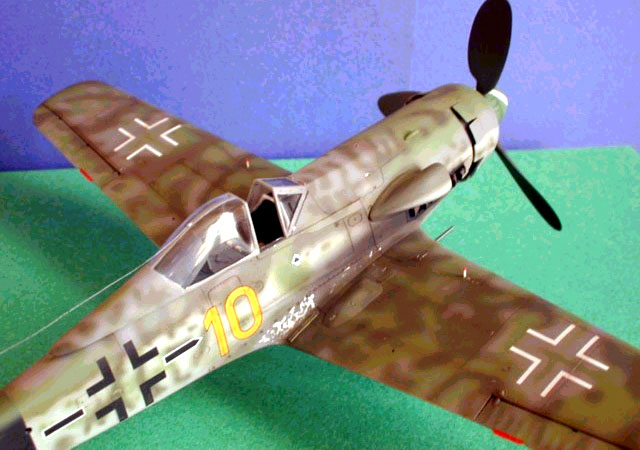
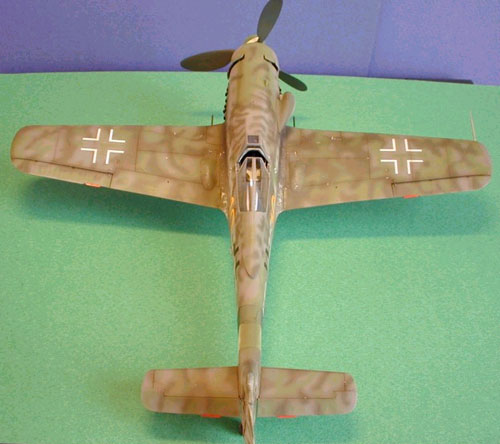
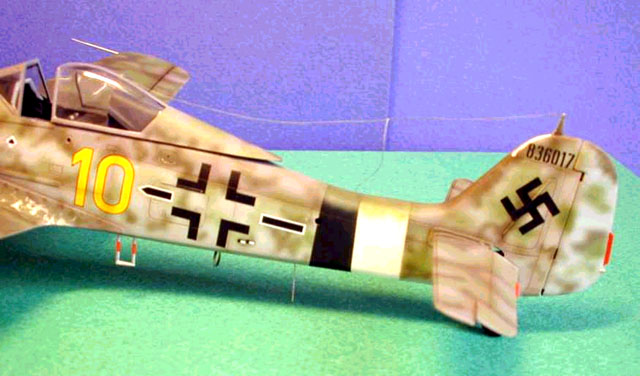
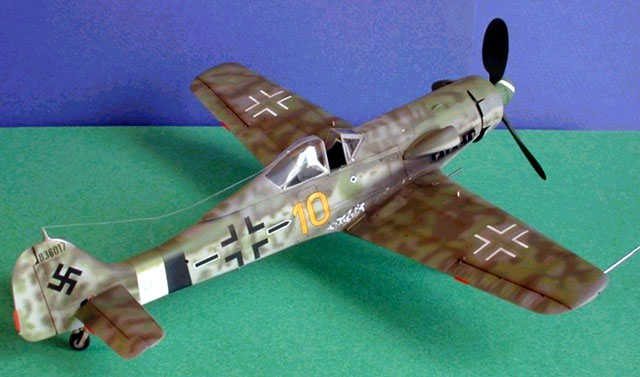
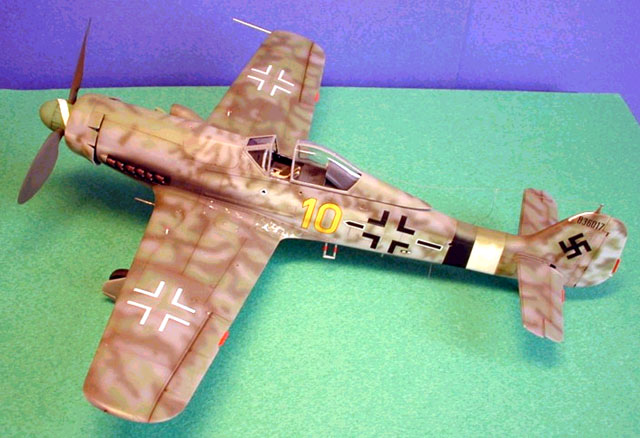
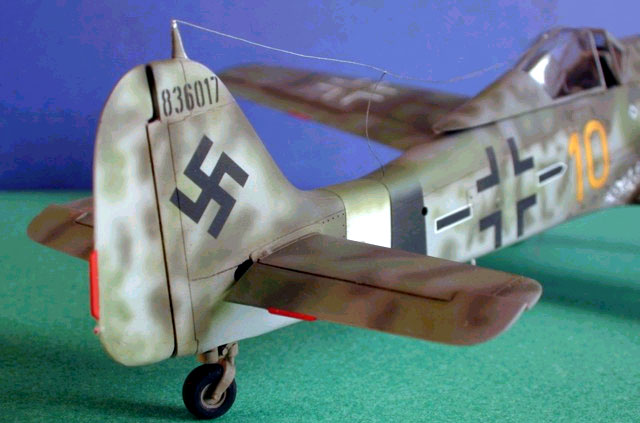
Focke-Wulf Fw 190D-13 by Julien Haccoun
The Fw 190 D-13 is a legendary bird for Luftwaffe fans. Here is my rendering of this beautiful aircraft. I used Tamiya’s 1/48 scale Focke-Wulf Fw 190D-9 as a basis, modified with Robert Stephenson’s resin conversion (now marketed with minor alterations under Eagle Parts label).
Since I intended to make a quick build in order to start the paint job as soon as possible, I didn’t modified the landing gear bays. I added an Aires cockpit and tail planes, an Adeco gunsight, and made the brake lines lines out of vinyl tubing and copper wire. Close examination of the photographs published in Eagle Editions "Yellow 10" book by Jerry Crandall reveals that the left tire is slick and the right one has a characteristic pattern similar to that of Tamiya’s kit part. I therefore puttied the left tire and sanded it smooth.
Weathering was done in two stages: a dark brown and black wash (artist oils diluted in lighter fluid) applied with a fine brush in the panel lines before the flat coat and then, the same mix (Tamiya acrylics thinned with water and Tamiya thinner) airbrushed along the panel lines. A darker coat is sprayed more heavily to represent the exhaust stains.
Paint chipping is made with Humbrol n°11 at different stages of the weathering but after applying the camouflage. All in all, the paint job took about 10 hours to be completed. Since I intend to build another D-13 with fully detailed landing gear bays, I preciously kept my EagleCals sheet aside and used the Kommandeur one instead with a few modifications to accurately match the pictures and color profiles. The lay down perfectly with a tad of Aerosol and their carrier film is invisible after a clear coat.
This model was a pleasure to build ! It required little extra work (to adjust the resin parts here and there) and was the opportunity to test my airbrush skills. In the end this makes a real eyecatcher in my collection.
Try it, you’ll like it !
Click the thumbnail to view the
image full size.
Text and Images Copyright © 2001 by Julien
Haccoun
|
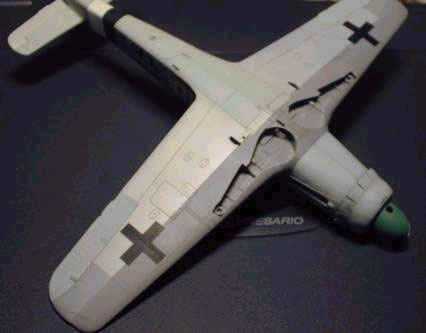 This
was one of the most challenging camouflage schemes I have ever
tackled.
This
was one of the most challenging camouflage schemes I have ever
tackled.