|
Focke-Wulf Fw 190D-9
by Brett Green
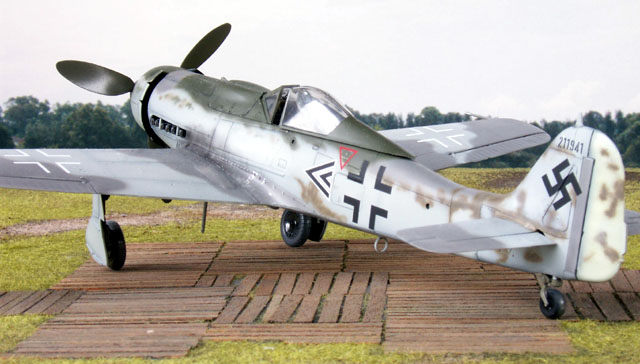 |
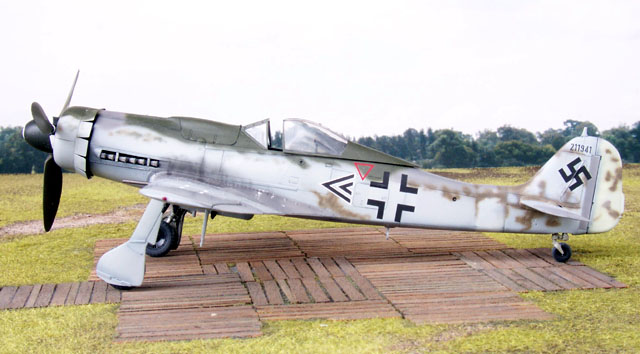
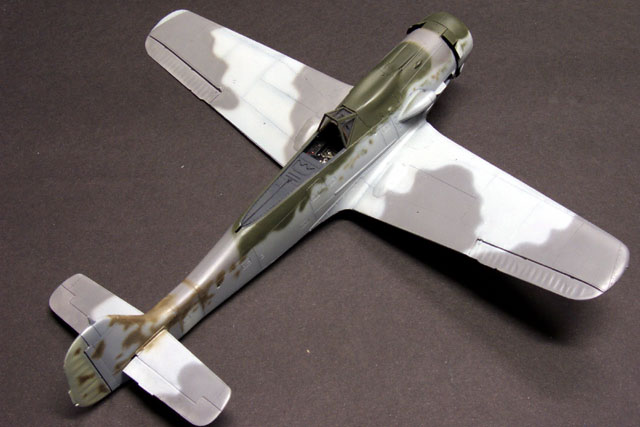
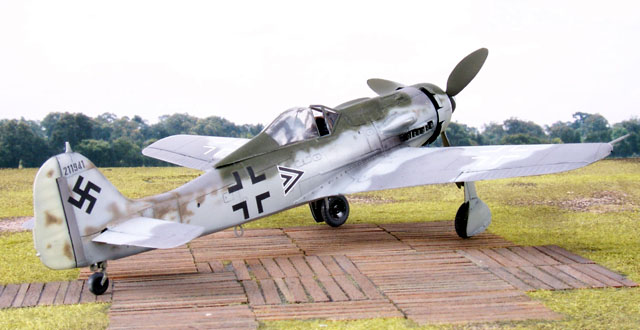
Focke-Wulf Fw 190D-9
W.Nr. 211941, Bayreuth-Bindlach, 1945
Possibly a Gruppen Kommandeur's aircraft of JG6 |

Tamiya's 1/48
scale Fw 190D-9 is available online from Squadron.com
Tamiya's 1/48 scale Focke-Wulf Fw 190D-9 is a beautifully engineered kit that
almost falls together. Nevertheless, it suffers from some noticeable
shortcomings. These include short main gear legs; a fictitious cover over the
rear of the engine inside the wheel well; incorrect shell ejector arrangement
for a Fw 190D-13; poorly shaped upper cowl, propeller blades and spinner; and
small main wheels.
The simplest solution for the modeller who wants an accurate Fw 190D-9 is
probably to build the Dragon kit. This model is quite accurate and is not as
difficult to build as the Dragon Fw 190A/G family of kits.
However, I had a few unbuilt Tamiya Doras in my collection so I decided to
correct one of these instead.
Correcting Tamiya’s
Lower Wing
Tamiya based the research for their Fw 190D-9 kit on the Dora at the US Air
Force Museum in Dayton Ohio. Unfortunately, the wing fitted to this Dora
actually belonged to a Fw 190D-13. The wings were inadvertently swapped in the
past when both aircraft were being reassembled. Tamiya’s kit faithfully reflects
this hybrid configuration. The main difference between the D-9 and D-13 wings is
the lower centre section that incorporates the shell ejector chute. The D-13
aircraft has no cowl guns and one co-axial 30mm cannon, so only one ejector
chute is present. The D-9 is equipped with two cowl guns and no co-axial cannon,
so it has two smaller ejector chutes.
In addition, Tamiya has moulded a fictitious ceiling on the wheel well that
covers the lower-rear engine section. This is a convenient blanking plate for
Tamiya’s empty engine bay, but the cover did not exist on the real aircraft.
I used the “Parts R Parts” Item Number PRP 001 “Fw 190D-9 Wheel Well Insert and
Engine Plug for Tamiya kit” to address these issues.
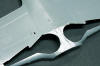
This set comprises just three parts in resin. All parts are well cast with no
visible flaws. However, the one-piece engine plug is a little rough and
over-simplified. The other two parts do not suffer from this problem. The wheel
well insert is better detailed than the kit part, and the centre wing panel
insert is accurate for the Fw 190D-9.
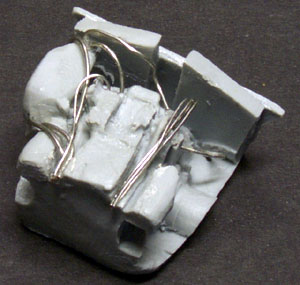
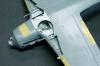
In preparation for installation of these parts, the front of the kit cockpit tub
was first cut off to make space for the engine plug. The back of the engine plug
becomes the cockpit firewall following this surgery. I detailed the engine plug
with various thicknesses of fuse wire before painting the completed sub-assembly
and applying a wash of thinned black oil paint.
Slide Show #1 - Engine Plug
Click a thumbnail below to view the
larger image on this page
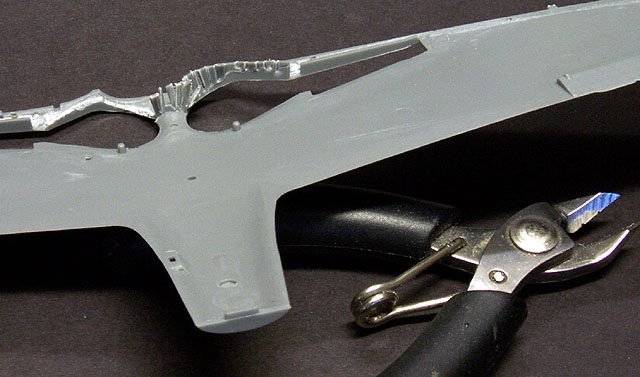
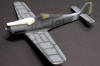
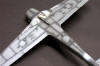
Some material was removed from the wheel well opening in the lower wing to make
room for the new wheel well insert. I used a pair of side-cutters to make many
short, vertical cuts close together. It was then a simple matter to snap off the
resulting waste before trimming the area with a sharp hobby knife.
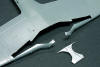
The section between the wheel wells must also be cut out of the lower wing to
make way for the accurate shell ejector panel with the two ejector chutes. I
strongly recommend cutting off less than you think will be required and trimming
gradually. The accurate panel was secured using super-glue, the wheel well
insert was glued to the top of the upper wing and the remainder of the wing was
assembled per the kit instructions.
Slide Show #2 - Wheel Well
Click a thumbnail below to view the
larger image on this page
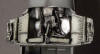
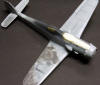
At this point, I taped the fuselage halved together with the cockpit tub trapped
between. I dry-fitted the engine plug. The fit was perfect. I had to slightly
trim the front of the shell ejector panel on the lower wing to achieve an
accurate join.
Cockpit and
Fuselage Assembly
 The
cockpit was next on the agenda. I replaced the seat with the resin item from
Cutting Edge. This seat features a cast-on harness that looks great after a coat
of paint and an oil wash. I enhanced Tamiya’s instruments with Reheat instrument
decals. A drop of Krystal Kleer was used to represent each instrument lens. The
cockpit was next on the agenda. I replaced the seat with the resin item from
Cutting Edge. This seat features a cast-on harness that looks great after a coat
of paint and an oil wash. I enhanced Tamiya’s instruments with Reheat instrument
decals. A drop of Krystal Kleer was used to represent each instrument lens.
With the cockpit complete, I raced through the assembly of the fuselage halves,
mating the wings to the fuselage and adding the horizontal tail surfaces.
Frequent dry-fitting during preparation contributed to very satisfactory fit
during this stage.
I also drilled out the kit exhaust stacks before adding them to the engine
cowling.
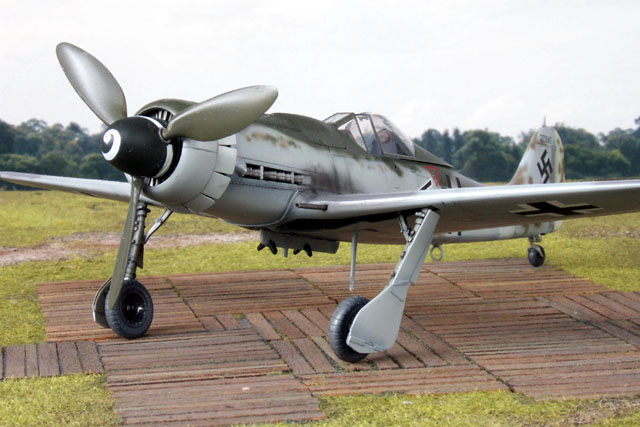
Correcting Tamiya’s
Upper Cowl and Prop Assembly
The Tamiya Dora includes an undersized spinner, inaccurately profiled propeller
blades and overstated upper cowl bulges. Eagle Parts supply a correction set for
these problems.
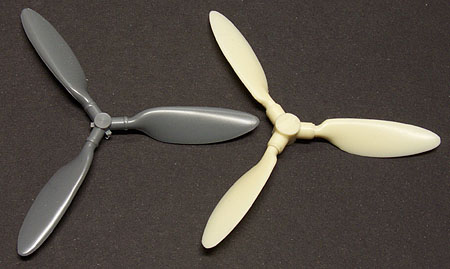 Eagle
Parts #4 includes the propeller hub, pitch collars, propeller blades, spinner,
backing plate, propeller shaft and gun cowl. As a bonus, it includes accurate (ie
larger) main wheels. Eagle
Parts #4 includes the propeller hub, pitch collars, propeller blades, spinner,
backing plate, propeller shaft and gun cowl. As a bonus, it includes accurate (ie
larger) main wheels.
I super-glued the three pitch collars to the propeller hub. I then dry-fitted
the propeller blades to the pitch collars. The fit was perfectly tight. The
spinner cap was also a push-fit on the backing plate. I decided to paint the hub
sub-assembly, the spinner, the backing plate and the propellers separately
before joining the parts. The hub and pitch collars were sprayed Tamiya Chrome
Silver, the spinner and backing plate were painted Gunze RLM 70 Black-Green and
the propeller blades received a coat of Gunze RLM 71 Dark Green. I applied the
spinner spiral before before completing the sub-assembly. Once the paint was dry
and the spiral decal was set, I glued the hub to the backing plate. I once again
dry-fitted the propeller blades to the hub and the spinner cap to the backing
plate. The fit of these parts was so tight that I decided not to apply glue at
all. Indeed, I carried this aircraft in my baggage from Sydney to Chicago and
back again with these dry-fitted parts remaining securely in place.
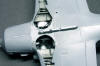
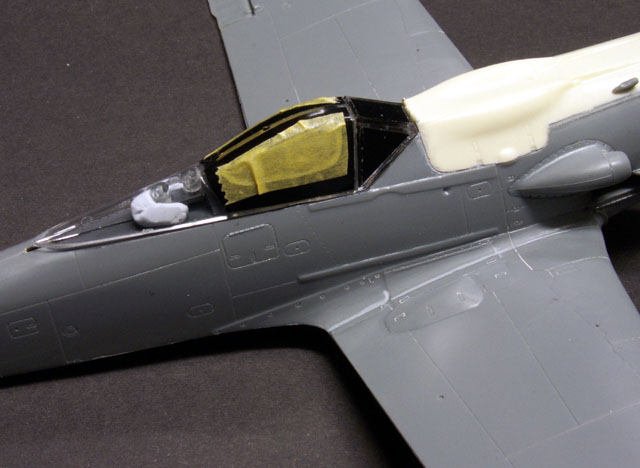
The Eagle Parts resin upper cowl was a simple replacement for the kit part. Once
again, fit was perfect – although glue was required this time!
Correcting Tamiya’s
Main Landing Gear
Tamiya’s landing gear legs are only a fraction of an inch too short, but
combined with the small main wheels they make a noticeable impact on the stance
of the completed model.
I used Parts R Parts Item Number PRP 007 “Fw 190D-9 Lengthened Landing Gear and
Doors for Tamiya kit” and Eagle Parts’ larger main wheels to address this
problem.
Parts R Parts’ four-part landing gear set is a simple, drop-fit replacement for
the main landing legs and gear doors of the 1/48 scale Tamiya Fw 190D-9. The
oleo scissors are cast onto the main gear legs. Each part is cast onto a wafer
of resin that was very simple to remove and clean up.
The gear legs were first painted with Gunze RLM 02 Grey then secured to the
locating holes in the gear bay using super glue. The fit of the gear legs was
quite positive.
Locating holes were drilled into the Eagle Parts wheels and, following painting,
these were glued to the gear legs.
I finished my Dora as one of the options on KommanDeur Decals’ sheet number
KD4803FD. I have a great affection for late-war Luftwaffe fighter camouflage
schemes that display an unusual combination of colours. This scheme really
fitted the bill!
Although the fuselage is fairly conventional, the upper wings of Double Chevron
are finished in a non-standard pattern of RLM 76 Light Blue and RLM 75 Grey
Violet.
I prepared for my paint job by masking the canopy with the Black Magic mask.
This was certainly much faster and easier than my normal practice of cutting
narrow strips of Tamiya masking tape.
Panel lines were then pre-shaded using Tamiya Dark Grey. All the camouflage
colours were Gunze acrylics sprayed freehand using my Aztek A470 airbrush. I was
unhappy with my initial paintjob on the upper wings. I therefore wings with my
heavily worn sanding stick, buffed the surface and repainted.
Slide Show #3 - Painting
Click a thumbnail below to view the
larger image on this page
The KommanDeur decals were impressively thin, and responded well to MicroSet and
MicroSol.
An exhaust stain was gradually built-up with the airbrush, and some chipping was
added to the leading edges of the wings and the wing roots using Tamiya Chrome
Silver applied with a small paintbrush. I added a thin wash of black oil paint
to the panel lines.
A coat of Gunze Flat Acrylic completed the job.
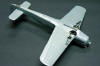
It is possible to finish Tamiya’s 1/48 scale Focke-Wulf Fw 190D-9 as a very
accurate model using a combination of the Part R Parts Engine Plug and Lower
Wing Insert, Lengthened Landing Gear and Eagle Parts’ Correction Set.
I really enjoyed this project. All of the accessories fitted well and made a
noticeable improvement to the kit. Construction was also surprisingly fast. I
commenced this model on 30 May this year and finished it on 3 July with a total
building duration of approximately 20 hours.
If you already own an unbuilt 1/48 scale Tamiya Fw 190D-9, I can recommend these
accessories as a way to achieve an accurate result.
Model, Images and
Article Copyright © 2001 by Brett Green
Page Created 06 August 2001
Last updated 04 June 2007
Back to HyperScale Main Page
Back to Features Page |
 Home
| What's New |
Features |
Gallery |
Reviews |
Reference |
Forum |
Search
Home
| What's New |
Features |
Gallery |
Reviews |
Reference |
Forum |
Search