|
Focke-Wulf
Fw 190D-9
by
Ian Robertson
|
|
|
Focke-Wulf
Fw 190D-9
|

Tamiya's
1/48 scale Focke-Wulf Fw 190D-9 is available online from Squadron.com
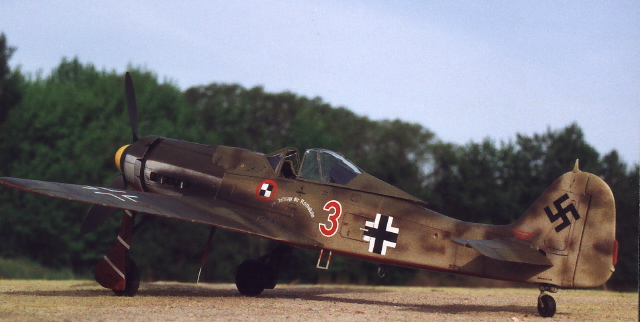
The four known Doras of JV44 (three D-9s and one D-11) were
responsible for protecting Me.262 jets from marauding Allied fighters
during takeoff and landing.
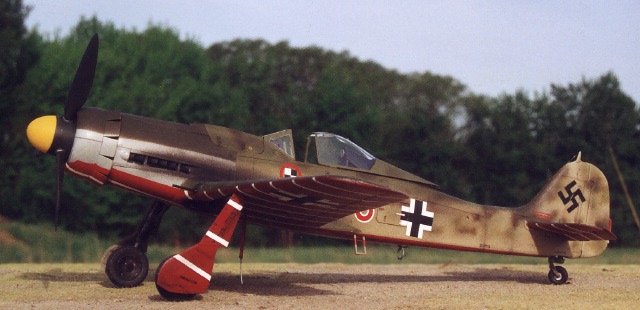
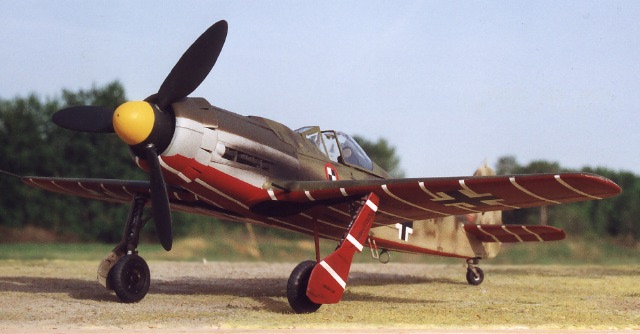
These Doras were flamboyantly marked with red and white stripes on
their undersides to reduce the risk of being shot down by friendly
ground fire. My model is of "Red 3", a D-9 piloted by Hptm.
Waldemar Wübke during the spring of 1945.
Tamiya's
Dora and its Modifications
|
The Tamiya 1/48 Fw.190D-9 is well known among modelers of WWII
aircraft, particularly Luftwaffe enthusiasts. The kit is very well
engineered and goes together beautifully. Out of the box (OOB) it
produces a very nice model that is unmistakably a Dora. However, there
are a number of shortcomings to the kit with regard to accuracy that
modelers may wish to correct. I have attempted to address these
shortcomings using a resin update set from Eagle Editions (EagleParts
#4) and a few additional modifications.
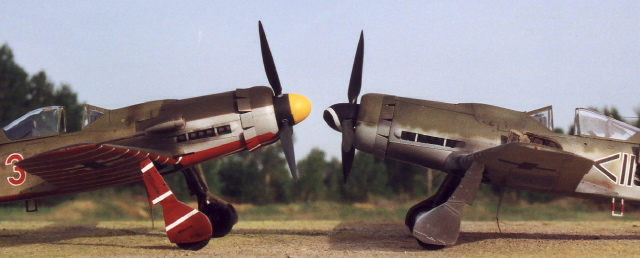
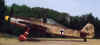
Perhaps one of the most obvious errors in the Tamiya kit is that
the landing gear is too short, resulting in a nose that sits too low
to the ground. This problem is exacerbated by wheels that are too
small. To illustrate, I have shown two Tamiya Fw190D-9's nose to nose,
the one on the left having corrected landing struts, the one on the
right built OOB.
The problem with wheel size was easily corrected using the
replacement parts from Eagle Editions. Lengthening the landing struts
presented a more difficult problem. I opted to cannibalize struts from
an Italeri (ex DML/Trimaster) Fw190D-9 kit; the struts in this kit are
the proper length. However, I did not simply replace the Tamiya struts
with the Italeri struts. Instead, I made a graft between the upper
part of the Tamiya strut and lower part of the Italeri strut. The
graft was held together with a wire pin and CA glue. Unorthodox
perhaps, but it gained me the added length I was after without
compromising the solid fit and positioning of the strut to the wing.
Looks like the Italeri kit will now have to be built in a wheels-up
display!
Although you might expect the Tamiya gear covers to be too short
once the struts were lengthened, this was not the case, at least in
the finished model. I simply made sure that less of the of the wheel
cover was tucked up in the wheel well than is normally the case with
the Tamiya model.
Another shortcoming of the Tamiya kit evident in the nose to nose
photograph is that the spinner is too small and pointy. The
replacement parts from Eagle Editions corrected this problem, and
included slightly modified propeller blades.
One of the more subtle improvements offered by the update set is
the gun bulges on the cowl. At first I thought the difference was
minor; however, head-on shots of the corrected and uncorrected kit
reveal that the gun bulges with the Tamiya kit are much more bulbous
than those produced by Eagle Editions. The lines of the corrected
model are more elegant in my opinion.
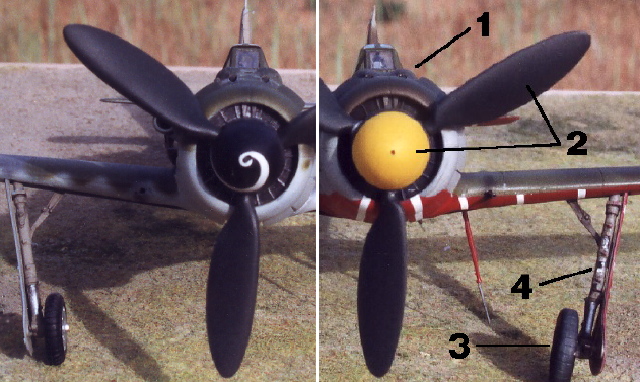
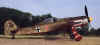
The changes I made to the Tamiya kit are summarized in the head-on
comparison of the OOB and JV44 models (photo above). The left frame
shows the original kit OOB. The right frame shows the JV44 model with
new gun bulges (1), new spinner and propeller blades (2), larger
wheels (3) and lengthened struts (4).
Paint,
Decals and Weathering
|
The model was painted with Polly Scale acrylics. I used the artwork
of Tom Tullis (see reference) as a guide to painting the camouflage
for this aircraft.
The scheme consisted of RLM 82/83 on the upper surfaces and RLM 76
on the side of the nose. The fuselage sides behind the leading edge of
the wings were painted a tan color found on some late war Luftwaffe
fighters. This color is often identified as RLM84, a fictitious
designation as it turns out. Polly Scale's "RLM84" looks too
much like RAF Sky "S" for my taste - I opted for a home mix
of RLM76 and light brown with a drop of red (again, my goal was to
approximate the artwork I used as a reference). I also toned down the
brightness of Polly Scale's RLM82 (light green) by adding RLM83 (dark
green), and I darkened Polly Scale's RLM83 with RLM81 (brown-violet).
This is similar to the paint scheme I used for my Tamiya Do.335 posted
on Hyperscale.
The undersides of the model were painted a mixture of RLM23 Red and
"Soo Line" Red. The propeller blades were painted RLM70
(black-green), the cockpit RLM66, and the wheel wells and struts
RLM02.
Decals are from EagleCals #14. This set includes markings for all
four JV44 Doras. Highly recommended. The slogan reads "By Order
of the State Railway"
The canopy was dipped in Future for a polished appearance. Exhaust
stains were airbrushed using highly thinned black paint with a touch
of brown. Additional dirt and grime was added with uneven coats of
highly thinned black paint. Stretched sprue was used for the sagging
antenna wire.
Pollard, S. (2000). Doras of the Galland Circus. In: Military In
Scale, January 2000 edn. Pp 46-51. [Artwork in the article was
reprinted from Jerry Crandall's book of the same title]
Click the thumbnails
below to view the images full-sized.
Use your browser's back arrow to return to this page.
Model, Images and Text Copyright © 2001 by
Ian Robertson
Page Created 28 June, 2001
Last Updated 04 June, 2007
Back to HyperScale Main
Page
Back to Features
Index
|
 Home
| What's New |
Features |
Gallery |
Reviews |
Reference |
Forum |
Search
Home
| What's New |
Features |
Gallery |
Reviews |
Reference |
Forum |
Search